Reverse Osmosis Water for Coffee and Espresso: What You Need to Know
If you’ve been down the rabbit hole of optimizing your coffee, you’ve probably heard that reverse osmosis water is the way to go — especially for espresso. And there’s truth to that. RO water gives you a clean, consistent starting point that lets you build the exact mineral profile your coffee needs. But it’s not as simple as hooking up an RO system and calling it done. Straight RO water, without remineralization, can actually make your coffee taste worse and damage your equipment.
This guide covers how reverse osmosis works for coffee, why remineralization is non-negotiable, what to look for in an RO system, and how to use mineral packets as an alternative or supplement. If you’re new to the idea of optimizing your brewing water, start with our complete guide to the best water for coffee and espresso for the fundamentals.
How Reverse Osmosis Works
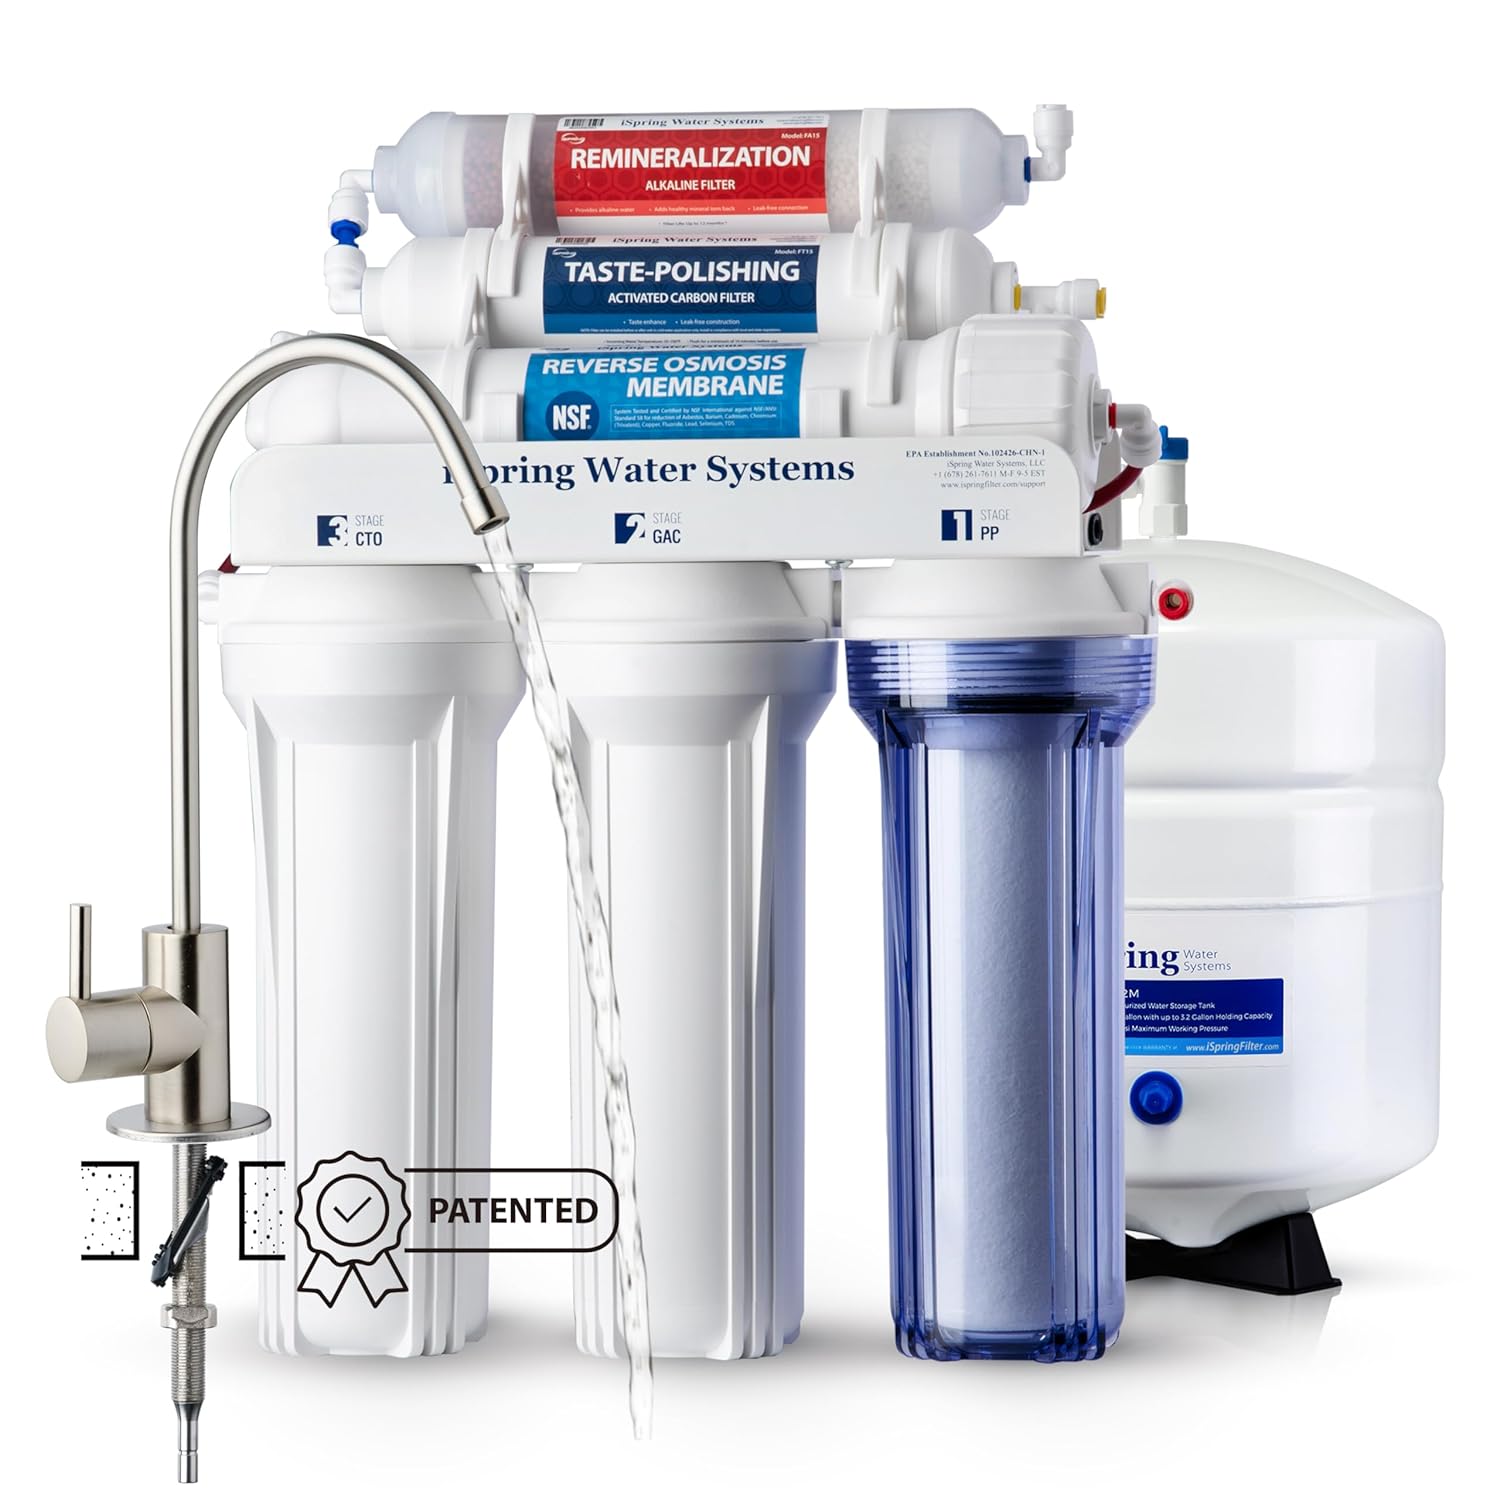
Reverse osmosis forces water through a semipermeable membrane under pressure. The membrane has pores small enough to let water molecules through but block dissolved solids, contaminants, heavy metals, chlorine, fluoride, bacteria, and virtually everything else. Most home RO systems include additional pre-filters (sediment and carbon) to protect the membrane and a post-filter for final polishing.
The result is water that’s been stripped of up to 99% of its dissolved solids. A typical RO system produces water with a TDS between 10 and 25 ppm — far below the 75 to 150 ppm range recommended by the Specialty Coffee Association for brewing.
Why Straight RO Water Is Bad for Coffee
Pure RO water without minerals produces consistently bad coffee. Here’s what happens when you brew with water that’s too pure:
Under-extraction with a twist: You might expect that mineral-free water would under-extract, but it actually extracts too aggressively in the wrong ways. Without minerals to moderate the process, the water rapidly pulls out harsh acids and bitter compounds before the sugars and more complex flavor compounds have time to dissolve. The result is coffee that tastes simultaneously thin and harsh.
Flat, lifeless body: Calcium and magnesium contribute directly to the perception of body and mouthfeel in coffee. Without them, even well-extracted coffee feels watery and hollow.
Weak espresso crema: Minerals help stabilize the crema on espresso. Straight RO water produces thin, pale crema that dissipates quickly.
Equipment damage: This is the one that catches people off guard. Pure, mineral-free water is slightly corrosive. In espresso machines, it can leach minerals from brass boilers, copper piping, and other metal components. Over time, this leads to pitting, corrosion, and premature failure of expensive parts. Some espresso machines won’t even turn on if the water conductivity is too low, as a built-in safety measure.
 Click for Reverse Osmosis Filtration Systems
Remineralization: The Missing Piece
The solution is simple in concept: strip everything out with RO, then add back just the minerals you want in the exact amounts you want. This gives you the purest possible starting point with none of the chlorine, heavy metals, or off-flavors from tap water, plus the precise mineral balance needed for optimal extraction and equipment protection.
There are two main ways to remineralize RO water for coffee:
Built-In Remineralization Stage
Many RO systems designed for coffee and beverage applications include a remineralization cartridge or blending valve as part of the system. A remineralization cartridge passes the purified water through a mineral bed (usually calcite or a calcium/magnesium blend) that adds minerals back in controlled amounts. A blending valve mixes a small amount of pre-filtered (but not RO-treated) source water back into the product water to naturally reintroduce minerals.
Blending valves are particularly popular in coffee-specific RO systems because they let you adjust the TDS of the output water by turning a dial. You can use a TDS meter to set it right at your target — typically 75 to 150 ppm for coffee. The advantage here is it’s fully automatic. Once you set it, every gallon of water comes out at the same mineral level.
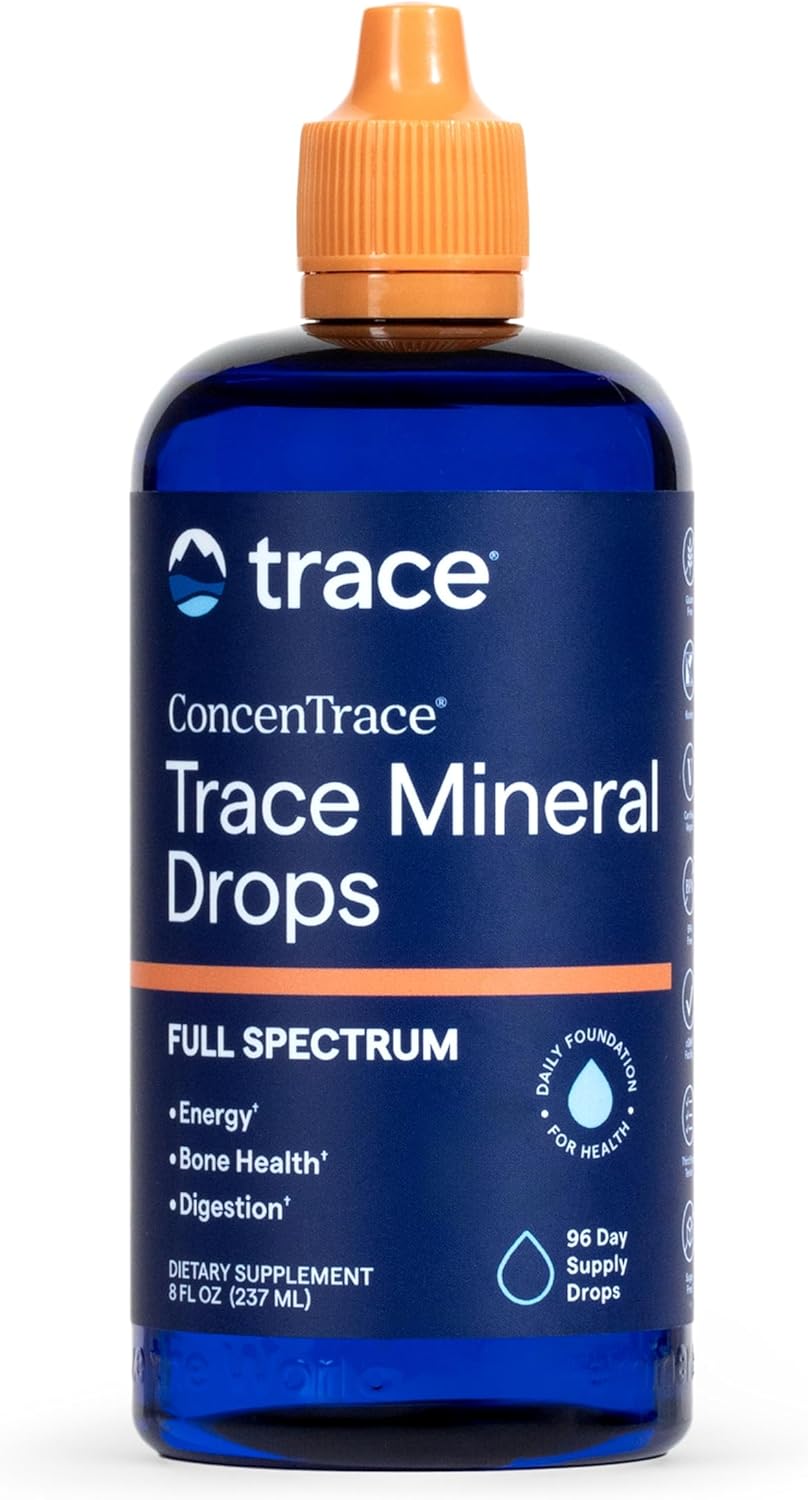
Click For Water Mineral Drops
Mineral Packets (Third Wave Water, etc.)
The other approach is to use your RO system to produce pure water, then add pre-measured mineral packets to each gallon. Third Wave Water is the most well-known option in the coffee world. They offer several profiles:
| Profile | Target TDS | Alkalinity | Best For | Key Minerals |
|---|---|---|---|---|
| Classic (Light Roast) | ~150 ppm | ~40 ppm | Pour-over, drip, AeroPress with light/medium beans | Magnesium sulfate, calcium citrate, sodium chloride |
| Espresso | ~150 ppm | ~80 ppm | Espresso machines (all roast levels) | Magnesium sulfate, calcium citrate, potassium bicarbonate |
| Dark Roast | ~180 ppm | ~135 ppm | Drip and manual brew with dark roast beans | Magnesium sulfate, calcium citrate, sodium bicarbonate |
The Espresso profile is specifically designed to avoid chlorides (which cause corrosion in espresso machine boilers under heat and pressure) and uses potassium bicarbonate as its buffer instead of sodium chloride. This is an important distinction — if you’re running an espresso machine, use the espresso-specific formula, not the classic drip formula.
At around $15 to $18 for a 12-pack (one packet per gallon), the cost works out to roughly $1.25 per gallon of optimized water. For home use, that’s very manageable.
RO System Types for Home Coffee Brewing
Under-Sink RO Systems
These are the most common setup for home use. They install beneath your kitchen sink, connect to the cold water line, and typically include a small storage tank. Water passes through 3 to 6 filtration stages (sediment filter, carbon pre-filter, RO membrane, carbon post-filter, and optionally a remineralization cartridge).
For coffee specifically, look for systems that include a remineralization stage or a TDS blending valve. Without one, you’ll need to manually add minerals to every batch of water you use for brewing.
Under-sink systems typically produce 50 to 100 gallons per day and cost between $150 and $500 depending on features and brand. Filter replacements run $40 to $80 per year for the pre and post filters, with the RO membrane needing replacement every 2 to 3 years.
Countertop RO Systems
If you rent or don’t want to modify your plumbing, countertop RO dispensers are a solid alternative. They connect to your faucet or work as standalone units that you fill manually. They’re compact, portable, and require no installation.
The tradeoff is slower production rate and smaller capacity compared to under-sink systems. But for the typical home brewer making 2 to 4 cups a day, they’re perfectly adequate.
Tankless RO Systems
Newer tankless designs skip the storage tank and filter water on demand. They take up less space under the sink and deliver water at a higher flow rate than traditional tank-based systems. They’re a good option if cabinet space is limited.
Setting Up RO Water for Espresso Machines
Espresso machines present some specific challenges when it comes to water treatment:
Plumbed-in machines: If your espresso machine connects directly to a water line, you can plumb the RO system’s output directly into the machine. Make sure the remineralization is dialed in before connecting — you want the output TDS in the 75 to 150 ppm range. Too low and you risk corrosion. Too high and you’ll get scale buildup in the boiler.
Reservoir machines: For machines with removable water tanks, you can mix RO water with mineral packets (like Third Wave Water Espresso Profile) in a separate gallon jug and pour it into the reservoir as needed. This is actually the most precise method since you control the exact mineral content of every gallon.
Remove built-in filters: If you’re using properly remineralized RO water, you don’t need the machine’s built-in water softening cartridge (like those BWT or Brita filters that come with many espresso machines). Using both can strip out too many minerals and defeat the purpose of your remineralization. Remove the in-machine filter and let your RO system do the work.
RO Water vs. Other Filtration for Coffee
| Factor | RO + Remineralization | Carbon Pitcher Filter | Under-Sink Carbon |
|---|---|---|---|
| Chlorine Removal | Yes (completely) | Yes (good) | Yes (very good) |
| Heavy Metal Removal | Yes | Limited | Some models |
| Mineral Control | Full control | Minimal | Minimal |
| Scale Prevention | Excellent (when properly set) | Poor | Poor |
| Coffee Flavor Impact | Maximum improvement | Noticeable improvement | Good improvement |
| Setup Cost | $150–$600 | $20–$45 | $50–$150 |
| Annual Maintenance | $40–$100 (filters) + mineral packets | $30–$60 (replacement filters) | $30–$80 (replacement cartridges) |
| Best For | Espresso machines, hard water areas, flavor optimization | Decent tap water, casual brewers | Better tap water, daily drip brewing |
For a closer look at the simpler filtration options, see our guide to pitcher and carbon filters for coffee. For the big-picture view of water and coffee, check out the best water for coffee and espresso.
How to Dial In Your RO Water
Here’s a practical workflow for getting your RO water right:
Step 1 — Test your RO output. Use a TDS meter to check the water coming out of your RO system before any remineralization. It should read somewhere between 10 and 30 ppm. If it’s higher, your membrane may need replacing.
Step 2 — Remineralize to target. If you’re using a blending valve, slowly adjust it upward while checking TDS until you hit 100 to 150 ppm. If you’re using mineral packets, add one packet per gallon of RO water and shake well. Test with your TDS meter to confirm — Third Wave Water packets should put you right around 150 ppm.
Step 3 — Brew and taste. Make coffee with your remineralized water and compare it to what you’ve been drinking. Most people notice an immediate difference in clarity, sweetness, and overall balance. If the coffee tastes sour or thin, your TDS might be too low. If it tastes muddy or bitter, you may have remineralized too aggressively.
Step 4 — Monitor over time. RO membranes degrade gradually, so check your output TDS monthly. Pre-filters should be replaced every 6 to 12 months, and the RO membrane every 2 to 3 years depending on your source water quality and usage volume.
Common Mistakes with RO Water and Coffee
Using straight RO water without remineralization: This is the most common mistake. Pure RO water tastes flat and can corrode your equipment. Always remineralize.
Using the wrong mineral profile for espresso: If you’re adding mineral packets, make sure you’re using an espresso-specific formula for any water going into an espresso machine. Formulas designed for drip coffee may contain chlorides that cause corrosion under the high heat and pressure of an espresso boiler.
Forgetting to replace filters: RO systems aren’t set-and-forget. Skipping filter changes leads to reduced output quality, slower flow rates, and potential contamination breakthrough. Set a calendar reminder.
Stacking filtration unnecessarily: If you’ve properly remineralized your RO water, you don’t need an additional in-machine water filter. Double-filtering can strip out the minerals you just added.
Is RO Worth It for Coffee?
It depends on your starting point. If you have very hard water (above 250 ppm TDS), live in an area with known water quality issues, or own an espresso machine you want to protect, RO with remineralization is a clear win. It’s the most reliable way to get consistent, optimized water for every brew while protecting your equipment from scale and corrosion.
If your tap water is already decent (75 to 200 ppm TDS, no off-flavors), a simpler carbon filter might be all you need. The best approach is to test your water first, then decide how much treatment it actually requires. Start with our main guide to coffee water if you haven’t already.
For most serious home espresso setups, RO with remineralization pays for itself by extending machine life, reducing descaling frequency, and — most importantly — making your coffee taste noticeably better.