Cleaning
How To Descale Breville Bambino
Click Here For Our Favorite Bambino Descaler Solution
Maintaining your Breville Bambino espresso machine doesn’t just keep it in good condition—it ensures that every shot of espresso tastes its best. Over time, mineral deposits from hard water build-up inside the machine, affecting performance and flavor. Descaling is a must to avoid a drop in coffee quality and prevent costly repairs.
Why You’ll Need to Descaling Your Bambino
Mineral buildup can impact your Bambino’s performance, from slowing the water flow to creating irregular steam pressure. Over time, this buildup affects not only your espresso’s taste but also your machine’s longevity. Regular descaling can help maintain:
- Consistent Flavor Quality – Mineral-free water extracts espresso evenly, so every shot is full-bodied and balanced.
- Machine Longevity – Without buildup, your Bambino operates smoothly, reducing wear and tear.
- Better Performance – You’ll notice better steam pressure and overall functionality with a clean machine.
The ideal frequency for descaling varies depending on water hardness. Typically, once every 1-3 months is a good rule of thumb, but you can also contact Breville for personalized advice.
 Click here for the best descale product for a Bambino
Getting Ready to Descale Your Breville Bambino
Before you start, you’ll need some descaling powder and a large container to catch the water during the process. Let’s prepare your machine.
Step 1: Empty the Drip Tray and Water Tank
Begin by emptying the drip tray and placing it back in the machine. Fill the water tank up to the “Descale” line, then add the descaling powder. Mix it with warm water until it dissolves fully.
Step 2: Place a Container Under the Group Head and Steam Wand
Set a container (about 68 ounces for the Bambino Plus, or 2 liters for the Bambino) under both the group head and steam wand. This will catch the water and descaling solution as it flows through the machine.
How To Descale Breville Bambino
Click here for my favorite descale solution
Now that your machine is ready, it’s time to enter descale mode.
Step 3: Cool the Machine and Enter Descale Mode
Turn off the machine and let it cool down for a few minutes. Then, depending on your model, activate descale mode:
- For the Bambino Plus, press and hold the one-cup and steam buttons for 5 seconds.
- For the Bambino, with the machine off, press and hold the two-cup and steam buttons for 5 seconds.
Step 4: Begin the Descale Process
Start the descaling cycle by pressing the appropriate button for your model:
- For the Bambino Plus, press either the one-cup or steam button.
- For the Bambino, press either the two-cup or steam button.
As the machine runs through the descaling cycle, you’ll see the buttons flash to indicate it’s working.
Pausing, Refilling, and Resuming the Cycle
Once the descaling solution runs out, the machine will pause, allowing you to complete the next steps.
Step 5: Rinse and Refill the Water Tank
Remove the tank, rinse it thoroughly, and refill it with fresh water to the maximum line. This fresh water will help flush out any remaining descaling solution from the machine.
Step 6: Restart the Cycle with Fresh Water
Return the tank and container to their positions and restart the cycle:
- For the Bambino Plus, press either the one-cup or steam button.
- For the Bambino, press the two-cup button.
The machine will run again, clearing out any descaling solution to ensure it doesn’t impact your next brew.
Finishing Up
When descaling is complete, your machine will signal that it’s finished.
Step 7: Check for Completion Signals
- The Bambino Plus will have both the one-cup and steam buttons flashing simultaneously before going into standby mode.
- The Bambino will have the one-cup and steam buttons flashing alternately before switching to standby.
Step 8: Final Cleaning
Remove and empty the container used for waste water. Rinse and dry the drip tray and water tank thoroughly before placing them back in the machine. Your Breville Bambino is now clean and ready to brew!
Long-Term Maintenance Tips for Your Breville Bambino
Regular descaling is essential, but additional maintenance can help your machine run even better.
- Descale Consistently: Depending on your water quality, descaling every 1-3 months is recommended.
- Routine Cleaning: Wipe down external parts after each use, empty the drip tray daily, and purge the steam wand to remove milk residue.
- Water Quality: Consider using filtered water to reduce mineral buildup, especially if you live in an area with hard water.
How To Descale Breville Precision Brewer
A clean coffee machine is the secret to consistently great-tasting coffee. Descaling your Breville Precision Brewer not only keeps it in top condition but also ensures every cup you brew tastes just as good as the first. Let’s dive into how you can easily descale your machine and keep it performing like new.
Why Descaling Your Precision Brewer Matters
Mineral buildup from water is inevitable when using a coffee maker, especially in hard water areas. Over time, this can and will negatively affect the performance of the machine, slowing brew times and impacting the flavor of coffee. Regular descaling helps to:
- Remove mineral deposits.
- Extend the life of your Breville Precision Brewer.
- Ensure a consistently delicious cup of coffee.
If the ‘CLEAN/DESCALE’ light on your machine is on, it’s time to take action.
What You’ll Need
Before you start, gather these items to make the process smooth and hassle-free:
- Breville descaling powder or liquid solution (we recommend the liquid for convenience).
- Fresh water.
- A carafe or large container to catch water.
- A soft cloth for cleaning.
Preparing for the Descaling Process
Start by preparing your descaling solution. If you’re using Breville’s descaling powder, dissolve the contents of one sachet into water as per the instructions. If you’re using the liquid, simply pour it into the water tank and add fresh water to dilute it according to the product guidelines. Ensure the water tank is full and the carafe is empty before moving on.
How to Start the Descaling Mode
To begin the descaling process, your Breville Precision Brewer must enter descaling mode. Here’s how to activate it:
- Press and hold the 2-CUP button.
- While holding it, press and hold the POWER button simultaneously.
- The machine will enter descaling mode, and you’re ready to proceed.
Descaling the Coffee Brewing Components
Once in descaling mode, press the 1-CUP button to descale the coffee brewing components. This step flushes the descaling solution through the coffee system. Repeat the process until the water tank is empty.
Descaling the Steam and Hot Water Components
Next, focus on the steam and hot water components:
- Turn the steam dial to the right if you want to descale the steam system.
- Turn the steam dial to the left if you want to descale the hot water system.
Repeat both steps until the solution in the tank is fully used. These steps ensure that mineral deposits are removed from all pathways in the machine.
Rinsing and Refreshing the Machine
After the descaling process, it’s essential to rinse the machine thoroughly to remove residue from the solution:
- Detach the water tank, rinse it well, and refill it with fresh cold water.
- Run the descaling steps again (both coffee and steam/hot water) using only clean water.
- Repeat the rinsing process at least twice to ensure there’s no leftover descaling solution.
Wrapping Up the Process
Once the machine is thoroughly rinsed, press the POWER button to exit descaling mode. If the ‘CLEAN/DESCALE’ light turns off, you’ve successfully completed the process. Your Breville Precision Brewer is now clean, descaled, and ready to brew delicious coffee.
Simple Maintenance Tips for Longer Machine Life
Regular descaling is key, but here are a few additional tips to keep your Breville Precision Brewer in top condition:
- Empty and/or rinse the water tank daily to prevent stale water buildup.
- Wipe it down with a damp cloth to keep it clean and looking great.
- Replace the water filter regularly to reduce mineral buildup.
Enjoy Better Coffee Every Day
Descaling your Breville Precision Brewer is an essential part of its maintenance, ensuring it continues to deliver exceptional coffee.
How To Descale Breville Barista Express Impress
Breville Espresso Machine Descaling
1. Safety First:
Before you begin, ensure the machine is turned off and unplugged from the power outlet. Safety should always be a priority.
2. Prepare the Water Tank:
First, remove the water filter from the tank. Then, fill it with cold tap water, ensuring you don’t exceed the maximum mark.
3. Prepare the Descaling Solution:
For this, you’ll need one sachet of the Breville descaling powder. We recommend using the Breville branded descaling powder.

Dissolve this in one liter of water. Once dissolved, pour this solution into the water tank.
4. Enter the Descaling Mode:
To initiate the descaling process, press and hold the 2 CUP and POWER buttons together for about 5 seconds. This will put your machine into its descale mode.
5. Start Descaling the Coffee Component:
Press the 2 CUP button. The machine will begin the descaling process for its coffee components, which should last about 25 seconds.
6. Descaling the Steam and Hot Water Components:
Rotate the steam dial to the right to initiate the descaling of the steam component. Once done, turn it to the left to descale the hot water component. These processes will take approximately 13 seconds and 8 seconds, respectively.
7. Complete the Descaling Process:
Repeat steps 5 and 6 until the water tank is devoid of the descaling solution.
8. Rinsing:
After descaling, it’s crucial to rinse the machine to ensure no residues remain. Thoroughly rinse the water tank, then refill it with fresh cold water, ensuring you don’t go beyond the maximum mark. Now, repeat steps 5 and 6. This will rinse the machine, ensuring all remnants of the descaling solution are flushed out.
9. Exit the Descaling Mode:
Once satisfied, press the POWER button. This will take your machine out of its descaling mode, making it ready for your next brew.
In conclusion, regularly descaling your Breville Barista Express Impress is an investment in delicious coffee and the longevity of your machine. Always remember to follow the manufacturer’s guidelines and enjoy your brews!
Can You Use Used Coffee Ground as a Deoderizer?
There’s nothing quite like the rich, refreshing scent of fresh coffee. But have you ever considered what happens to the grounds post-brew? Amidst our quest for new environments, a common query surfaces: Do used coffee grounds absorb odors? Let’s dive into the aroma-filled world of coffee grounds and explore their efficacy in keeping our spaces odor-free.
Used Coffee Grounds as Deodorizer
Many swear by the odor-neutralizing powers of coffee grounds, utilizing them in various contexts, from the fridge to the fireplace. The claim often hinges on the nitrogen content in coffee, which is believed to neutralize sulfur, a typical culprit behind unpleasant smells. While you can use used coffee you might consider this as well.
Practical Brews: Using Coffee Grounds Effectively
Despite the unclear scientific consensus, practical applications of using coffee grounds as a deodorizer prevail. Here’s how you can use this aromatic waste:
- Fridge Freshener: Place an open container of used coffee grounds in your fridge to combat unwanted smells.
- DIY Sachets: Fill old pantyhose or mesh bags with coffee grounds and place them in odor-prone areas like gym bags or drawers.
- Handy Helper: Rubbing your hands with coffee grounds can mitigate lingering smells after cooking.
- Fireplace Friend: Sprinkle coffee grounds over ashes to reduce smoke and dust when cleaning your fireplace.
Percolating Alternatives
Other Odor-absorbing Options
If you’re not a coffee drinker or are looking for additional solutions, consider these alternative odor absorbers:
- Baking Soda: A classic choice for neutralizing odors in various settings, especially refrigerators.
- Charcoal Bags: Effective at absorbing unwanted smells and maintaining a fresh environment.
- Vinegar: A bowl of vinegar can help neutralize persistent odors, such as cigarette smoke.
- Citrus Peels: Add a zest of freshness by placing dried citrus peels in odor-prone areas.

Brewing Thoughts
Commercial Options to Consider
Exploring beyond DIY solutions? Here are some commercial products that promise to keep your spaces fresh:
- Odor-absorbing Gels and Beads: Convenient and available in various fragrances.
- Charcoal Purifiers: Reusable bags that promise to keep environments odor-free.
- Air Purifiers: A technological approach to continuously clean and refresh the air.

The Final Sip
While using coffee grounds as a deodorizer is widely practiced, the underlying scientific verification could use more clarity. Nonetheless, the myriad ways coffee grounds are used to combat odors hint at their potential utility, even as we explore other alternatives.
Whether you stick with the traditional baking soda or venture into the fragrant world of coffee grounds, maintaining a fresh and pleasant environment involves a thorough cleaning, effective waste management, and the strategic placement of odor absorbers.
How To Descale Breville Espresso Machine: Bambino, Barista Express, Barista Touch, Barista Pro
Hey there, fellow coffee lovers! Are you ready to dive into the world of descaling and unlock the secrets to brewing the perfect cup of coffee? Descaling your coffee machine may not be the most glamorous task, but trust me, it’s an essential one. In this ultimate guide, we’ll explore why descaling is crucial for maintaining your coffee machine’s performance and ensuring a fantastic coffee experience every time you brew.
How To Descale Breville Espresso Machines: Bambino, Barista Express, Barista Touch, Barista Pro
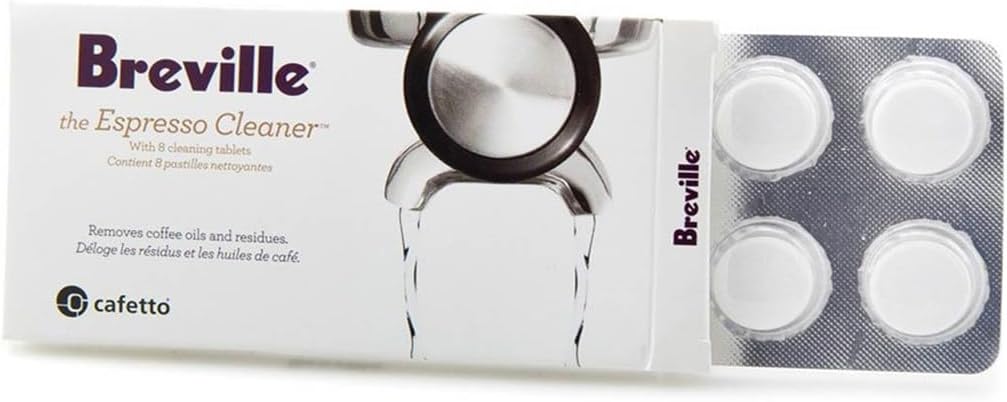
Descaling your Breville espresso machine is an important part of maintaining its performance and prolonging its lifespan. It is recommended to descale any coffee or espresso machine every 3 months. Here are the steps to descale a Breville.
- Empty the water tank and remove any remaining water filter from the reservoir.
- Mix a descaling solution by adding one packet of Breville Descaler to 1 quart of warm water. Alternatively, you can use white vinegar diluted with equal parts water as a natural descaling solution.
- Pour the descaling solution into the water tank.
- Turn the machine on and let it warm up for at least 20 minutes.
- Place a large container under the group head to catch the water.
- Press the 1 cup button and let the descaling solution run through the machine. Switch the machine off and let it sit for 15 minutes.
- Repeat the process by pressing the 2 cup button, letting the descaling solution run through the machine again.
- Rinse the tank thoroughly and fill it with clean water.
- Run clean water through the machine by pressing the 1 cup and 2 cup buttons multiple times to flush out any remaining descaling solution.
- Replace the water filter in the water tank (if applicable).
- Wipe down the machine and all detachable parts with a clean cloth and reassemble.
 Coffee Machine Descaler
For specific manuals for your Breville machine, please click here.
Signs That Your Coffee Machine Needs Descaling
Wondering if your coffee machine is due for descaling? Look out for these telltale signs:
- Changes in Coffee Taste: If your once-delicious coffee now tastes a bit off or lacks the vibrant flavors you’re used to, it’s a clear indicator that descaling is in order.
- Slow Brewing or Dripping: Is your coffee taking longer than usual to brew or dripping at a snail’s pace? Mineral buildup might be clogging the internal pipes, causing a sluggish brewing process.
- Unusual Noises or Vibrations: Is your coffee machine suddenly making strange noises or vibrating excessively? It could be a result of limescale interfering with the machine’s mechanisms.
The Benefits of Descaling Your Coffee Machine
Now, let’s talk about why descaling is worth your time and effort:
- Enhanced Coffee Flavor and Aroma: Descaling removes the mineral buildup that hampers the natural flavors and aroma of your coffee. Say hello to a richer, more satisfying cup of joe!
- Prolonged Lifespan of Your Coffee Machine: Regular descaling prevents limescale from wreaking havoc on your machine’s internal parts, extending its lifespan and saving you from premature breakdowns.
- Improved Brewing Efficiency and Speed: By eliminating mineral deposits, your coffee machine can operate at optimal efficiency, ensuring faster brewing times and a smoother brewing process.
- Cost Savings on Repairs and Replacement: Neglecting descaling can lead to costly repairs or getting a new coffee machine. Save your hard-earned money by maintaining your machine through regular descaling.
- Consistency in Brewing Quality: Descaling helps you maintain a consistent brewing quality, ensuring that every cup is as delightful as the last.
Different Methods of Descaling
When it comes to descaling, you have a few methods to choose from:
- Traditional Descaling Solutions: There are descaling solutions specifically designed for coffee machines available in the market. These solutions are usually effective and straightforward to use.
- Vinegar-Based Descaling: If you prefer a more natural approach, vinegar can be a viable option. Dilute vinegar with water and run it through your coffee machine to dissolve the mineral deposits.
- Descaling Tablets or Powders: Some coffee machine manufacturers offer descaling tablets or powders. These products are convenient and often come with specific instructions for your machine.
Remember, each method has its pros and cons, so choose the one that best suits your needs and preferences.
Frequently Asked Questions (FAQs) About Descaling Breville Machines
Now, let’s address some common questions you might have about descaling your coffee machine:
- Descaling frequency depends on water hardness and machine usage. It’s recommended to descale every 3-6 months.
- Can you use alternative descaling solutions? While it’s best to follow the manufacturer’s recommendations, some alternative solutions like citric acid can be used for descaling. However, be cautious and research proper dilution ratios.
- What if you forget to descale your coffee machine? If you’ve missed a descaling cycle, don’t panic. Simply perform the descaling process as soon as possible to remove the mineral buildup and get back on track.
Tips for Preventing Mineral Buildup and Maintaining Your Coffee Machine
Prevention is always better than cure. Here are some tips to help you prevent mineral buildup and keep your coffee machine in top shape:
- Proper Cleaning Routines and Maintenance: Regularly clean your coffee machine’s external and removable parts, such as the water reservoir, filters, and brew group. Refer to the manufacturer’s instructions for specific cleaning guidelines.
- Importance of Using Filtered or Soft Water: Consider using filtered or soft water in your coffee machine. This helps minimize the mineral content in the water and reduces the chances of limescale formation.
- Avoiding Common Mistakes: Avoid leaving water in the reservoir for extended periods, as it can lead to mineral buildup. Additionally, don’t forget to descale regularly, even if your water source is already filtered or soft.
- Regular Inspection and Part Replacement: Keep an eye out for any signs of wear or damage on your coffee machine. Replace worn-out parts promptly to prevent potential issues and maintain optimal performance.
The Bottom Line On Descaling a Breville
Congratulations, coffee aficionados! You’ve now unlocked the secrets to maintaining a clean and efficient coffee machine through regular descaling. By descaling your coffee machine, you’ll enjoy a more flavorful cup of coffee, extend the lifespan of your beloved machine, and ensure consistent brewing quality. So, don’t procrastinate—grab that descaling solution and give your coffee machine the TLC it deserves. Cheers to a perfectly brewed cup of joe every time!
Nespresso Vertuo Next Descaling Done Easy
Maintaining your Nespresso Vertuo Next is essential for consistently great coffee and the longevity of your machine. One key maintenance task is descaling, which removes mineral deposits that build up over time. In this guide, we’ll walk you through a simple step-by-step process to describe your Vertuo Next, ensuring it operates at peak performance. Let’s get started!
Signs Your Nespresso Vertuo Next Needs Descaling
- Slower brewing times.
- Weaker coffee flavor.
- Unusual noises during brewing.
Step-by-Step Descaling Guide: Prepare Your Items
Ensure you have the following items on hand:
- Nespresso descaling liquid or descaling agent
- 0.8 liters of water
- A 1 liter container to catch the descaling solution
How To Descale Nespresso Vertuo Next

Credit: Nespresso.com
Step 1: Turning On the Machine
- Action: Push the button to turn the machine on.
- Indicator: The light will start blinking, indicating the machine is heating up. Once the light is steady, the machine is ready.
Step 2: Ejecting Used Capsule
- Action: Open the machine head to automatically eject the used capsule.
- Position: Leave the lever in the “UNLOCKED” position, pointing towards the front of the machine.
Step 3: Preparing for Descaling
- Action: Ensure the cup support and the used capsule container are emptied to accommodate the descaling solution.
Step 4: Filling the Water Tank
- Action: Mix 1 unit of Nespresso descaling liquid with 0.8 liters of water in the water tank.
Step 5: Entering Descaling Mode
- Action: Hold the button for at least 7 seconds to enter descaling mode.
- Indicator: The button will blink rapidly, signaling that you have 45 seconds to confirm entry into descaling mode.
Step 6: Confirming Descaling Mode
- Action: To confirm, lock the machine by turning the lever to the left (lock symbol) and then unlock by turning it right. Hold the button again for at least 7 seconds while in the “UNLOCKED” position.
Step 7: Starting the Descaling Process
- Action: Position a container beneath the coffee outlet, secure the machine by rotating the lever to the left, and press the button to initiate the descaling process. The machine will stop automatically once the descaling is finished.
Step 8: Rinsing the Machine
- Action: After descaling, empty, rinse, and clean the water tank and cup support thoroughly.
- Next Steps: Fill the water tank with fresh drinking water, replace it, and push the button to rinse the machine. The machine will stop automatically when the rinse is complete.
Step 9: Exiting Descaling Mode
- Action: To exit descaling mode, hold the button for at least 7 seconds until the rapid blinking stops and the light becomes steady.
Step 10: Completing the Descaling Process
- Final Steps: Allow the machine to dry for 10 minutes. The machine is now ready for use.
- Duration: The entire process takes approximately 20 minutes.
- Additional Notes: If the machine is heavily scaled, the descaling program might need a pause to allow the descaling agent to penetrate the scale build-up before restarting.

Nespresso Descaling Solution
Signs Your Nespresso Vertuo Needs to be Descaled
Signs include slower brewing times, weaker coffee flavor, and decreased performance overall.
For example, look inside this tea kettle that had to be thrown away. The mineral deposits grew so much that the kettle barely boiled water. It had to be thrown out.
Can You Descale Your Nespresso With Vinegar?
With its acetic acid properties, Vinegar has been a time-honored soldier in the battle against limescale and mineral deposits in various household appliances. However, when it comes to Nespresso machines, tread with caution. The Nespresso company has expressed reservations about using vinegar as a descaling agent, citing its potentially aggressive nature, which could compromise the integrity of the machine’s internal piping. For this reason, it’s a little self-defeating to clean the machine while simultaneously potentially damaging it. So for this reason, we don’t recommend this solution. Instead, we recommend you stick with the Nespresso Descaling Agent.

FAQ
Why is descaling my Nespresso Vertuo Next important?
Descaling removes mineral deposits inside your machine over time. This buildup can slow brewing, reduce coffee quality, and even damage the machine. Regular descaling ensures optimal performance and extends your machine’s lifespan.
How often should I descale my Nespresso Vertuo Next?
Nespresso recommends descaling every 2-4 months, depending on your water hardness and usage. If you notice slower brewing times, weaker coffee flavor, or the descaling light turns on, it’s time to descale.
Can I use vinegar to descale a Nespresso Vertuo Next?
Vinegar is not recommended for Nespresso machines. Its high acidity can damage the machine’s internal components. Use a Nespresso-approved descaling solution for the best results and to avoid voiding your warranty.
What do I need to descale my Vertuo Next?
You’ll need:
Nespresso descaling solution or another approved descaling agent.
0.8 liters of water.
A 1-liter container to catch the descaling solution.
How long does the descaling process take?
The entire process takes approximately 20 minutes, including the descaling and rinsing cycles. Plan for a bit of cooling time after completion.
What happens if I don’t descale my machine?
Failing to descale can lead to:
Slower brewing times.
Coffee with off-flavors or reduced strength.
Potential damage to your machine’s internal components, which could shorten its lifespan or result in costly repairs.
Can I use filtered or bottled water to prevent mineral buildup?
Yes! Using filtered water can significantly reduce mineral deposits, especially in areas with hard water. It can also enhance the taste of your coffee and prolong the time between descaling cycles.
What should I do if the descaling process doesn’t complete?
If the descaling cycle is interrupted:
Ensure the machine is in descaling mode.
Check the water tank for enough solution and refill if needed.
Follow the descaling steps again, starting from Step 1.
Where can I find the Nespresso Vertuo Next manual?
You can download the manual directly from Nespresso’s website here for detailed instructions and troubleshooting tips.
How do I know if my water is “hard”?
Hard water contains calcium and magnesium, which contribute to faster mineral buildup. You can test your water hardness with a home testing kit or consult your local water provider.
Can I descale other Nespresso machines with the same instructions?
The descaling process varies by machine model. While some steps overlap, always check your specific machine’s manual or instructions for descaling.
Wrapping Up Descaling a Nespresso
It’s so important to stay on top of descaling your Nespresso occasionally, if not every few months. Again, it depends on the water you use in it and how hard it may be. If you live in a region with super hard water, it might be better to use filtered water that’s been treated to remove heavy elements from it. Remember that you’re drinking all that, and heavy metals in your water aren’t good. You can extend the life of your Nespresso by doing a little extra maintenance to keep it happy. If you need the manual for the Nespresso, here’s a link to it. Happy brewing!
How To Get Rid of Fruit Flies in Drain
There’s nothing like the beautiful aroma of freshly brewed coffee filling the morning air. It’s the scent of a new day, possibilities, and a much-needed caffeine kick. But, sometimes, our serene morning ritual gets interrupted, not just by drain flies but their equally pesky cousins: fruit flies. If you need to remove fruit flies from a coffee machine, we show you how to do it here.
- Drain Flies: These tiny, moth-like creatures love the stagnant water in drains, sewage systems, and damp organic material.
- Fruit Flies: These are slightly different and more attractive to ripe, rotting, or decayed fruit and vegetables. They can also breed in drains, empty bottles, and cans.
Why They Love Your Coffee Corner
- Attraction to Moisture: Coffee machines, especially those with reservoirs, can retain moisture, a perfect breeding ground for both flies.
- Proximity to Food Sources: Storing fruits or organic materials near your coffee machine can be an open invitation for fruit flies.
- Drains: If your coffee machine is situated near a sink, the flies might migrate from the drain, drawn by the warmth and aroma of your brew.
Effective Methods to Bid Them Goodbye
- Boiling Water: A straightforward remedy. Pour boiling water down the drain to kill eggs or larvae and prevent the proliferation of these pests.
- Natural Drain Cleaner: A mix of salt, baking soda, and vinegar poured down the drain can be left overnight and flushed with boiling water the next day. This mixture tackles clogs and removes the organic residue that’s so inviting to flies.
- Commercial Drain Cleaners: Products like Drano or Bio-Clean can effectively combat fly infestations. Always ensure you follow the manufacturer’s instructions.
- Apple Cider Vinegar Trap: A time-tested remedy. Fill a dish with apple cider vinegar, cover it with plastic wrap, poke a few holes, and watch as the flies get lured in, never to come out.
 WE RECOMMEND: GREEN GOBBLER FRUIT FLY KILLER
Ways to Stay Fly-Free
- Regularly clean and dry your drains to prevent stagnation.
- Properly store fruits and organic materials.
- Maintain and dry your coffee machines after every use.
- Consider mesh screens for your windows and doors to act as a barrier.
Conclusion
Your morning coffee moments should be treasured, undisturbed by the irritating buzz of flies. While these tiny pests are harmless, they can certainly be annoying. By following the steps above and ensuring a clean environment, you can sip your brew in peace every day.
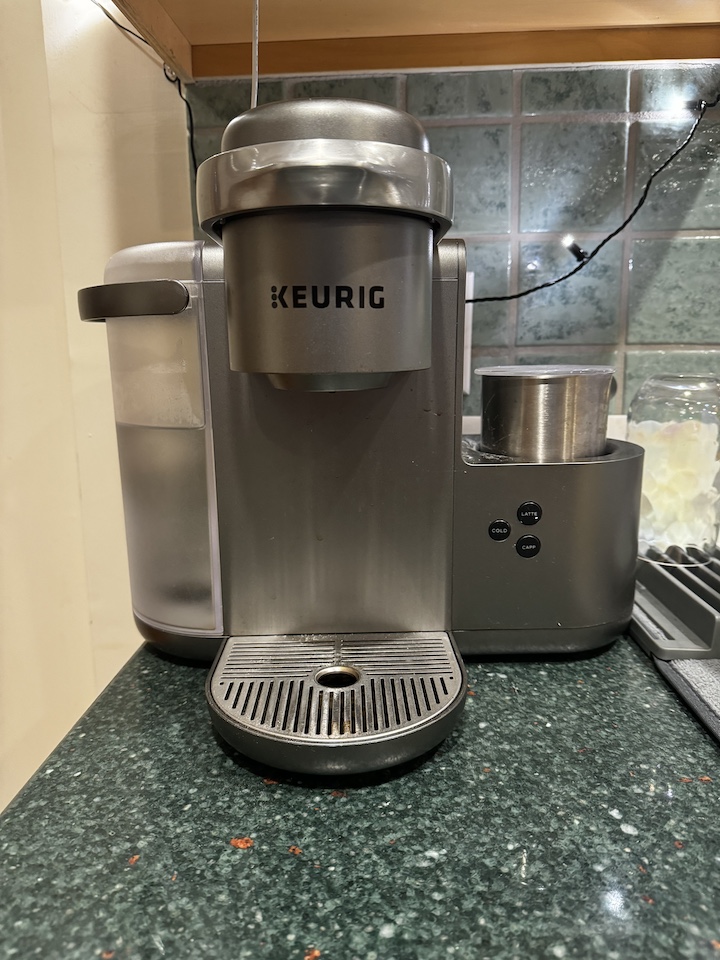
How To Descale a Keurig K Cafe
Click For Descale Solution
If your Keurig has started brewing slower, making strange noises, or makes coffee that tastes off, you’re likely dealing with mineral build-up inside the machine. Having opened my Keurig already to fix it, I can tell you first hand that it is a well-built machine with delicate parts that need to be clean to operate! The solution? Descaling — a simple yet often overlooked maintenance step that keeps your drinks tasting great and your machine running like new.
In this guide, you’ll learn what descaling is, how often to do it, the different methods available, and step-by-step instructions to clean your K Cafe Keurig like a pro.
What Is Descaling & Why It Matters
Descaling is the process of removing limescale and calcium deposits that build up inside your coffee maker over time. This naturally occurs when water is heated, especially in areas with hard water.
If left unchecked, limescale can:
- Alter the taste of your coffee
- Slow down brew times
- Cause clogs and machine malfunctions
- Shorten the lifespan of your Keurig
Signs Your Keurig Needs Descaling
You might need to descale your Keurig if you notice:
- Bitter or metallic coffee taste
- Slower brewing speed than normal
- Unusual noises during the brewing process
- The “Descale” light/message appears on your machine
How Often Should You Descale?
Keurig recommends descaling every 3–6 months, but you may need to do it more often if:
- You drink multiple cups a day
- You use unfiltered tap water
- You live in a hard water area
Which Descaling Method Is Best?
There are three main options for descaling your Keurig:
- Keurig Descaling Solution
- Pros: No odor, precise formulation, safe for all models
- Cons: Costs more than homemade options
- White Vinegar & Water (1:1 ratio)
- Pros: Inexpensive, effective
- Cons: Strong smell, may require extra rinsing
- Lemon Juice & Water (1:1 ratio)
- Pros: Natural, pleasant scent
- Cons: Slightly less effective on heavy build-up

Step-by-Step: How to Descale Your Keurig
Step 1 – Prepare Your Machine
- Unplug your Keurig
- Remove any K-cups or coffee pods
- Empty the drip tray
- Remove the water filter (if applicable)
Step 2 – Mix Your Solution
- Fill the water reservoir with descaling solution
Step 3 – Run Cleaning Cycles
- Place a large mug on the drip tray
- Without a K-cup, run a brew cycle
- Repeat until the “Add Water” light comes on
Step 4 – Let It Sit
- Leave the machine on for 30–60 minutes to break down mineral deposits
Step 5 – Rinse Thoroughly
- Empty the reservoir
- Fill with fresh water
- Run multiple brew cycles until there’s no trace of solution or smell
Step 6 – Reassemble
- Replace the water filter and any removed parts
- Resume brewing as normal
Troubleshooting After Descaling
- Descale light won’t turn off: Run another rinse cycle or consult your model’s reset instructions
- Vinegar taste remains: Continue brewing cycles with clean water until it’s gone
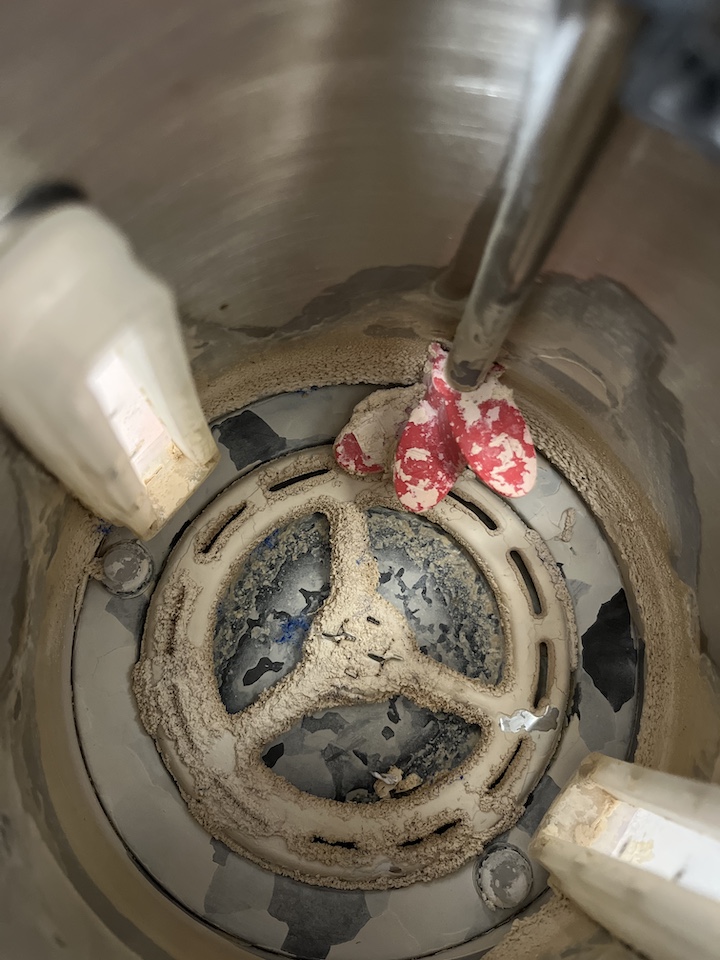
- Water isn’t flowing: Check the needle for clogs and clean it with a paperclip
How to Prevent Limescale Build-Up
- Use filtered or bottled water
- Empty the water reservoir at night
- Wipe down removable parts weekly
- Store with the lid open to prevent trapped moisture
Quick Descaling Frequency Chart
Coffee Per DayWater TypeDescale Every
1–2 cups Filtered/Bottled 6 months
3–4 cups Tap 3 months
Heavy use Hard Tap 1–2 months

FAQs
Can I use baking soda to descale my Keurig?
No, baking soda can damage internal components and is not effective for dissolving limescale.
Can I run straight vinegar?
It’s better to dilute it 1:1 with water to avoid overwhelming odors and possible damage to internal seals.
Is descaling the same as cleaning?
No — cleaning focuses on removing coffee residue from external and removable parts, while descaling targets mineral build-up inside the machine.
Do commercial Keurigs need different care?
They require more frequent descaling due to higher usage.
Final Thoughts
Descaling your Keurig is quick, inexpensive, and critical for ensuring great-tasting coffee and a long-lasting machine. By adding it to your regular maintenance routine, you’ll enjoy faster brewing, better flavor, and fewer breakdowns.
Enjoy your next cup knowing your Keurig is as clean and efficient as the day you bought it.