matt
Best Coffee Beans For Moka Pot
Finding the best coffee beans for moka pot coffee takes a little finessing. Basically you’re trying to make a stovetop espresso, that isn’t technically an espresso (there isn’t enough pressure for it to be ‘authentic’. But regardless, who cares? I love my moka pot, and the psuedo-espresso coffee it produces. So which coffee beans are the best for it? Let’s take a look!
Best Coffee Beans For Moka Pot
I recommend darker roasts for moka pot brewing because they are less acidic, and their rich flavors come out a lot better than a lighter roast which risks tasting acidic.
Here are a few coffees I recommend you try:
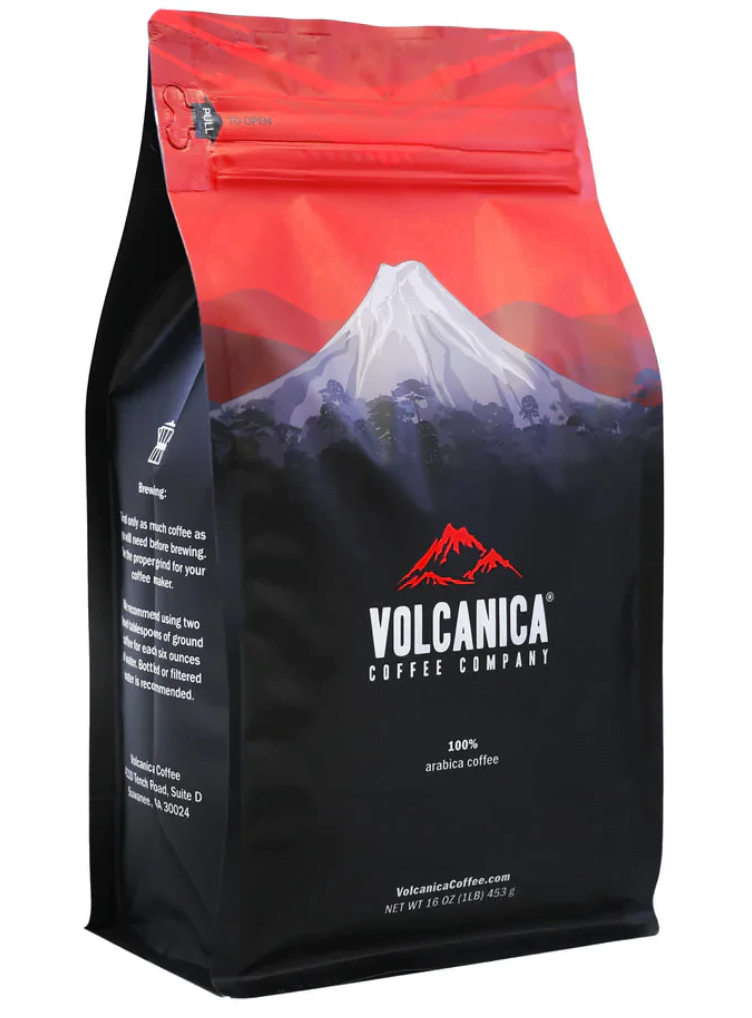
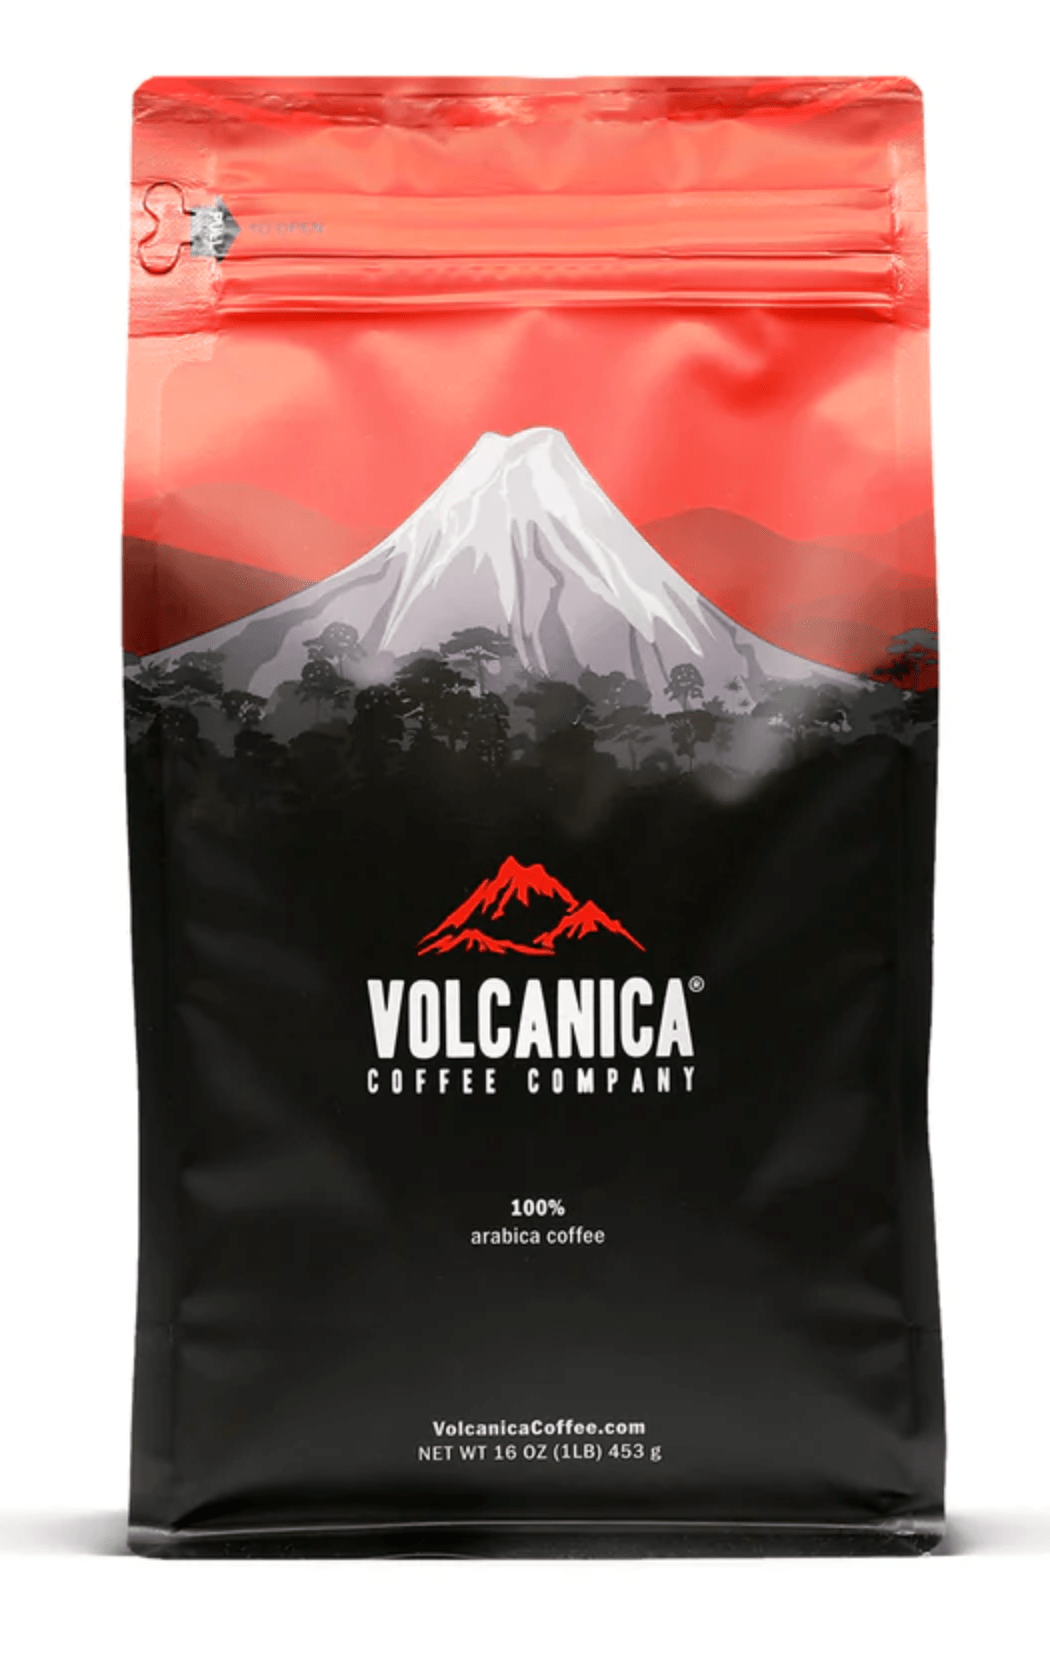 Volcanica Cafe Cubano
Roast Level:
-
- Opt for Medium to Dark Roasts. These roasts are generally recommended for Moka pots as they highlight the coffee’s rich flavors without being overly bitter.
- Light Roasts are less ideal. They can result in a brew that tastes sour or overly acidic in a Moka pot due to the brewing process.
Grind Size:
-
- Fine to Medium-Fine is the recommended grind size for Moka pots. This size ensures the water can extract flavors effectively without being obstructed.
- Avoid Coarse Grinds as they can produce a diluted or weak coffee.
- Extremely Fine Grinds can lead to problems like clogging the pot or over-extracting the coffee, making it bitter.
Origin:
-
- Coffee beans from different regions have distinctive flavor profiles. For Moka pots, beans from Brazil, Colombia, Ethiopia, and Indonesia are popular. They provide diverse flavors, ranging from nutty and rich to light and fruity.
Flavor Profile:
-
- This is subjective and depends on individual taste. Coffee beans can offer various tastes, such as sweetness, bitterness, acidity, etc. It’s best to sample a few and find out what suits your palate.
Tips for Brewing:
- Water: Use fresh, cold water. If your tap water has a strong taste or odor, consider using filtered water.
- Heat: A low to medium heat is recommended. Too high a heat can cause the coffee to taste burnt.
- Cleaning: Ensure your Moka pot is clean and free from old coffee residues. This ensures a fresh taste every time.

History of the Moka Pot
Italy, 1933, engineer Alfonso Bialetti steps onto the scene and invents the Moka pot, soon to be in almost every Italian’s home. This game-changer turned Italian kitchens into home-brew stages overnight.
This stovetop coffee brewer was crafted to deliver a coffee experience so close to espresso, it is sometimes referred to as an espresso maker. However it cannot reach the 9-bar of pressure that espresso demands, although it still manages to create an incredible coffee that is strong, and bold.
Best Coffee Beans for Moka Pot
These are our top choices for coffee beans when using a moka pot.
Volcanica Cafe Cubano Miami Espresso
Volcanica’s Cafe Cubano is a traditional Cuban coffee espresso blend that is made to represent common coffees found in Cuba, and the Miami area. It is made from a signature blend of coffee sourced from Brazil, Colombia, and Guatemala. It’s a strong coffee, robust, and also happens to be certified Kosher! Flavor notes include chocolate, caramel, and a nutty finish. Cuban coffee is still traditionally made in a moka pot, and this produces a sweet and viscous crema.
- Flavor notes of chocolate, caramel, and nuts
- Signature blend of coffee from Brazil, Colombia, and Guatemala
- Certified Kosher
 Lifeboost Coffee Medium Roast Coffee
Medium roasted coffee makes for great flavor which is why I like the Lifeboost Medium Roast, a full bodied coffee that’s low acid, and non-GMO. Made from 100% Arabica coffee beans, single origin and grown in the shade. Lifeboost also prides itself in their third-party testing for toxins, and for sourcing some of the healthiest beans attainable on the market. This coffee has a rounded flavor profile that has hints of sweetness, nuts, cream, and chocolate. If you order direct from Lifeboost, just know that they roast the beans fresh before it ships out for freshness. For ultimate freshness get the whole bean coffee directly from Lifeboost and grind it as needed to keep it fresh.
- 100% Arabica beans
- Non-GMO / Fair traded organic
- Flavor notes of sweetness, nuts, cream, and chocolate
- Low acid
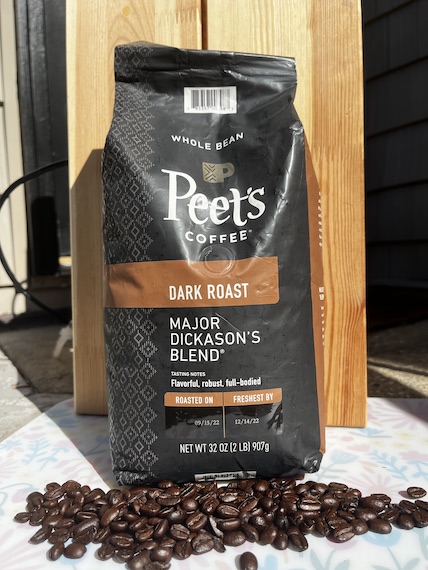 Peet’s Coffee Major Dickason’s Blend

Peet’s Major Dickason’s blend is another favorite for moka pot coffee. It is a blend of earthy, spice that comes from the Americas and the Indo-Pacific. It’s a dark roast with medium-high brightness and a full body and a robust flavor. I find it to be very well balanced, and was thoroughly impressed where it has become one of my top go to coffees.
- Robust flavor with hints of spice
- Blended from the Americas & Indo-Pacific
- Dark roast, perfect for moka pot brewing
- Get the whole bean version and grind it yourself
 Stone Street Brooklyn Roast
Stone Street’s Brooklyn Roast fits the bill for moka pot coffee and they happen to make some of my favorite coffee. This is a medium-dark roast that is going to give a blend of light roast with dark roast for a bright, yet syrupy thickness in its flavor. It’s made with 100% Arabica coffee beans and is smooth and delicious. Small batch roasted in Brooklyn, New York and sourced ethically from their coffee farms.
- Medium-dark roast
- 100% Arabica
- Excellent beans for moka pot coffee
- Available in a dark roast as well

Lifeboost Embolden Dark Roast
Lifeboost makes a second appearance with their Embolden dark roast sourced from the mountains of Nicaragua. It is grown in the shade, sun dried, and washed with spring water and never touches pesticides. In fact Lifeboost prides itself on third-party testing to back that up. This coffee is low acid, smooth, strong, and gentle on the stomach. When using with the moka pot, grind it to a medium-fine powder, and you’ll see this coffee comes out tasty as heck.
- Dark roast
- non-GMO, USDA Organic
- Smooth, strong, low acid
- Shade grown in the mountains
- Third party tested for mycotoxins & pesticides
Best Espresso Beans for Lattes
A latte, also known as a café latte, is a popular espresso-based coffee beverage that originated in Italy. The word “latte” means “milk” in Italian, and a latte is made with espresso and steamed milk.
Lattes are known for their creamy texture and mild, slightly sweet flavor. They are typically served in larger cups or glasses than other espresso-based drinks, such as a cappuccino, and are often enjoyed as a morning or afternoon pick-me-up.
How to Choose the Best Coffee Beans for Lattes
Roast Level
The roast level of coffee beans significantly influences the flavor of your latte. Generally, medium to dark roasts are preferred for lattes because they offer a robust flavor that can stand up to milk. Light roasts tend to be more acidic and can get drowned out by the milk.
Origin
The geographical origin of the coffee bean can impact its flavor profile. Beans from Ethiopia often have fruity and floral notes, while those from Brazil might offer a nutty, chocolatey taste. Your preference in flavor can guide your choice of origin.
Flavor Profile
When shopping for coffee beans, you’ll often see flavor notes on the packaging, ranging from ‘earthy’ to ‘citrusy.’ For a latte, you might want a well-rounded bean that offers a balanced flavor to complement the milk.
Best espresso beans for lattes
1. Volcanica Espresso Dark Roast Coffee
High-Quality Beans
Volcanica Coffee specializes in sourcing gourmet coffee beans from volcanic regions around the world. The mineral-rich volcanic soil lends the beans a unique flavor and high quality that’s hard to find in regular coffee beans.
Ethical Sourcing
Volcanica offers high-quality beans and is committed to ethical sourcing practices, often supporting Fair Trade and Rainforest Alliance-certified farms.
2. Peet’s Coffee, Dark Roast Whole Bean Coffee
 Are you a fan of lattes that come with a punch of strong, rich flavor? Then you might want to consider Peet’s Espresso Forte for your next brew.
Roast Profile
Espresso Forte falls under a dark roast category, making it intensely rich and full-bodied. The darker roast complements the creaminess of a latte, creating a harmonious balance between milk and coffee.
Flavor Notes
The blend is crafted for complexity and vigor, featuring a symphony of bright, fruity notes along with deeper, chocolaty undertones. This dynamic flavor profile is versatile enough to shine through the milk in a latte or stand alone as a straight espresso.
Versatility in Brewing
While designed for espresso, the blend is versatile enough to work well with other brewing methods, such as the French Press or AeroPress, although the unique characteristics might be best showcased in an espresso machine.
3: LifeBoost Dark Roast Bean
Lifeboost’s Embolden Dark Roast is one of the best coffee beans for latte drinkers. We recommend buying this one directly from them because it’s going to ensure a freshly roasted coffee that hasn’t been sitting on a shelf in a warehouse for months. Lifeboost Embolden Dark Roast is a type of coffee that is known for its bold, rich flavor profile. It is a dark roast coffee that is made from 100% organic, shade-grown beans that are sustainably sourced from Nicaragua.
How To Descale Breville Espresso Machine: Bambino, Barista Express, Barista Touch, Barista Pro
Hey there, fellow coffee lovers! Are you ready to dive into the world of descaling and unlock the secrets to brewing the perfect cup of coffee? Descaling your coffee machine may not be the most glamorous task, but trust me, it’s an essential one. In this ultimate guide, we’ll explore why descaling is crucial for maintaining your coffee machine’s performance and ensuring a fantastic coffee experience every time you brew.
How To Descale Breville Espresso Machines: Bambino, Barista Express, Barista Touch, Barista Pro
Descaling your Breville espresso machine is an important part of maintaining its performance and prolonging its lifespan. It is recommended to descale any coffee or espresso machine every 3 months. Here are the steps to descale a Breville.
- Empty the water tank and remove any remaining water filter from the reservoir.
- Mix a descaling solution by adding one packet of Breville Descaler to 1 quart of warm water. Alternatively, you can use white vinegar diluted with equal parts water as a natural descaling solution.
- Pour the descaling solution into the water tank.
- Turn the machine on and let it warm up for at least 20 minutes.
- Place a large container under the group head to catch the water.
- Press the 1 cup button and let the descaling solution run through the machine. Switch the machine off and let it sit for 15 minutes.
- Repeat the process by pressing the 2 cup button, letting the descaling solution run through the machine again.
- Rinse the tank thoroughly and fill it with clean water.
- Run clean water through the machine by pressing the 1 cup and 2 cup buttons multiple times to flush out any remaining descaling solution.
- Replace the water filter in the water tank (if applicable).
- Wipe down the machine and all detachable parts with a clean cloth and reassemble.
 Coffee Machine Descaler
For specific manuals for your Breville machine, please click here.
Signs That Your Coffee Machine Needs Descaling
Wondering if your coffee machine is due for descaling? Look out for these telltale signs:
- Changes in Coffee Taste: If your once-delicious coffee now tastes a bit off or lacks the vibrant flavors you’re used to, it’s a clear indicator that descaling is in order.
- Slow Brewing or Dripping: Is your coffee taking longer than usual to brew or dripping at a snail’s pace? Mineral buildup might be clogging the internal pipes, causing a sluggish brewing process.
- Unusual Noises or Vibrations: Is your coffee machine suddenly making strange noises or vibrating excessively? It could be a result of limescale interfering with the machine’s mechanisms.

The Benefits of Descaling Your Coffee Machine
Now, let’s talk about why descaling is worth your time and effort:
- Enhanced Coffee Flavor and Aroma: Descaling removes the mineral buildup that hampers the natural flavors and aroma of your coffee. Say hello to a richer, more satisfying cup of joe!
- Prolonged Lifespan of Your Coffee Machine: Regular descaling prevents limescale from wreaking havoc on your machine’s internal parts, extending its lifespan and saving you from premature breakdowns.
- Improved Brewing Efficiency and Speed: By eliminating mineral deposits, your coffee machine can operate at optimal efficiency, ensuring faster brewing times and a smoother brewing process.
- Cost Savings on Repairs and Replacement: Neglecting descaling can lead to costly repairs or getting a new coffee machine. Save your hard-earned money by maintaining your machine through regular descaling.
- Consistency in Brewing Quality: Descaling helps you maintain a consistent brewing quality, ensuring that every cup is as delightful as the last.
Different Methods of Descaling
When it comes to descaling, you have a few methods to choose from:
- Traditional Descaling Solutions: There are descaling solutions specifically designed for coffee machines available in the market. These solutions are usually effective and straightforward to use.
- Vinegar-Based Descaling: If you prefer a more natural approach, vinegar can be a viable option. Dilute vinegar with water and run it through your coffee machine to dissolve the mineral deposits.
- Descaling Tablets or Powders: Some coffee machine manufacturers offer descaling tablets or powders. These products are convenient and often come with specific instructions for your machine.
Remember, each method has its pros and cons, so choose the one that best suits your needs and preferences.
Frequently Asked Questions (FAQs) About Descaling Breville Machines
Now, let’s address some common questions you might have about descaling your coffee machine:
- Descaling frequency depends on water hardness and machine usage. It’s recommended to descale every 3-6 months.
- Can you use alternative descaling solutions? While it’s best to follow the manufacturer’s recommendations, some alternative solutions like citric acid can be used for descaling. However, be cautious and research proper dilution ratios.
- What if you forget to descale your coffee machine? If you’ve missed a descaling cycle, don’t panic. Simply perform the descaling process as soon as possible to remove the mineral buildup and get back on track.
Tips for Preventing Mineral Buildup and Maintaining Your Coffee Machine
Prevention is always better than cure. Here are some tips to help you prevent mineral buildup and keep your coffee machine in top shape:
- Proper Cleaning Routines and Maintenance: Regularly clean your coffee machine’s external and removable parts, such as the water reservoir, filters, and brew group. Refer to the manufacturer’s instructions for specific cleaning guidelines.
- Importance of Using Filtered or Soft Water: Consider using filtered or soft water in your coffee machine. This helps minimize the mineral content in the water and reduces the chances of limescale formation.
- Avoiding Common Mistakes: Avoid leaving water in the reservoir for extended periods, as it can lead to mineral buildup. Additionally, don’t forget to descale regularly, even if your water source is already filtered or soft.
- Regular Inspection and Part Replacement: Keep an eye out for any signs of wear or damage on your coffee machine. Replace worn-out parts promptly to prevent potential issues and maintain optimal performance.
The Bottom Line On Descaling a Breville
Congratulations, coffee aficionados! You’ve now unlocked the secrets to maintaining a clean and efficient coffee machine through regular descaling. By descaling your coffee machine, you’ll enjoy a more flavorful cup of coffee, extend the lifespan of your beloved machine, and ensure consistent brewing quality. So, don’t procrastinate—grab that descaling solution and give your coffee machine the TLC it deserves. Cheers to a perfectly brewed cup of joe every time!
Nespresso Vertuo Next Descaling Done Easy
Maintaining your Nespresso Vertuo Next is essential for consistently great coffee and the longevity of your machine. One key maintenance task is descaling, which removes mineral deposits that build up over time. In this guide, we’ll walk you through a simple step-by-step process to describe your Vertuo Next, ensuring it operates at peak performance. Let’s get started!
Signs Your Nespresso Vertuo Next Needs Descaling
- Slower brewing times.
- Weaker coffee flavor.
- Unusual noises during brewing.
Step-by-Step Descaling Guide: Prepare Your Items
Ensure you have the following items on hand:
- Nespresso descaling liquid or descaling agent
- 0.8 liters of water
- A 1 liter container to catch the descaling solution
How To Descale Nespresso Vertuo Next

Credit: Nespresso.com
Step 1: Turning On the Machine
- Action: Push the button to turn the machine on.
- Indicator: The light will start blinking, indicating the machine is heating up. Once the light is steady, the machine is ready.
Step 2: Ejecting Used Capsule
- Action: Open the machine head to automatically eject the used capsule.
- Position: Leave the lever in the “UNLOCKED” position, pointing towards the front of the machine.
Step 3: Preparing for Descaling
- Action: Ensure the cup support and the used capsule container are emptied to accommodate the descaling solution.
Step 4: Filling the Water Tank
- Action: Mix 1 unit of Nespresso descaling liquid with 0.8 liters of water in the water tank.
Step 5: Entering Descaling Mode
- Action: Hold the button for at least 7 seconds to enter descaling mode.
- Indicator: The button will blink rapidly, signaling that you have 45 seconds to confirm entry into descaling mode.
Step 6: Confirming Descaling Mode
- Action: To confirm, lock the machine by turning the lever to the left (lock symbol) and then unlock by turning it right. Hold the button again for at least 7 seconds while in the “UNLOCKED” position.
Step 7: Starting the Descaling Process
- Action: Position a container beneath the coffee outlet, secure the machine by rotating the lever to the left, and press the button to initiate the descaling process. The machine will stop automatically once the descaling is finished.
Step 8: Rinsing the Machine
- Action: After descaling, empty, rinse, and clean the water tank and cup support thoroughly.
- Next Steps: Fill the water tank with fresh drinking water, replace it, and push the button to rinse the machine. The machine will stop automatically when the rinse is complete.
Step 9: Exiting Descaling Mode
- Action: To exit descaling mode, hold the button for at least 7 seconds until the rapid blinking stops and the light becomes steady.
Step 10: Completing the Descaling Process
- Final Steps: Allow the machine to dry for 10 minutes. The machine is now ready for use.
- Duration: The entire process takes approximately 20 minutes.
- Additional Notes: If the machine is heavily scaled, the descaling program might need a pause to allow the descaling agent to penetrate the scale build-up before restarting.

Nespresso Descaling Solution
Signs Your Nespresso Vertuo Needs to be Descaled
Signs include slower brewing times, weaker coffee flavor, and decreased performance overall.
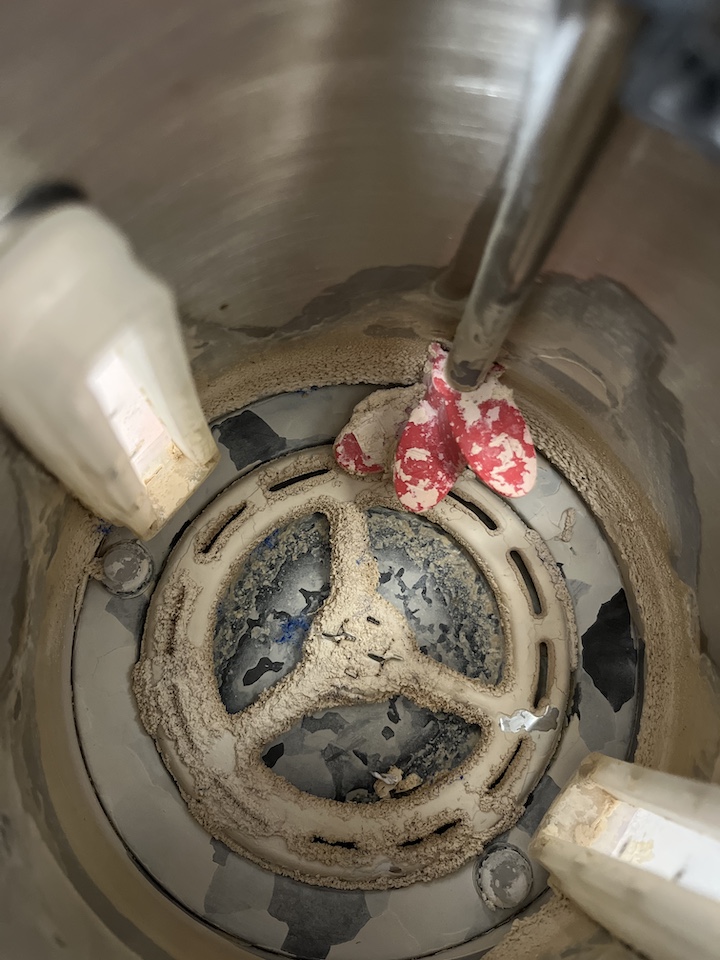
For example, look inside this tea kettle that had to be thrown away. The mineral deposits grew so much that the kettle barely boiled water. It had to be thrown out.
Can You Descale Your Nespresso With Vinegar?
With its acetic acid properties, Vinegar has been a time-honored soldier in the battle against limescale and mineral deposits in various household appliances. However, when it comes to Nespresso machines, tread with caution. The Nespresso company has expressed reservations about using vinegar as a descaling agent, citing its potentially aggressive nature, which could compromise the integrity of the machine’s internal piping. For this reason, it’s a little self-defeating to clean the machine while simultaneously potentially damaging it. So for this reason, we don’t recommend this solution. Instead, we recommend you stick with the Nespresso Descaling Agent.

FAQ
Why is descaling my Nespresso Vertuo Next important?
Descaling removes mineral deposits inside your machine over time. This buildup can slow brewing, reduce coffee quality, and even damage the machine. Regular descaling ensures optimal performance and extends your machine’s lifespan.
How often should I descale my Nespresso Vertuo Next?
Nespresso recommends descaling every 2-4 months, depending on your water hardness and usage. If you notice slower brewing times, weaker coffee flavor, or the descaling light turns on, it’s time to descale.
Can I use vinegar to descale a Nespresso Vertuo Next?
Vinegar is not recommended for Nespresso machines. Its high acidity can damage the machine’s internal components. Use a Nespresso-approved descaling solution for the best results and to avoid voiding your warranty.
What do I need to descale my Vertuo Next?
You’ll need:
Nespresso descaling solution or another approved descaling agent.
0.8 liters of water.
A 1-liter container to catch the descaling solution.
How long does the descaling process take?
The entire process takes approximately 20 minutes, including the descaling and rinsing cycles. Plan for a bit of cooling time after completion.
What happens if I don’t descale my machine?
Failing to descale can lead to:
Slower brewing times.
Coffee with off-flavors or reduced strength.
Potential damage to your machine’s internal components, which could shorten its lifespan or result in costly repairs.
Can I use filtered or bottled water to prevent mineral buildup?
Yes! Using filtered water can significantly reduce mineral deposits, especially in areas with hard water. It can also enhance the taste of your coffee and prolong the time between descaling cycles.
What should I do if the descaling process doesn’t complete?
If the descaling cycle is interrupted:
Ensure the machine is in descaling mode.
Check the water tank for enough solution and refill if needed.
Follow the descaling steps again, starting from Step 1.
Where can I find the Nespresso Vertuo Next manual?
You can download the manual directly from Nespresso’s website here for detailed instructions and troubleshooting tips.
How do I know if my water is “hard”?
Hard water contains calcium and magnesium, which contribute to faster mineral buildup. You can test your water hardness with a home testing kit or consult your local water provider.
Can I descale other Nespresso machines with the same instructions?
The descaling process varies by machine model. While some steps overlap, always check your specific machine’s manual or instructions for descaling.
Wrapping Up Descaling a Nespresso
It’s so important to stay on top of descaling your Nespresso occasionally, if not every few months. Again, it depends on the water you use in it and how hard it may be. If you live in a region with super hard water, it might be better to use filtered water that’s been treated to remove heavy elements from it. Remember that you’re drinking all that, and heavy metals in your water aren’t good. You can extend the life of your Nespresso by doing a little extra maintenance to keep it happy. If you need the manual for the Nespresso, here’s a link to it. Happy brewing!
Nitro Cold Brew
Welcome to the world of nitro cold brew, where coffee meets a creamy, velvety sensation that will elevate your caffeine experience to new heights. In this comprehensive guide, we’ll dive deep into the enchanting realm of nitro cold brew, exploring its brewing process, unique qualities, and why it has become a favorite among coffee enthusiasts.
What Is Nitro Cold Brew?
Before we embark on this flavor-filled journey, let’s take a moment to understand what nitro cold brew actually is. Nitro cold brew is a coffee beverage that combines the smoothness of cold brew with the infusion of nitrogen gas. The result? A luscious, creamy texture with a flavor profile that’s unlike anything you’ve ever tasted.
The nitrogen infusion process typically involves adding nitrogen to the coffee through a pressurized valve and dispensing it from a special tap, similar to a draft beer. The nitrogen gives it tiny bubbles that give the coffee a creamy and smooth texture, and enhance its sweetness and flavor. Nitro coffee is typically served on its own, over ice, and is often served in a glass with a creamy head, similar to that of a stout beer. It is also a popular option for coffee shops and cafes, as it offers a unique and visually appealing presentation.
Prepare yourself for an extraordinary sensory experience with nitro cold brew. As you take your first sip, you’ll notice the silky-smooth texture that coats your palate. It’s like savoring a velvety symphony of flavors. The nitrogen infusion creates tiny bubbles that dance on your tongue, enhancing the overall mouthfeel.
But it’s not just about the taste and texture; nitro cold brew is a visual feast as well. When poured, it showcases a mesmerizing cascading effect, with distinct layers forming in the glass. The creamy head on top resembles the frothy foam of a Guinness beer, making it an Instagram-worthy delight.
WE RECOMMEND: The Original Royal Brew Nitro Cold Brew Coffee Maker

How To Make Nitro Cold Brew
Making nitro coffee at home requires specialized equipment and a bit of technical know-how, but with the right tools and some practice, it can be done. Here is a basic guide for making nitro coffee:
Ingredients:
- 1 cup coarsely ground coffee beans
- 4 cups cold filtered water
- Nitrogen gas charger or nitrogen infusion system (available at specialty coffee stores or online)
- Optional: Flavor syrups, milk, or sweeteners for customization
Equipment:
- Large jar or container with a lid
- Fine mesh sieve or cheesecloth
- Airtight container for storing the cold brew
- Nitrogen infusion system (if not using a nitrogen gas charger)
- Glass or mug for serving
Instructions:
- Coarsely grind the coffee beans: Start by grinding your coffee beans to a coarse consistency. This helps prevent over-extraction during the extended brewing process.
- Prepare the cold brew concentrate: In a large jar or container, combine the coarsely ground coffee beans and cold filtered water. Stir gently, seal it with a lid.
- Brew the cold brew concentrate: Place the sealed jar in the refrigerator and let it steep for 24 hours.
- Strain the cold brew concentrate: After the steeping time, remove the jar from the refrigerator. Line a cheesecloth over another container and carefully pour the cold brew concentrate through the sieve to remove any coffee grounds. Press to extract all the liquid. Discard the remaining grounds.
- Transfer the cold brew concentrate: Pour the strained cold brew concentrate into an airtight container. This will be your base for making nitro cold brew.
- Infuse with nitrogen gas: If you have a nitrogen gas charger, follow the instructions provided with the charger to infuse nitrogen into the cold brew. This will create the desired creamy texture and cascading effect. Alternatively, if you have a nitrogen infusion system, carefully follow the instructions to infuse nitrogen into the cold brew.
- Store and chill: Seal the airtight container and place it in the refrigerator to chill for at least 4 hours. This allows the nitrogen to fully integrate into the cold brew, enhancing the texture and flavor.
- Serve and enjoy: When ready to serve, pour the nitro cold brew into a glass or mug. Observe the mesmerizing cascading effect and creamy head that forms on top. Sip and savor the smooth, velvety texture and rich flavor. If desired, you can customize your nitro cold brew with flavor syrups, milk, or sweeteners.
- Store the remaining nitro cold brew: it can be stored for up to a week.
Note: Infusing nitrogen into coffee requires specialized equipment, such as a nitro charger or nitrogen regulator, and a stainless steel keg. If you don’t have access to this equipment, you can purchase a pre-made nitro coffee concentrate, or you can visit a coffee shop that specializes in nitro coffee to try it.
No Nitrogen Equipment? Starbucks Nitro Cold Brew

What Is Nitro Coffee & What’s The Difference?
Nitro coffee, on the other hand, starts with traditional hot brewed coffee. The coffee beans are brewed using methods such as drip brewing or espresso extraction. The resulting hot coffee is then chilled to a cold temperature.
Similar to nitro cold brew, the chilled coffee is infused with nitrogen gas to create nitro coffee. The nitrogen infusion adds a creamy texture and enhances the mouthfeel of the coffee. When poured, nitro coffee also displays the cascading effect and forms a frothy head on top, similar to nitro cold brew.
The flavor of nitro coffee retains the characteristics of the base coffee used. However, the nitrogen infusion can contribute to a slightly sweeter and smoother taste compared to regular hot brewed coffee. The nitrogen bubbles also provide a subtle effervescence, enhancing the overall drinking experience.
Summary of Differences:
- Brewing Method: Nitro cold brew is made using the cold brew method, while nitro coffee starts with hot brewed coffee.
- Flavor Profile: Nitro cold brew has a smoother and milder flavor with lower acidity, while nitro coffee retains the flavor characteristics of the base hot brewed coffee.
- Temperature: Nitro cold brew is served cold, usually without ice, while nitro coffee is typically chilled but can also be served over ice.
- Texture and Mouthfeel: Nitro cold brew has a velvety, creamy texture, whereas nitro coffee also has a creamy mouthfeel but may not be as pronounced as nitro cold brew.
- Presentation: Both nitro cold brew and nitro coffee exhibit a cascading effect and form a frothy head when poured, creating an aesthetically pleasing presentation.
Comparing Nitro Cold Brew to Other Coffee Beverages
Now, you might be wondering how nitro cold brew stacks up against other coffee beverages. Let’s explore the differences:
- Traditional Hot Brewed Coffee: Nitro cold brew is a departure from the hot brewed coffee you’re accustomed to. It offers a smoother and less acidic profile, allowing the flavors to shine through without the sharpness. The extended brewing time and nitrogen infusion create a coffee experience that is simply unmatched.
- Iced Coffee: While both iced coffee and nitro cold brew are chilled, they differ in preparation and taste. Iced coffee is brewed hot and then cooled down, whereas nitro cold brew undergoes a cold brewing process. Nitro cold brew boasts a creamier texture and fuller flavor due to the nitrogen infusion, setting it apart from traditional iced coffee.
- Nitro Coffee and Nitro Tea: Nitro cold brew is often confused with nitro coffee or nitro tea. While they all share the nitrogen infusion, the key distinction lies in the base beverage. Nitro coffee starts with regular hot brewed coffee, while nitro tea begins with brewed tea. Nitro cold brew, on the other hand, starts with the unique cold brew method, giving it a distinct flavor profile.
Nitro Cold Brew: Health Benefits and Considerations
Aside from its irresistible taste, nitro cold brew offers some potential health benefits worth noting. The extended brewing process results in lower acidity, making it easier on the stomach for those with acid sensitivity. Additionally, the reduced bitterness and smoother flavor make it more appealing to coffee drinkers who find traditional hot brews too strong.
However, it’s important to consume nitro cold brew in moderation. While it may be tempting to indulge in this delightful elixir all day long, remember that it still contains caffeine. Keep in mind your personal tolerance and be mindful of any additives that might be added.
The Ultimate Heated Mug Showdown: Ember, Nextmug, OHOM & More
For anyone who enjoys coffee or tea throughout the day, one problem is universal: by the time you get halfway through your cup, it’s already gone lukewarm. Over the past few years, a new category of heated drinkware has emerged to solve this.
The market now offers two main approaches:
-
Self-heating mugs, like the Ember Mug 2, which use internal batteries and heating elements to actively maintain your beverage at a set temperature.
-
Corded mug warmers, which act like mini hotplates that sit on your desk and keep any mug warm as long as they’re plugged in.
Both methods work — but in very different ways. Smart mugs emphasize portability and precision, while plug-in warmers deliver affordability and long-term reliability. The right choice depends on your drinking habits, your budget, and your expectations.

Understanding the Categories
Self-Heating Smart Mugs (Cordless)
Self-heating mugs integrate a battery and heating element into the mug itself. They can keep drinks at a chosen temperature — typically between 120°F and 145°F — for about an hour to 90 minutes when off the charger.
Pros
-
Portable: carry them from room to room.
-
Precise: often controlled through an app.
-
Premium designs and finishes.
Cons
-
Battery life is usually shorter than advertised.
-
Hand-wash only (electronics inside can’t handle dishwashers).
-
High price compared to traditional mugs.
Best for: People who sip slowly and want their drink to stay at the perfect temperature without reheating.
Example: Ember Mug 2 — sleek, app-controlled, and considered the market leader.
Mug Warmers (Corded)
Mug warmers are heated pads that plug into the wall. Place your mug on top, and the warmer transfers heat through the base.
Pros
-
Affordable (often under $30).
-
Reliable and easy to use.
-
Works with many types of mugs.
-
Unlimited runtime while plugged in.
Cons
-
Not portable — must stay at your desk.
-
Performance depends on mug shape and material (flat-bottom mugs work best).
Best for: People who mainly drink at a desk and don’t want to worry about charging.
Example: Sweetfull Coffee Mug Warmer — a budget-friendly, no-fuss option.
Vacuum-Insulated Mugs (Non-Heating)
While not truly “heated,” vacuum-insulated mugs trap heat inside double walls to slow cooling. Some can keep drinks warm for 4–6 hours.
Pros
-
No batteries, no cords.
-
Portable and durable.
-
Easy to clean.
Cons
-
Don’t actively maintain a set temperature.
-
Drink still cools over time.
Best for: Commuters and travelers who want portability without electronics.
Spotlight: The Ember Ecosystem
The Ember Mug 2 and Ember Travel Mug 2 are considered the most advanced heated mugs available.
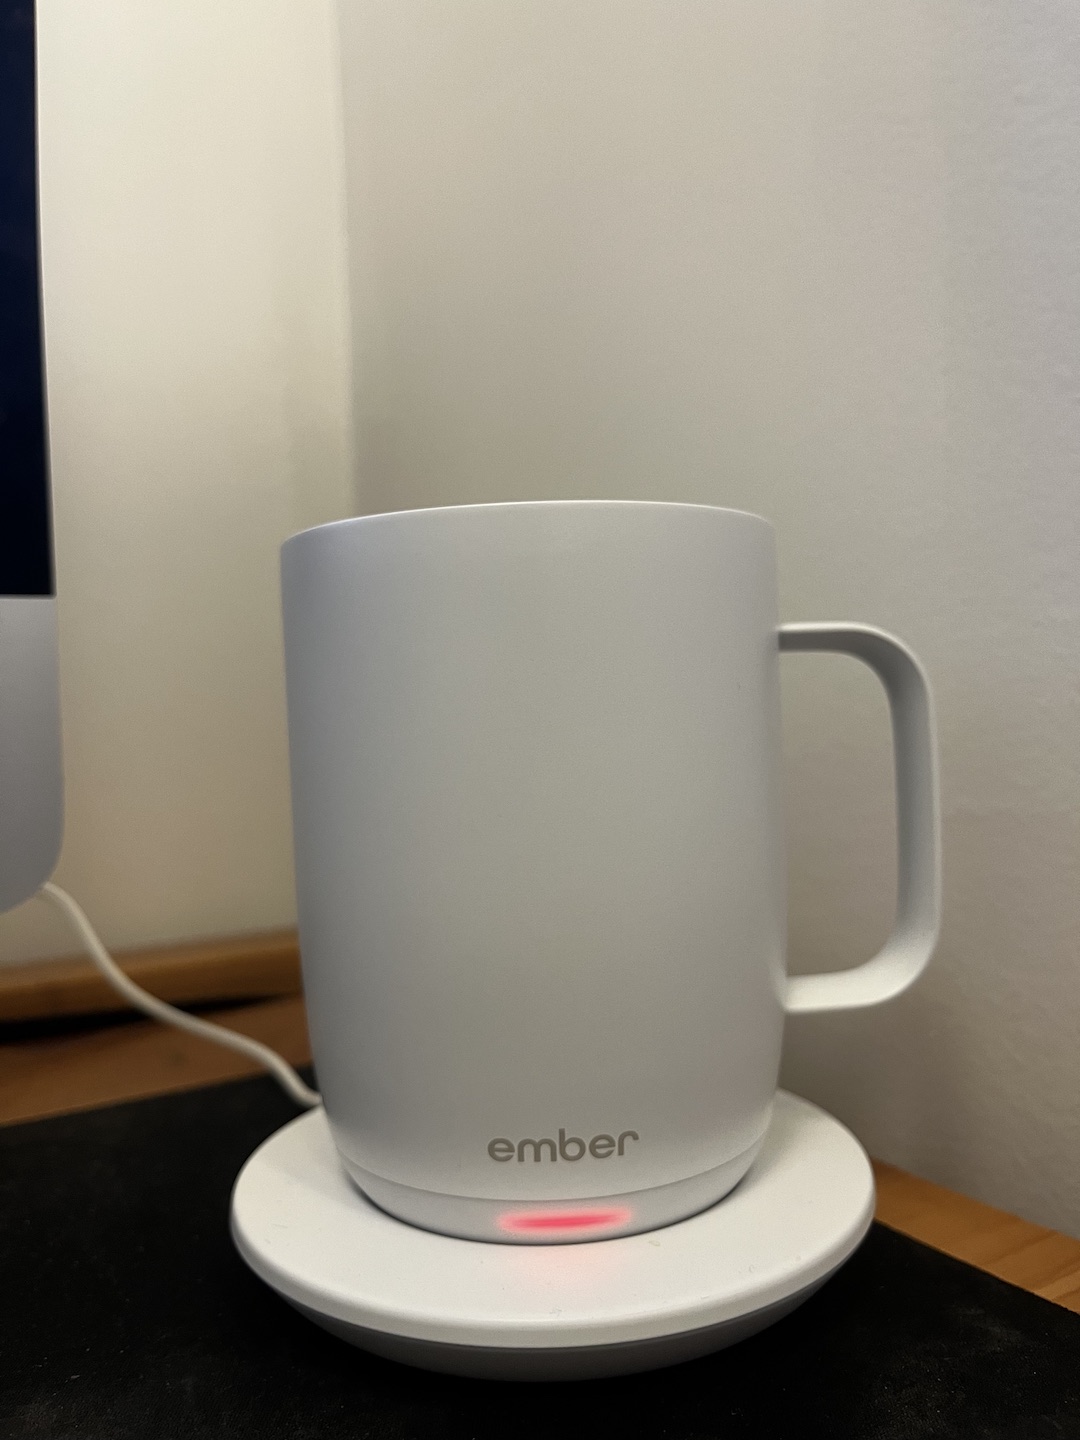
Key Features
-
Temperature range: 120–145°F.
-
Controlled via the Ember app (or defaults to ~135°F without it).
-
Real-time monitoring and preset options for coffee, tea, or hot chocolate.
-
Premium build quality with ceramic or coated finishes.
Performance
-
Claimed battery life: 90 minutes (Mug 2) and 3 hours (Travel Mug 2).
-
Real-world results: typically closer to 70–90 minutes off the coaster.
-
Works best with a lid (slows heat loss and extends battery life).
-
On the charging coaster, the mug can keep drinks hot for hours.
Trade-offs
-
Hand-wash only.
-
Expensive compared to alternatives.
-
Some consumer complaints around durability and customer service.
Competitors and Alternatives
-
Nextmug: Cheaper and available in more colors, with a spill-resistant lid. However, testing shows inconsistent performance and shorter battery life.
-
OHOM Ui Mug & Warmer: Ceramic mug with a wireless-charging coaster that can also charge a phone. Dishwasher safe, but requires careful placement on the coaster for best results.
-
Budget Plug-In Warmers (Sweetfull, VOBAGA): Extremely reliable for fixed use. They don’t heat a cold drink, but they do an excellent job of keeping hot drinks warm.
Comparison at a Glance
| Product | Price | Capacity | Temp Range | Battery/Power | Cleaning | Best For |
|---|---|---|---|---|---|---|
| Ember Mug 2 | $$$ | 10–14 oz | 120–145°F | 70–90 min battery | Hand-wash | Precision + portability |
| Ember Travel Mug 2 | $$$$ | 12 oz | 120–145°F | ~3 hrs (with lid) | Hand-wash | On-the-go sipping |
| Nextmug | $$ | ~14 oz | Up to 140°F | Short battery life | Hand-wash | Budget smart option |
| OHOM Ui Mug | $$ | 12 oz | ~130°F | Corded | Dishwasher safe | Easy cleaning |
| Sweetfull Mug Warmer | $ | Any | 105–180°F | Plug-in (unlimited) | Wipe clean | Desk value option |
Ownership Experience
Cleaning
-
Most smart mugs are hand-wash only. Electronics inside can be damaged if submerged.
-
The OHOM Ui Mug is a rare dishwasher-safe exception.
Customer Support
-
Many consumers report mixed experiences with Ember’s customer service.
-
Budget mug warmers have fewer moving parts and tend to be less problematic over time.
Safety Notes
-
Never microwave self-heating mugs (they contain batteries and metal).
-
Use lids when possible — they reduce spills and extend battery life.
-
Avoid very old ceramic mugs (possible unsafe glazes) and cheap plastics (risk of leaching).
-
Keep battery-powered mugs out of reach of children.
FAQ
How long do self-heating mugs last on battery?
Usually 70–90 minutes, shorter than advertised. Best to keep them on the charging coaster.
Do I need the app for Ember?
No — the mug defaults to ~135°F. The app just adds customization and LED color control.
Does heating affect taste?
Some users notice a flavor change after long heating periods. Insulated mugs may preserve taste better if flavor is a top concern.
Can I microwave an Ember?
No. The battery and electronics make it unsafe.
What colors are available?
Black, white, gray, red, and metallic finishes like copper and rose gold. Sizes range from 10 to 14 oz, with the Travel Mug at 12 oz.
Recommendations
-
Best Overall: Ember Mug 2 — for people who want tech, precision, and style.
-
Best Portability: Ember Travel Mug 2 — longer battery, lid, and display for on-the-go use.
-
Best Value: Sweetfull Coffee Mug Warmer — reliable, inexpensive, no extra learning curve.
-
Best Easy-Care Option: OHOM Ui Mug — dishwasher safe, with a versatile charging coaster.
Conclusion
The world of heated mugs is full of trade-offs. If you want the luxury of perfect-temperature coffee at your desk or around the house, Ember is the gold standard — though you’ll pay for it, and you’ll need to accept hand-washing and battery limits.
If you just want something simple and reliable to keep coffee warm while you work, a corded mug warmer like Sweetfull or VOBAGA is hard to beat. And for those who want portability without fuss, a good vacuum-insulated travel mug remains a practical, low-maintenance choice.
In short: choose based on your priorities — tech and control, budget and value, or simplicity and reliability. No matter your preference, there’s now a way to enjoy every sip of your coffee or tea at the temperature you like best.
Cappuccino vs Flat White
A Cappuccino is a coffee beverage made with espresso, steamed milk, and a layer of foam on top. It typically has equal parts of each ingredient, and the foam is usually around 1/8 inch thick. A Flat White, conversely, is a coffee beverage made with espresso and steamed milk. It has less foam than a cappuccino, and the milk is usually microfoamed to give it a silky texture. In a Flat White, the ratio of espresso to milk is typically 1:2, and the foam is less than that of a Cappuccino.
Cappuccino:
- Cappuccino is a traditional Italian coffee drink with equal parts espresso, steamed, and frothed milk. The frothed milk is typically spooned on the espresso and steamed milk, giving the drink a layered look.
- Served in a smaller cup and has a thick layer of froth on top, with the espresso and steamed milk underneath. The froth is often dusted with cocoa powder or cinnamon for added flavor.
- The taste of cappuccino is balanced between the espresso’s bitterness and the milk’s sweetness, with the frothed milk adding a light, airy texture.
Flat White:
- Originated in Australia and New Zealand. It is made with a double shot of espresso and steamed milk. Unlike a cappuccino, no frothed milk is used in a flat white.
- The steamed milk in a flat white is smooth and velvety, with a glossy texture that creates a flat layer on top of the espresso.
- Flat whites are usually served in a larger cup than cappuccinos but still smaller than latte. They have a more intense espresso flavor than milk.
- The taste of flat white is more focused on the espresso, with the steamed milk providing a creamy texture and slight sweetness that complements the bold flavor of the espresso.
Macchiato vs Cappuccino
Macchiato vs Cappuccino
Macchiato and cappuccino are two popular espresso-based drinks that differ in their preparation, size, and ingredients. Here’s a summary of the key differences between the two:
Macchiato:
- A macchiato is an espresso-based drink that is usually served in a small glass or ceramic cup. It’s made by adding a small amount of foamed milk or milk foam to a shot of espresso.
- The word “macchiato” means “stained” or “marked” in Italian, referring to the small amount of milk that is added to the espresso. A traditional macchiato is served in a small cup and has a strong, bold taste with a hint of sweetness from the milk.
Cappuccino:
- A cappuccino is a popular espresso-based drink that is made with equal parts of espresso, steamed milk, and milk foam. It’s typically served in a larger cup or mug than a macchiato.
- The milk in a cappuccino is steamed to create a thick, creamy foam that sits on top of the espresso. The drink is often dusted with cocoa powder or cinnamon for added flavor and presentation.
- Cappuccinos have a more balanced flavor profile than macchiatos, with a mild espresso taste and a creamy, sweet finish from the milk and foam.
In summary, a macchiato is a smaller, stronger drink that features a small amount of foamed milk or milk foam added to a shot of espresso. A cappuccino is a larger drink made with equal parts of espresso, steamed milk, and milk foam, with a milder espresso taste and a creamy, sweet finish. Both drinks are delicious and can be customized to suit individual taste preferences.
Ratio Differences
One of the main differences between a macchiato and a cappuccino is the ratio of ingredients. In a macchiato, the espresso is the dominant flavor, with a small amount of steamed milk and foam to balance it out. In a cappuccino, the espresso, steamed milk, and foam are in equal parts, creating a more balanced and creamy drink. This is the reason why a macchiato is considered as a stronger coffee than a cappuccino.
Drink Size
Another difference between the two drinks is the size. A macchiato is typically served in a small cup, while a cappuccino is served in a medium-sized cup. This is because a macchiato is intended to be a stronger, more concentrated coffee, while a cappuccino is intended to be a more balanced, creamy coffee.
Preparation
In terms of preparation, a macchiato is typically made with a single shot of espresso, while a cappuccino is made with a double shot of espresso. This is because a macchiato is intended to be a stronger, more concentrated coffee, while a cappuccino is intended to be a more balanced, creamy coffee.
The Bottom Line – Macchiato vs Cappuccino
In conclusion, a macchiato and a cappuccino are two classic Italian coffees that are quite different in terms of taste, texture, and preparation. A macchiato is a stronger, more concentrated coffee that is made by layering espresso, steamed milk, and foam, while a cappuccino is a balanced, creamy coffee that is made by layering espresso, steamed milk, and foam in equal parts. Next time you order a coffee, take into consideration the type of coffee you are in the mood for, whether it’s a stronger or a more balanced one, and make your choice accordingly.
Light Roast vs Dark Roast
Light Roast vs Dark Roast
When it comes to coffee, the roast level can greatly affect the taste and aroma of the final product. The two main categories of coffee roasts are light roast and dark roast, and each has unique characteristics and flavor profile. Understanding the difference between light roast vs dark roast is essential for any coffee lover looking to explore and appreciate the nuances of coffee.
Light Roasts
Dark Roasts
Dark roast coffee has a dark brown color and an oily surface. The beans are roasted longer, usually between 15-25 minutes, at a higher temperature of around 480°F. The result is a full-bodied coffee with a low acidity and a rich, robust flavor. The unique flavor profile of dark roast coffee is because the beans are roasted for longer, which causes the development of new flavors and aromas, such as chocolate, caramel, and smoky notes. Dark roast coffee is often considered more complex in flavor, with a more intense taste.
It’s worth mentioning that the roast level can also influence the caffeine content in coffee. Dark roast coffee has less caffeine than light roast coffee. The longer roasting process causes the beans to lose some caffeine content.
When it comes to choosing between light roast and dark roast coffee, it ultimately comes down to personal preference. Light roast coffee is ideal for those who prefer a bright and fruity flavor with a high acidity, while dark roast coffee is ideal for those who prefer a rich and robust flavor with a low acidity.
Nitro Cold Brew vs Cold Brew
Nitro Cold Brew vs Cold Brew
Cold Brew
First, let’s start with cold brew. Cold brew is made with coarsely ground coffee in cold water for an extended period, usually between 12 and 24 hours. This long steeping process results in a smoother, less acidic, and less bitter coffee than traditional hot brewed coffee. The slow extraction process also results in coffee with a higher caffeine content than traditional hot brewed coffee. Cold brew coffee is typically served cold or over ice, making it a perfect summertime beverage.
Nitro Cold Brew
Nitro cold brew is made using the same process as traditional cold brew, but it is infused with nitrogen gas after it has been brewed. This process gives the coffee a creamy texture and a smoother, sweeter taste. The nitrogen also creates a cascading effect, which is similar to the effect of pouring a Guinness beer. Nitro cold brew coffee is typically served on draft, just like beer, and it is often served in a glass with a creamy head of foam on top.
Nitro Cold Brew vs Cold Brew Flavor Differences
One of the biggest differences between cold brew and nitro cold brew is the taste. Cold brew coffee is known for its smooth and refreshing taste, but it can also be slightly bitter. Nitro cold brew, on the other hand, has a creamier texture and a sweeter taste due to the nitrogen infusion. This makes nitro cold brew a great option for those who find traditional cold brew too bitter.
Caffeine and Serving
Another difference is the caffeine content. Cold brew coffee typically has a higher caffeine content than traditional hot brewed coffee due to the longer steeping process. Nitro cold brew, however, has a lower caffeine content than traditional cold brew because the nitrogen infusion causes some of the caffeine to be released from the coffee.
When it comes to serving, cold brew coffee is typically served cold or over ice, making it a perfect summertime beverage. Nitro cold brew, on the other hand, is typically served on draft, just like beer, and it is often served in a glass with a creamy head of foam on top.
The Bottom Line – Nitro Cold Brew vs Cold Brew
In conclusion, both cold brew and nitro cold brew are great options for those looking for a smooth and refreshing coffee experience. Cold brew coffee is known for its smooth and refreshing taste, while nitro cold brew has a creamier texture and a sweeter taste due to the nitrogen infusion. Nitro cold brew typically has lower caffeine content than cold brew coffee. Cold brew coffee is typically served cold or over ice, while nitro cold brew is typically served on draft. Ultimately, it depends on personal preference, and both options can be enjoyed in different occasions.