matt
Best Frother for Almond Milk
 Best Frother for Almond Milk
Unlike dairy milk, which contains a higher fat and protein content, non-dairy milk can be a bit trickier to froth. The lack of certain proteins and fats can make it harder to create stable bubbles, resulting in a less voluminous and less stable foam. However, this doesn’t mean you have to sacrifice your frothy coffee dreams!
Choosing Your Milk Wisely
Some varieties, like oat milk and barista-blend almond milk, tend to froth much better than others due to their formulation and added stabilizers. Soy milk can also produce decent results, while rice milk tends to fall flat.
Picking the Perfect Frother
Now for the fun part – choosing your frothing weapon! There are two main types:
- Handheld Frothers: These battery-operated gadgets are affordable, portable, and easy to use. They are a great option for beginners or those who want a simple solution.
- Electric Frothers: These more powerful devices often come with heating capabilities, allowing you to froth and warm your milk simultaneously. They can create a smoother, more consistent foam and are a good choice for frequent frothers.
Mastering the Frothing Technique
Regardless of your chosen frother, there are a few key techniques to keep in mind:
- Milk Temperature: Start with cold milk straight from the refrigerator. This helps to create smaller, more stable bubbles.
- Frothing Technique: For handheld frothers, move the whisk up and down gently just below the surface of the milk. For electric frothers, follow the manufacturer’s instructions.
- Patience and Practice: It may take a few tries to find your perfect rhythm and achieve the desired foam consistency. Don’t be discouraged!
Bonus Tips:
- Shake It Up: Give your non-dairy milk a good shake before frothing to evenly distribute the proteins and fats.
- Barista Blends: Look for non-dairy milk labeled “barista blend.” These are specially formulated for frothing and steaming.
- Experiment: Try different techniques and frothing times to find what works best for your milk and frother.
How to Make a Spanish Latte
Hello, coffee enthusiasts and curious home baristas! Today, we’re diving into the delightful world of Spanish Lattes. This creamy, sweet twist on the traditional café con leche has become a coffeehouse favorite around the globe. In this post, we’ll explore what makes a Spanish Latte uniquely satisfying and guide you through crafting this exquisite drink in the comfort of your own kitchen. So, grab your favorite mug, and let’s get started!
What is a Spanish Latte?
A Spanish Latte, or Café Con Leche Español, is a luxurious coffee drink that blends bold espresso with the rich sweetness of condensed milk, topped off with a generous amount of frothy milk. Originating from Spain, this drink takes the classic café con leche to a new level of indulgence, making it a perfect treat for those with a sweet tooth.
It differs from a standard latte primarily in its use of scalded milk instead of foamed or steamed milk. This technique involves heating the milk to near boiling and then cooling it to room temperature, which impacts the drink’s flavor. Additionally, the Spanish Latte is sweeter than a standard latte, typically using sugar or condensed milk for sweetness rather than flavored syrups. This allows the espresso’s flavor to shine through. The ingredients needed to make it at home are simple: milk, sugar or condensed milk, water, and strong coffee, preferably espresso.
Ingredients Needed
To create an authentic Spanish Latte, you’ll need:
- Freshly brewed espresso
- Milk (whole milk works best for frothing)
- Condensed milk (for that signature sweetness)
I like Lavazza’s super crema, but you can use whatever coffee you like.

If you’re vegan or lactose intolerant, don’t worry! Substitute the milk with your preferred dairy-free option, and use a plant-based condensed milk.
Step-by-Step Instructions
- Heat the Milk: Start by gently heating your milk. Be careful not to boil it; we’re aiming for a nice, warm temperature that’s perfect for frothing.
- Brew the Espresso: While the milk is heating, brew a shot (or two, if you like it strong) of rich espresso.
- Mixing: In your mug, combine the espresso with condensed milk. Stir well to ensure it’s sweetened to your liking.
- Froth and Pour: Once your milk is warm, froth it to create a smooth, creamy texture. Gently pour the frothed milk into your mug with the espresso mixture, creating a beautiful layer of foam on top.
Wrapping Up Spanish Lattes
How to Make Espresso in a French Press
Coffee lovers worldwide have enjoyed rich, robust espresso for decades. But what if you don’t have an espresso machine at home? Can you still enjoy that intense coffee shot? Absolutely! With a French press, it can brew a coffee that closely resembles the strength and flavor of an espresso. Let’s dive into the world of making espresso with a French press.

A common French Press
Why Use a French Press?
Before we begin, it’s essential to understand that while a French press can’t replicate the exact characteristics of a traditional espresso (which requires high pressure to extract), it can produce a concentrated coffee that mimics the strength and flavor of espresso. Here’s why using a French press is a game-changer:
- Easy to Use: No complicated settings or machinery. Just your French press, coffee, and water.
- Versatile: Experiment with grind sizes and steeping times to find your perfect brew.
- Affordable: A French press is generally cheaper than most espresso machines.
Let’s Brew That “Espresso”!
- Choose Your Coffee Beans:
Opt for a dark roast for that classic espresso flavor.
- Grind the Beans:
- For a Strong Brew, Use a fine grind.
- For a Lighter Brew: Opt for a coarser grind.
- Measure and Heat the Water:
Use filtered water and heat it to around 200°F (93°C). The water quality can drastically affect your brew’s taste.
- Combine Coffee and Water:
For every cup of water, use 2 tablespoons of coffee. Adjust to your preference.
- Steep:
- For a Strong Brew, Let it steep for 4 minutes.
- For a Lighter Brew, Steep for a longer time, around 7-8 minutes.
- Plunge:
Slowly press down the plunger. Ensure you’re gentle to prevent agitation and avoid over-extraction, which can make the coffee bitter.
Want a Latte or Cappuccino? Froth That Milk!
Heat some milk (using a microwave or stovetop). Pour it into your French press and rapidly move the plunger up and down. This action will froth the milk, giving you that creamy texture perfect for lattes and cappuccinos.
Bonus Tip:
If you’re looking for an alternative to the French press for a more espresso-like experience, consider using an AeroPress. It operates on a similar principle but can generate more pressure, resulting in a brew even closer to traditional espresso.
In Conclusion
If you want to enjoy a strong cup of coffee without purchasing an expensive machine, making espresso in a French press is a great alternative. It may differ from the traditional method, but it’s worth experimenting with and adjusting to your personal taste. Remember, the key to success is to experiment. So, grab that French press and start brewing!
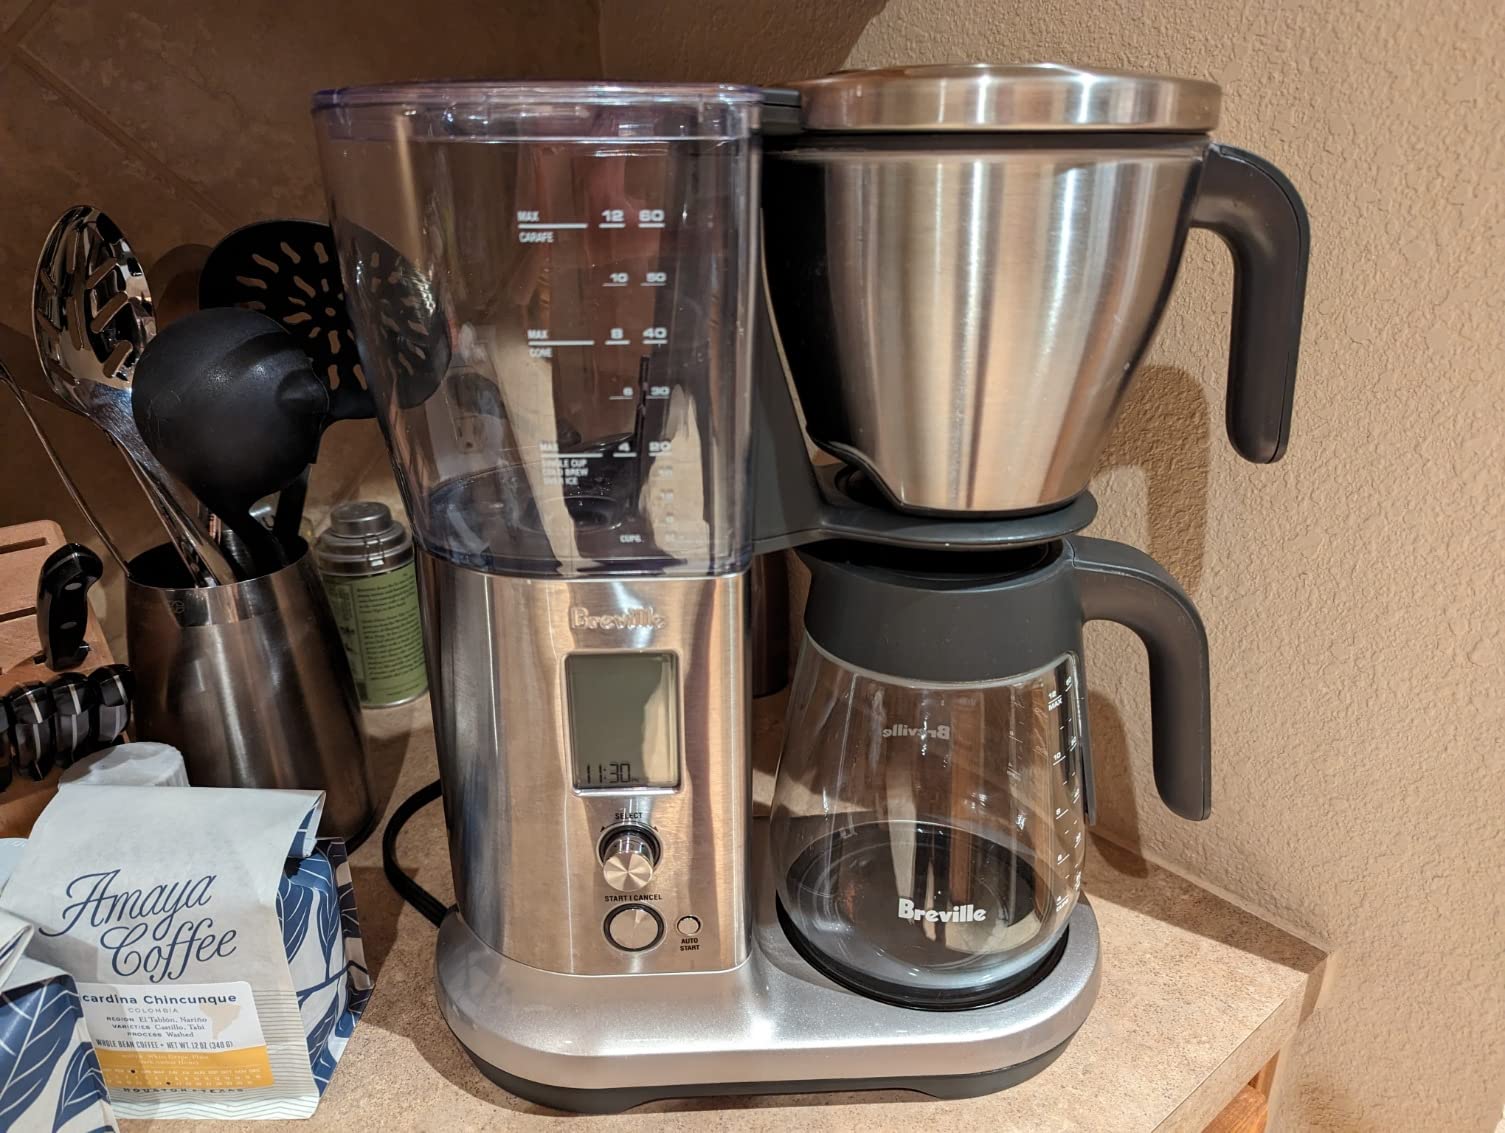
How To Descale Breville Precision Brewer
A clean coffee machine is the secret to consistently great-tasting coffee. Descaling your Breville Precision Brewer not only keeps it in top condition but also ensures every cup you brew tastes just as good as the first. Let’s dive into how you can easily descale your machine and keep it performing like new.
Why Descaling Your Precision Brewer Matters
Mineral buildup from water is inevitable when using a coffee maker, especially in hard water areas. Over time, this can and will negatively affect the performance of the machine, slowing brew times and impacting the flavor of coffee. Regular descaling helps to:
- Remove mineral deposits.
- Extend the life of your Breville Precision Brewer.
- Ensure a consistently delicious cup of coffee.
If the ‘CLEAN/DESCALE’ light on your machine is on, it’s time to take action.
What You’ll Need
Before you start, gather these items to make the process smooth and hassle-free:
- Breville descaling powder or liquid solution (we recommend the liquid for convenience).
- Fresh water.
- A carafe or large container to catch water.
- A soft cloth for cleaning.

Preparing for the Descaling Process
Start by preparing your descaling solution. If you’re using Breville’s descaling powder, dissolve the contents of one sachet into water as per the instructions. If you’re using the liquid, simply pour it into the water tank and add fresh water to dilute it according to the product guidelines. Ensure the water tank is full and the carafe is empty before moving on.
How to Start the Descaling Mode
To begin the descaling process, your Breville Precision Brewer must enter descaling mode. Here’s how to activate it:
- Press and hold the 2-CUP button.
- While holding it, press and hold the POWER button simultaneously.
- The machine will enter descaling mode, and you’re ready to proceed.
Descaling the Coffee Brewing Components
Once in descaling mode, press the 1-CUP button to descale the coffee brewing components. This step flushes the descaling solution through the coffee system. Repeat the process until the water tank is empty.
Descaling the Steam and Hot Water Components
Next, focus on the steam and hot water components:
- Turn the steam dial to the right if you want to descale the steam system.
- Turn the steam dial to the left if you want to descale the hot water system.
Repeat both steps until the solution in the tank is fully used. These steps ensure that mineral deposits are removed from all pathways in the machine.
Rinsing and Refreshing the Machine
After the descaling process, it’s essential to rinse the machine thoroughly to remove residue from the solution:
- Detach the water tank, rinse it well, and refill it with fresh cold water.
- Run the descaling steps again (both coffee and steam/hot water) using only clean water.
- Repeat the rinsing process at least twice to ensure there’s no leftover descaling solution.
Wrapping Up the Process
Once the machine is thoroughly rinsed, press the POWER button to exit descaling mode. If the ‘CLEAN/DESCALE’ light turns off, you’ve successfully completed the process. Your Breville Precision Brewer is now clean, descaled, and ready to brew delicious coffee.
Simple Maintenance Tips for Longer Machine Life
Regular descaling is key, but here are a few additional tips to keep your Breville Precision Brewer in top condition:
- Empty and/or rinse the water tank daily to prevent stale water buildup.
- Wipe it down with a damp cloth to keep it clean and looking great.
- Replace the water filter regularly to reduce mineral buildup.
Enjoy Better Coffee Every Day
Descaling your Breville Precision Brewer is an essential part of its maintenance, ensuring it continues to deliver exceptional coffee.
How To Descale Breville Barista Express Impress
Breville Espresso Machine Descaling
1. Safety First:
Before you begin, ensure the machine is turned off and unplugged from the power outlet. Safety should always be a priority.
2. Prepare the Water Tank:
First, remove the water filter from the tank. Then, fill it with cold tap water, ensuring you don’t exceed the maximum mark.
3. Prepare the Descaling Solution:
For this, you’ll need one sachet of the Breville descaling powder. We recommend using the Breville branded descaling powder.

Dissolve this in one liter of water. Once dissolved, pour this solution into the water tank.
4. Enter the Descaling Mode:
To initiate the descaling process, press and hold the 2 CUP and POWER buttons together for about 5 seconds. This will put your machine into its descale mode.
5. Start Descaling the Coffee Component:
Press the 2 CUP button. The machine will begin the descaling process for its coffee components, which should last about 25 seconds.
6. Descaling the Steam and Hot Water Components:
Rotate the steam dial to the right to initiate the descaling of the steam component. Once done, turn it to the left to descale the hot water component. These processes will take approximately 13 seconds and 8 seconds, respectively.
7. Complete the Descaling Process:
Repeat steps 5 and 6 until the water tank is devoid of the descaling solution.
8. Rinsing:
After descaling, it’s crucial to rinse the machine to ensure no residues remain. Thoroughly rinse the water tank, then refill it with fresh cold water, ensuring you don’t go beyond the maximum mark. Now, repeat steps 5 and 6. This will rinse the machine, ensuring all remnants of the descaling solution are flushed out.
9. Exit the Descaling Mode:
Once satisfied, press the POWER button. This will take your machine out of its descaling mode, making it ready for your next brew.
In conclusion, regularly descaling your Breville Barista Express Impress is an investment in delicious coffee and the longevity of your machine. Always remember to follow the manufacturer’s guidelines and enjoy your brews!
How to Make Espresso Without a Machine
Espresso, the rich and robust coffee shot, forms the foundation of numerous beloved coffee drinks. But what if you’re craving that intense coffee flavor and don’t have an espresso machine? Fear not, coffee lover! There are alternative methods to get you close to that espresso experience without the specialized equipment. Let’s dive into the world of manual espresso-making techniques.
How to Make Espresso Without a Machine
AeroPress
Coffee enthusiasts love the AeroPress for its portability and versatility. It uses air pressure to extract flavors, making it a suitable alternative to espresso.
Steps:
- Stack the AeroPress with a filter and coffee grounds.
- Add hot water and ensure all the coffee grounds are submerged.
- Stir the mixture.
- Press down hard into a demitasse or small cup.
Pros:
- Portable and lightweight.
- Easy to clean and maintain.
- Offers a rich and smooth coffee shot.
Cons:
- It is less concentrated than traditional espresso.
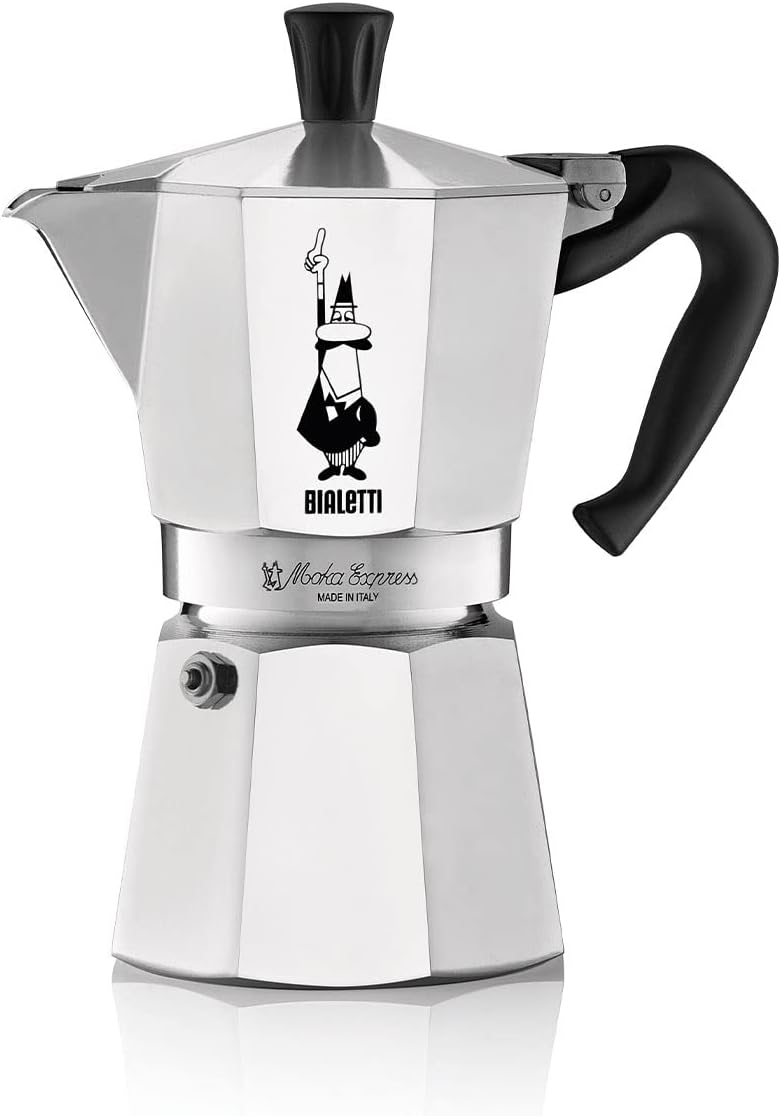
Moka Pot
The Moka pot, often dubbed the “stovetop espresso maker,” is a classic coffee brewing device that has been a staple in many Italian households since its invention in the early 20th century by Alfonso Bialetti. Designed with a distinctive octagonal shape, the Moka pot consists of three main parts:
- A bottom chamber for water.
- A middle filter basket for ground coffee.
- The upper chamber stores the brewed coffee.
When heated on a stovetop, the water in the bottom chamber boils and creates steam pressure, pushing the water upward through the coffee grounds and into the upper chamber. The resulting brew is a strong, rich coffee that shares some similarities with espresso, although it lacks the characteristic crema.
How it Works:
The Moka pot uses pressure to push hot water through the coffee grounds, producing a strong coffee shot.
Steps:
- Fill the bottom of the pot with water.
- Add coffee grounds to the filter basket.
- Screw on the top of the Moka pot securely.
- Place it on a burner and heat until you hear a bubbling sound and see coffee filling the top chamber.
Pros:
- Creates a rich and strong coffee flavor.
- Inexpensive and durable.
- Easy to use once you get the hang of it.
Cons:
- It’s not the same as machine espresso.
- It can sometimes produce a slightly bitter taste if over-extracted.

French Press
The French press, a press pot or plunger pot, is a timeless coffee brewing apparatus cherished for its simplicity and effectiveness. Originating in France in the late 19th century, its design encompasses a cylindrical glass or stainless steel container accompanied by a metal or mesh plunger. To brew coffee, coarsely ground beans are immersed in hot water in the container and left to steep. After a few minutes, the plunger is pressed downward, separating the grounds from the extracted coffee. The result is a full-bodied and aromatic brew that retains the essential oils and flavors of the coffee beans. Beyond its primary use for coffee, the French press is also favored by tea enthusiasts for its ability to make a robust and flavorful cup of tea.
How it Works:
While the French press is traditionally used for making regular coffee, you can get a concentrated coffee shot resembling espresso with a minor tweak in the brewing process.
Steps:
- Add coarse coffee to the French press.
- Pour in hot water.
- Bloom the coffee for about 30 seconds.
- After blooming, steep the coffee for approximately 4 minutes.
- Press the plunger halfway, then press it down completely.
- Pour your concentrated coffee into a mug and enjoy.
Pros:
- Straightforward method.
- Produces a flavorful coffee shot.
Cons:
- It might contain some sediment at the bottom.
- It lacks the crema that tops a traditional espresso shot.
Can You Use Used Coffee Ground as a Deoderizer?
There’s nothing quite like the rich, refreshing scent of fresh coffee. But have you ever considered what happens to the grounds post-brew? Amidst our quest for new environments, a common query surfaces: Do used coffee grounds absorb odors? Let’s dive into the aroma-filled world of coffee grounds and explore their efficacy in keeping our spaces odor-free.
Used Coffee Grounds as Deodorizer
Many swear by the odor-neutralizing powers of coffee grounds, utilizing them in various contexts, from the fridge to the fireplace. The claim often hinges on the nitrogen content in coffee, which is believed to neutralize sulfur, a typical culprit behind unpleasant smells. While you can use used coffee you might consider this as well.
Practical Brews: Using Coffee Grounds Effectively
Despite the unclear scientific consensus, practical applications of using coffee grounds as a deodorizer prevail. Here’s how you can use this aromatic waste:
- Fridge Freshener: Place an open container of used coffee grounds in your fridge to combat unwanted smells.
- DIY Sachets: Fill old pantyhose or mesh bags with coffee grounds and place them in odor-prone areas like gym bags or drawers.
- Handy Helper: Rubbing your hands with coffee grounds can mitigate lingering smells after cooking.
- Fireplace Friend: Sprinkle coffee grounds over ashes to reduce smoke and dust when cleaning your fireplace.
Percolating Alternatives
Other Odor-absorbing Options
If you’re not a coffee drinker or are looking for additional solutions, consider these alternative odor absorbers:
- Baking Soda: A classic choice for neutralizing odors in various settings, especially refrigerators.
- Charcoal Bags: Effective at absorbing unwanted smells and maintaining a fresh environment.
- Vinegar: A bowl of vinegar can help neutralize persistent odors, such as cigarette smoke.
- Citrus Peels: Add a zest of freshness by placing dried citrus peels in odor-prone areas.

Brewing Thoughts
Commercial Options to Consider
Exploring beyond DIY solutions? Here are some commercial products that promise to keep your spaces fresh:
- Odor-absorbing Gels and Beads: Convenient and available in various fragrances.
- Charcoal Purifiers: Reusable bags that promise to keep environments odor-free.
- Air Purifiers: A technological approach to continuously clean and refresh the air.

The Final Sip
While using coffee grounds as a deodorizer is widely practiced, the underlying scientific verification could use more clarity. Nonetheless, the myriad ways coffee grounds are used to combat odors hint at their potential utility, even as we explore other alternatives.
Whether you stick with the traditional baking soda or venture into the fragrant world of coffee grounds, maintaining a fresh and pleasant environment involves a thorough cleaning, effective waste management, and the strategic placement of odor absorbers.
Nespresso Reusable Pods
Embarking on a coffee journey with a Nespresso machine opens you to aromatic experiences and tasteful adventures. But have you ever considered the magic, and indeed, the practicality, that comes with using reusable Nespresso pods? If you’re pondering the purchase of a Nespresso machine or looking for ways to elevate your coffee experience, this little secret of the coffee world is something you’ll want to explore!
Why Go for Reusable Pods?
- Environmental Impact: Embracing reusable pods means you’re not just savoring coffee but also being a guardian of the environment. With over 60 billion single-use pods discarded annually, switching to reusable pods curtails this wastefulness, contributing to a greener planet.
- Infinite Variety at Your Fingertips: Imagine sipping a different blend of coffee every day, right in the comfort of your home. Reusable pods allow you to experiment with various beans, roasts and grinds, unleashing multiple flavors and aromas to delight your senses.
- Freshness Like Never Before: Fill your pods with freshly ground beans and let every sip be an orchestra of vibrant, fresh flavors. You control the freshness, ensuring every cup is as exhilarating as possible.
- Pocket-Friendly Luxury: While enjoying myriad flavors, reusable pods are also kind to your wallet, providing a cost-effective yet luxurious coffee experience by reducing the per-cup cost significantly.

A Rich Palette of Experiences
Don’t limit yourself to a singular flavor profile provided by pre-packaged pods. The world of coffee is vast, with beans from various regions offering myriad experiences. From the robust, chocolatey notes of Brazilian beans to the fruity undertones of Ethiopian coffee, reusable pods are your ticket to exploring this rich palette without leaving your kitchen.
Crafting Your Perfect Cup
Using your coffee means you can adjust the strength, flavor, and aroma to create a cup that’s uniquely yours. It’s not just coffee; it’s an expression of your palate, allowing you to be the master of your brew.
Practical and Sustainable
Reusable pods are not just environmentally friendly but also practical. Easy to clean and maintain, they ensure you enjoy your favorite blends without contributing to landfill waste. It’s a small step towards sustainability, aligning your coffee habits with eco-friendly practices.
In Conclusion
As you stand on the brink of diving into the world of Nespresso, consider the boundless possibilities that reusable pods offer. It’s more than just a cup of coffee; it’s a commitment to quality, freshness, and sustainability. It’s an invitation to explore, create, and indulge in a world where you curate your coffee experiences, ensuring every sip is a masterpiece of your creation.
So, why wait? Embark on your coffee journey with Nespresso reusable pods and discover a universe of flavors while being a connoisseur and conscientious consumer.
Chobani Coffee Creamer – Everything You Need To Know
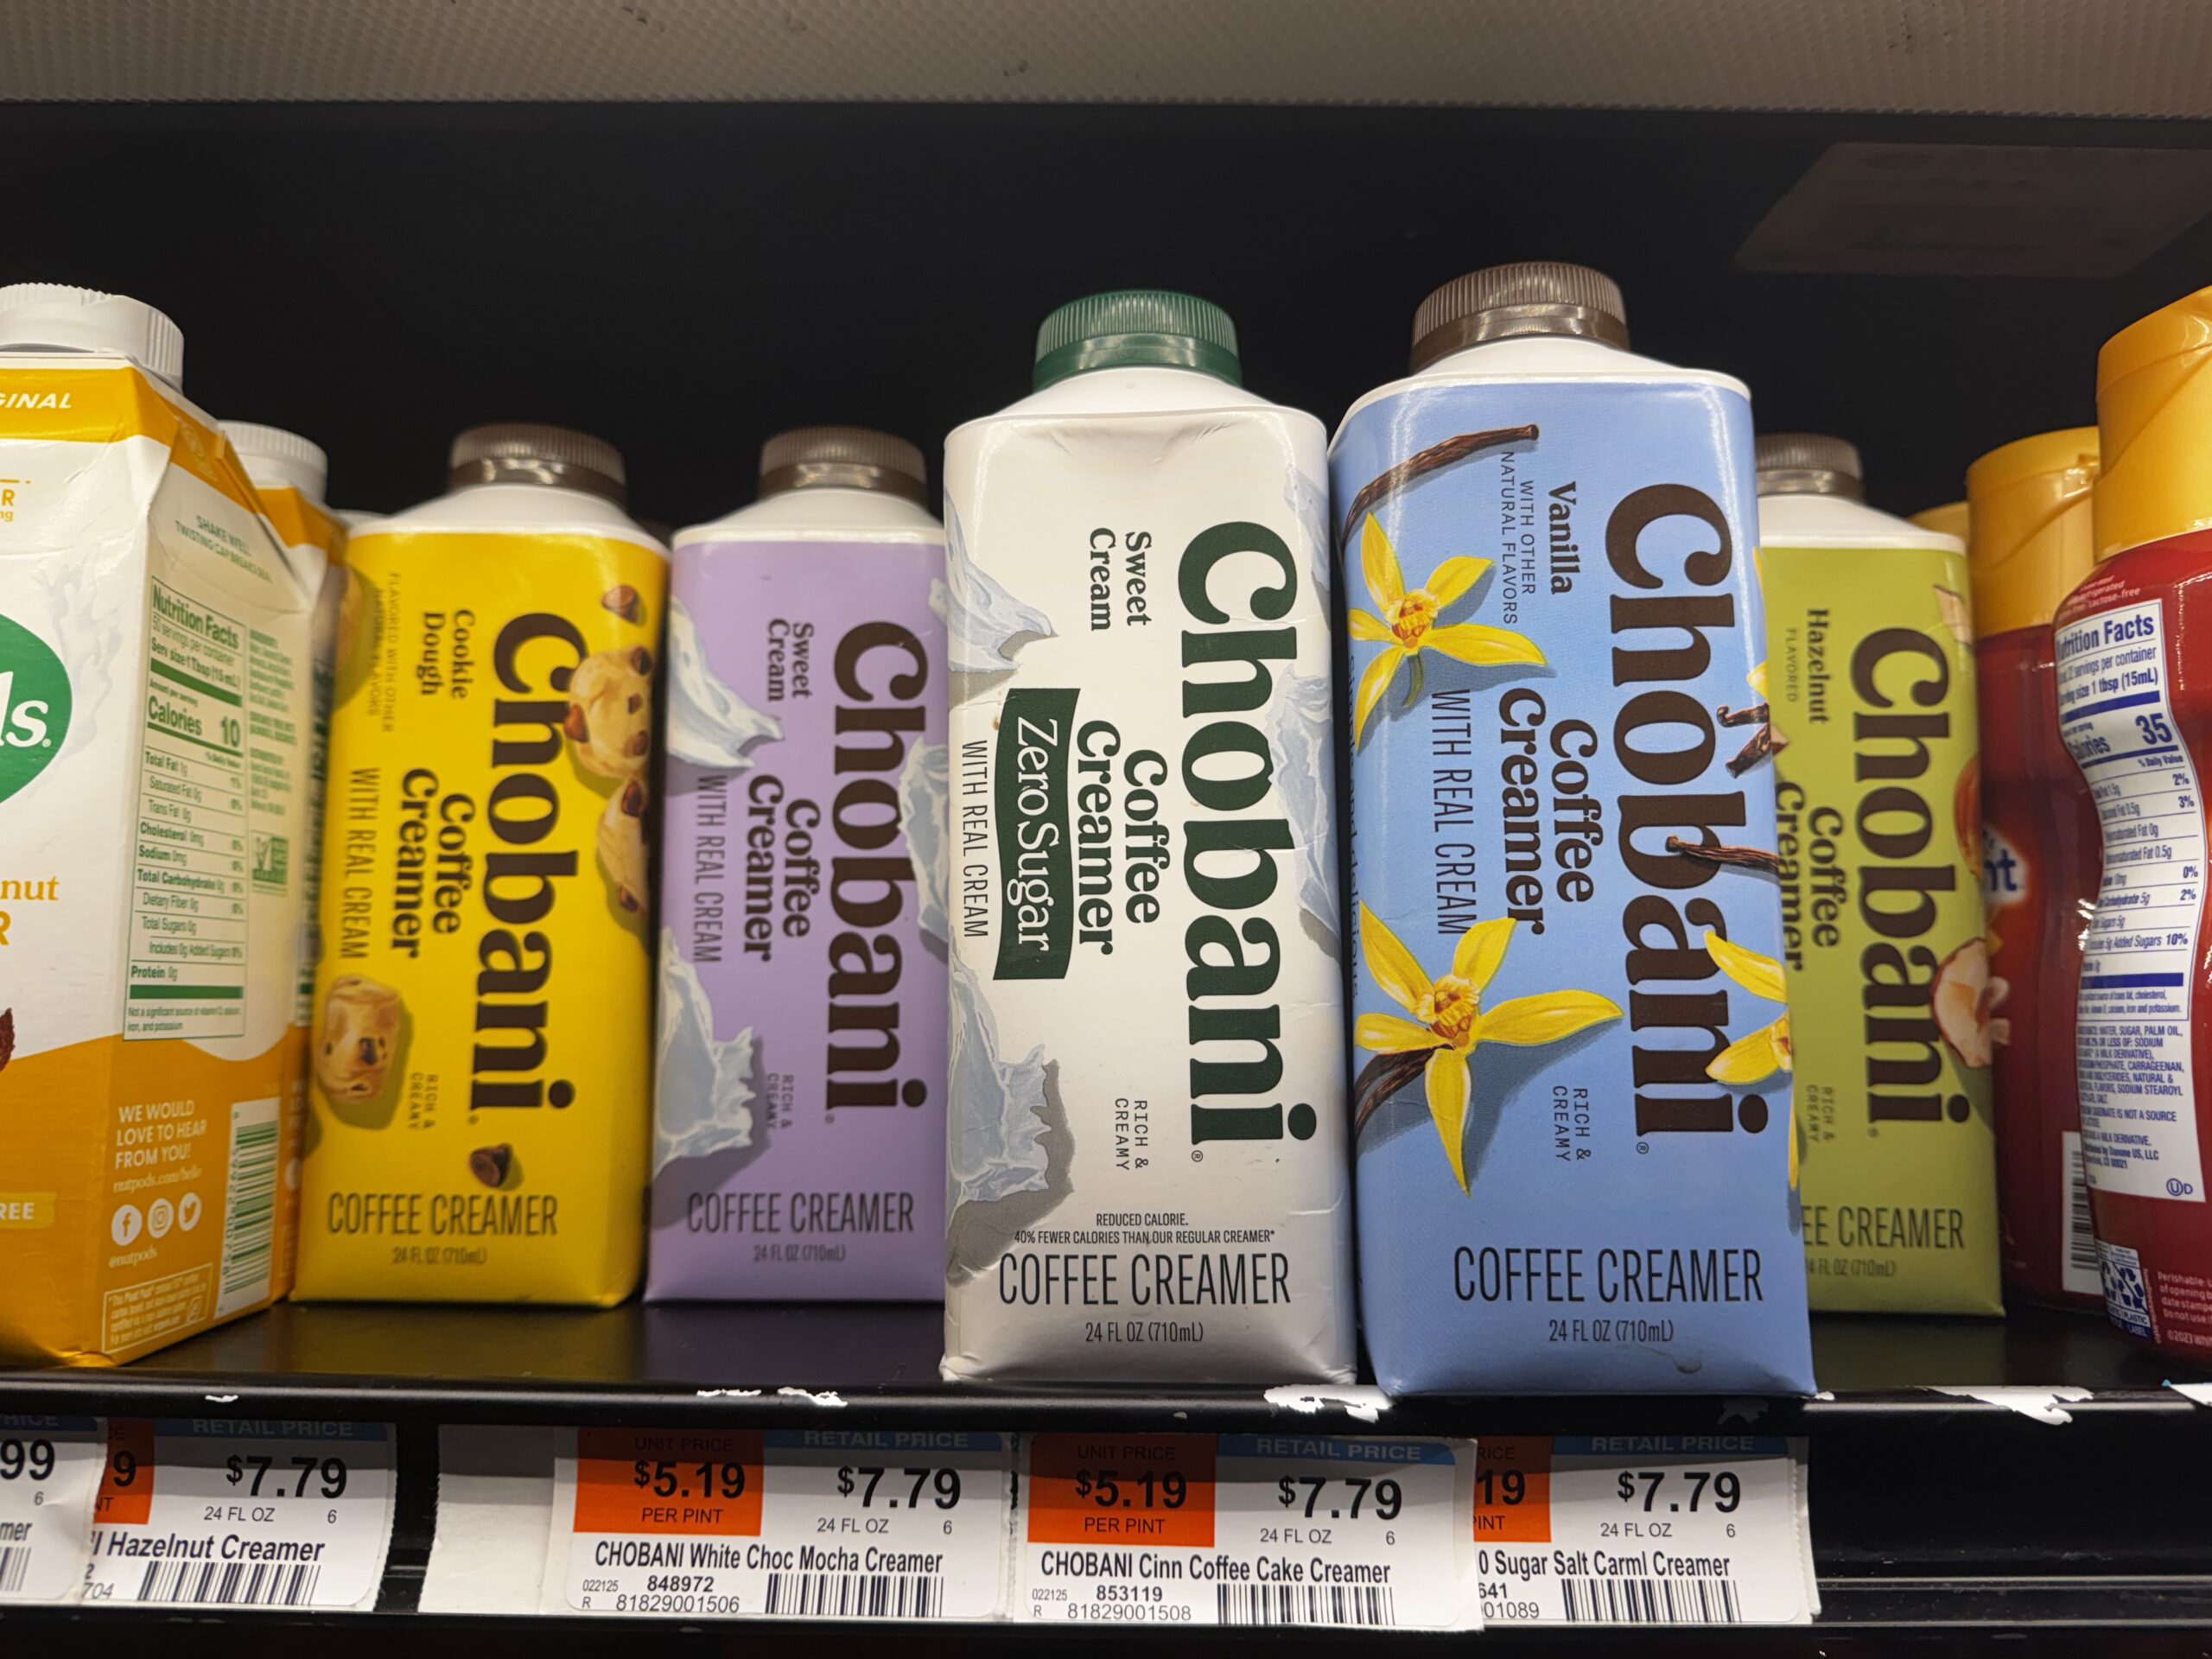
Coffee aficionados know the pivotal role that a good creamer plays in elevating the entire coffee-drinking experience. Chobani, a brand synonymous with high-quality dairy products, has stepped into the coffee creamer arena, offering a line that promises to enrich your coffee moments. Whether you’re a seasoned coffee connoisseur or a casual sipper, choosing the right creamer can be a game-changer for your cup of joe.

Flavors and Types of Chobani Coffee Creamers
Click here to see the latest Chobani creamer flavors
- Type: Dairy
- Flavor Profile: Subtle and lightly sweet.
- Best Paired With: Medium roasts to add a gentle sweetness without overpowering the inherent coffee flavors.
- Tip: Ideal for those who prefer their coffee to retain a strong presence, complementing rather than transforming the original taste.
 Chobani Vanilla Coffee Creamer
- Type: Dairy
- Flavor Profile: Smooth vanilla undertones.
- Best Paired With: Light roasts, enhancing the mild coffee flavor with a sweet and aromatic vanilla essence.
- Tip: Can also be utilized in baking or cocktail making, infusing a vanilla flavor without using extract.

Chobani Coffee Creamer, Hazelnut Flavored
- Type: Dairy
- Flavor Profile: Distinctly nutty and sweet.
- Best Paired With: Any coffee type where a boost of sweetness and a nutty aroma are desired.
- Tip: A delightful addition to a hot chocolate, providing a nuanced flavor twist.
Chobani Plant-Based Coffee Creamers
Indulge in a creamy journey with Chobani Coffee Creamers, your ticket to enriching every sip with a cascade of real, wholesome ingredients and delectable flavors. Explore our range of dairy and plant-based creamers, thoughtfully crafted to elevate your coffee experience, whether you crave the classic, the sweet, or the adventurous in your cup.Crafted meticulously with organic oats, these non-dairy delights offer a creamy, lush texture and a subtly sweet flavor, promising to elevate your coffee experience without a drop of dairy. Whether it’s the classic allure of French Vanilla or the seasonal charm of Pumpkin Spice, Chobani ensures that every pour is a cascade of plant-based goodness, enriching your beverages while honoring your dietary choices. Perfect for vegans, lactose intolerants, or those exploring dairy alternatives, Chobani’s oat milk creamers invite you to savor every sip, assuring that your coffee moments are both exquisite and ethically sound.
- Type: Non-Dairy (Oat Milk)
- Flavor Profile: Neutral, with a creamy and slightly oaty sweetness.
- Best Paired With: Espresso and dark roasts, providing a smooth, creamy base without altering the coffee’s robust profile.
- Serving Suggestion: Excellently froths and steams, making it a superb choice for lattes, cappuccinos, and other espresso-based drinks.
- Tip: Not just for coffee! Use Chobani Oat Barista Edition in your tea, cereal, or smoothies for that added creamy texture without the dairy.
- Note: Crafted to cater to baristas and coffee enthusiasts alike, this oat milk blends seamlessly into your beverages, offering a dairy-free alternative without compromising on texture or taste.

Chobani Plant-Based Caramel Macchiato Coffee Creamer
- Type: Non-Dairy (Oat Milk)
- Flavor Profile: Sweet caramel with a hint of roasted coffee essence.
- Best Paired With: Espresso, offering a dairy-free way to soften and sweeten a potent coffee shot.
- Tip: Try it with desserts; a splash over ice cream or in a milkshake could be a decadent treat.

Chobani Coffee Creamer, Non-Dairy, Maple Flavored
- Type: Non-Dairy (Oat Milk)
- Flavor Profile: Sweet and mapley.
- Best Paired With: Cold brews, offering a refreshing, sweet, and slightly earthy undertone.
- Tip: Consider it as a sweetener for your morning oatmeal or granola.

Chobani Plant-Based French Vanilla Coffee Creamer
- Type: Non-Dairy (Oat Milk)
- Flavor Profile: Creamy with a soft vanilla note.
- Best Paired With: Light and medium roasts, where the gentle vanilla notes can shine without being lost.
- Tip: A perfect companion for a vegan-friendly baking session, providing moisture and sweetness.

Chobani Limited Batch Pumpkin Spice Oat Coffee Creamer
- Type: Non-Dairy (Oat Milk)
- Flavor Profile: Seasonal spices with a pumpkin undertone.
- Best Paired With: Dark roasts, where the robust coffee flavor is complemented by the seasonal spices.
- Tip: Can be used in autumnal recipes to infuse a hint of pumpkin spice effortlessly.
A Splash of Quality with Chobani Coffee Creamers
Chobani Coffee Creamers have carved a niche by providing a range of flavors and formulations to cater to diverse palates and preferences. From dairy-based creamers that boast real milk and cane sugar to plant-based options that delight with organic oats, Chobani’s offerings blend simplicity and authenticity. With a commitment to using fewer natural ingredients, these creamers are a fresh and wholesome addition to your coffee.

Where to Buy Chobani Coffee Creamer
Amazon is going to be the best bet, they’ve pretty much got every flavor offered by Chobani.
How Long Does Chobani Coffee Creamer Last
- Dairy Creamers: These have a grace period of about a week beyond their use-by date when unopened. However, if already opened or if the use-by date has elapsed, it’s recommended to part ways with the product.
- Non-dairy Creamers: These can typically be kept for up to two weeks past their use-by date if unopened. Similar to their dairy counterparts, once opened or past the use-by date, it’s time for disposal.
- Mini Coffee Creamer Cups: These petite portions have a more extended shelf life, lasting up to an extra month beyond their use-by date when unopened.
- Powdered Creamers: When unopened, these can stay good for an additional three months past their printed use-by date. Once opened, the usual rules apply.
Dialing into Your Preferences
Choosing the right Chobani Coffee Creamer begins with understanding your coffee preferences and dietary needs. Here are some pivotal points to consider:
- Flavor Adventure: Whether you’re into classic Sweet Cream or explorative with Hazelnut and Caramel, identify your flavor profile.
- Dietary Considerations: Choose dairy and plant-based options depending on your dietary needs and lifestyle.
- Sweetness Level: From subtle to sweet, select a creamer that aligns with your sweetness preference.
Pairing Chobani Creamers with Coffee Types
Coffee and creamer pairings can transform your beverage into a gourmet experience. Here are some pairings to explore:
- Light Roasts: Enhance the mildness with flavored creamers like Vanilla or Hazelnut.
- Medium Roasts: Introduce a touch of Sweet Cream, preserving the balanced coffee flavors.
- Dark Roasts: Complement the robustness with a rich and delightful Peppermint Mocha.
- Espresso: Soften the strong with Oat Milk Creamer, crafting a creamy dairy-free latte.
- Cold Brews: Elevate the smoothness with oat milk’s creamy and slightly sweet profile.

Brewing Perfection with Chobani Creamer
Your coffee ritual should be a moment of joy and serenity. Here are some tips to get the most out of your Chobani Creamer:
- Temperature Mastery: Ensure your coffee is at the right temperature to blend with the creamer harmoniously.
- Proportion Balance: Experiment with proportions to find your ideal coffee-to-creamer ratio.
- Mixing Method: Ensure thorough mixing to distribute the creamer evenly throughout.
Culinary Creations with Chobani
Chobani Creamers aren’t limited to your coffee cup. Explore their versatility by:
- Incorporating them into your baking for a hint of creamy sweetness.
- Crafting coffee cocktails that delight with nuanced flavors.
- Utilizing them in breakfast recipes like oatmeal or pancakes for an extra flavor punch.
Best Aeropress Recipe
The perfect cup of joe can transform your morning, fuel your day, and even become a cherished ritual. With various brewing methods available, the AeroPress stands out for its portability, versatility, and ability to produce an exceptional cup of coffee. If you’re searching for the “best AeroPress recipe,” you’re likely driven to make your coffee experience as delightful as possible. This article will guide you through what you need to know to find your perfect brew.
The Variables that Matter
When brewing with an AeroPress, several variables can significantly impact your coffee’s flavor, aroma, and mouthfeel. These include:
- Grind Size: Affects the extraction rate and, consequently, the taste.
- Water Temperature: Determines how efficiently the flavors are extracted from the coffee grounds.
- Coffee-to-Water Ratio: Influences the strength of your brew.
- Steeping Time: Longer steep times can produce a more robust flavor but may also introduce bitterness.
Fantastic AeroPress Recipe: The Flavorful Fusion
Ingredients:
- Freshly ground coffee (medium-fine grind): 18 grams
- Hot water at 92°C (198°F): 250 ml
- A paper filter for the AeroPress
Equipment Needed:
- AeroPress Coffee Maker
- Electric Kettle
- Burr Coffee Grinder
- Measuring Scale (.001g accuracy is important)
- Timer
Instructions:
- Prep the AeroPress: Place a paper filter in the AeroPress cap and rinse it with hot water to remove any paper taste. Attach the cap to the AeroPress and set it on your mug or coffee server.
- Weigh and Grind: Measure 18 grams of your favorite coffee beans and grind them to a medium-fine consistency.
- Heat the Water: Bring your water to 92°C (198°F). If you don’t have a temperature-specific kettle, bring the water to a boil and let it sit for about 30 seconds to reach the desired temperature.
- Add Coffee: Place your AeroPress on the measuring scale and tare it. Add freshly ground coffee to the AeroPress chamber.
- First Pour: Start your timer and pour 100 ml of hot water into the AeroPress. Make sure all the coffee grounds are saturated. Let it bloom for 30 seconds.
- Stir and Steep: After the 30-second bloom, give the coffee a gentle stir.
- Second Pour: Add 150 ml of hot water to the AeroPress.
- Seal and Steep: Insert the plunger into the AeroPress to create a vacuum seal. This prevents the coffee from dripping through. Allow the coffee to steep for an additional 1 minute.
- Press: After the steeping time is up, press down on the AeroPress plunger with steady pressure. The press should take about 30 seconds.
- Serve and Enjoy: Your coffee is now ready! Please give it a quick stir and enjoy your delicious, smooth, and aromatic AeroPress coffee.
Optional:
- For an extra kick, add a tiny pinch of salt or a dash of cinnamon to the coffee grounds before brewing.
Why This Recipe Works:
- The two-stage pouring process allows the coffee to bloom, releasing carbon dioxide and aiding in even extraction.
- The medium-fine grind and 92°C (198°F) water are optimized for a balanced extraction, resulting in a rich and smooth cup.
- The vacuum seal helps maintain the brewing temperature and prevents dripping, ensuring that your coffee extracts evenly.
Enjoy your Awesome AeroPress coffee! Feel free to adjust the variables to suit your taste preferences better.
The Aeropress Original Coffee Press is a versatile and innovative coffee brewing device that promises to revolutionize your coffee experience. This product is designed to extract the best flavors from your coffee beans, consistently delivering a smooth, rich, and grit-free brew.
- Versatile Brewing: Combines the principles of French press, pour-over, and espresso brewing methods.
- Superior Extraction: Uses agitation, pressure, and micro-filtration to produce a smooth, rich, and grit-free coffee.
- Durable Material: Made from a shatterproof material that can withstand daily use.
- Easy to Clean: Designed for quick and easy cleaning after each use.
- Lightweight Design: Ideal for coffee lovers on the go.
- Highly Rated: Has an impressive rating of 4.7 out of 5 stars based on 19,702 reviews.
What is an AeroPress?
Before diving into recipes, it’s essential to understand what an AeroPress is. A portable coffee maker brews coffee by pressing hot water through a paper filter and ground coffee. Designed for ease of use, the AeroPress has become a favorite among novices and coffee connoisseurs.
Wrapping Up Aeropress Coffee
The AeroPress coffee maker has gained a loyal following among coffee aficionados and casual drinkers alike and for good reasons. One of the key features that sets AeroPress apart is its immersion-style brewing method. In this process, medium-fine ground coffee is fully immersed in hot water, allowing for a robust and even extraction of flavors. This is a departure from methods like drip coffee making, where water passes through the coffee grounds rather quickly, sometimes resulting in uneven extraction.
The AeroPress also boasts a shorter brew time compared to other methods. While you might think a quick brew could compromise flavor, it’s quite the opposite. The shorter brewing time helps reduce bitterness and acidity, two elements that can mar the taste of your coffee. This unique advantage of AeroPress is that it allows for a rich, full-bodied cup of coffee without the harshness often associated with more extended brewing methods.
What truly elevates the AeroPress experience is using a micro-filter and a plunger to create pressure during the brewing process. This pressure catalyzes extracting a broader spectrum of flavors and aromas from the coffee grounds. The micro-filter ensures the final brew is smooth and grit-free, capturing even the finest coffee particles. As a result, you’re left with a cup of coffee that’s not just rich and flavorful but also remarkably clean.
Despite the complexity behind the scenes, using an AeroPress is remarkably straightforward. It essentially boils down to three main steps: measuring the coffee and water, stirring the mixture, and pressing the plunger. This simplicity makes it accessible for coffee lovers who may not have barista-level skills but still crave a high-quality cup of coffee at home or on the go.
In summary, the AeroPress offers a unique combination of immersion-style brewing, quick extraction time, and pressure-induced flavor extraction; all wrapped up in an easy-to-use package. Whether you’re an experienced coffee connoisseur or a beginner, AeroPress provides an uncomplicated route to a cup of coffee that is both complex in flavor and smooth in texture.