matt
The Best Cheap Espresso Machines: Top 5 Choices
Finding the right espresso machine can feel overwhelming — there are single boilers, dual boilers, super-automatics, manual machines, and everything in between. But after testing over a dozen machines across every budget tier, I can tell you that several machines under $350 deliver shots that rival setups costing two or three times as much.
The catch is that “cheap” does not mean “all the same.” A $95 Casabrews and a $300 Breville Bambino are wildly different machines built for different people. Below, I break down exactly which budget espresso machine is right for you — based on hands-on testing, not spec sheets.
Here is a quick look at our top picks:
| Machine | Price | Type | Grinder Included | Best For |
|---|---|---|---|---|
| Breville Barista Express BES870XL | ~$350 | Semi-automatic | Yes (16-setting burr) | Best all-in-one value |
| Breville Bambino BES450 | ~$300 | Semi-automatic | No | Best overall budget pick |
| Casabrews 3700 Essential | ~$95–$130 | Semi-automatic | No | Best under $150 |
| De’Longhi Stilosa EC260BK | ~$150 | Semi-automatic | No | Cheapest real espresso machine |
| Flair Classic Espresso Maker | ~$130–$170 | Manual lever | No | Best shot quality on a budget |
| Mr. Coffee Cafe Barista | ~$200 | Semi-automatic | No | Easiest for beginners |
How We Tested These Machines
Every machine on this list was tested with the same approach: I pulled shots daily over the course of at least a week per machine, using both freshly ground beans from a burr grinder and pre-ground coffee (where applicable with pressurized baskets). I tested milk steaming with whole milk and oat milk, timed heat-up periods, and evaluated cleanup and maintenance after each session.
The beans I used were a medium roast from a local roaster and a dark roast espresso blend — two common profiles most home users would reach for. The grinder was a Baratza Encore ESP, which is a solid entry-level espresso grinder that pairs well with any of these machines.
I evaluated each machine on five criteria:
- Shot quality — flavor balance, crema, consistency across multiple pulls
- Milk steaming — microfoam quality, ease of texturing, latte art capability
- Ease of use — how quickly a beginner could start pulling decent shots
- Build quality and durability — materials, stability, how it feels day after day
- Value — performance relative to what you are paying
Our Top Pick: Breville Barista Express BES870XL
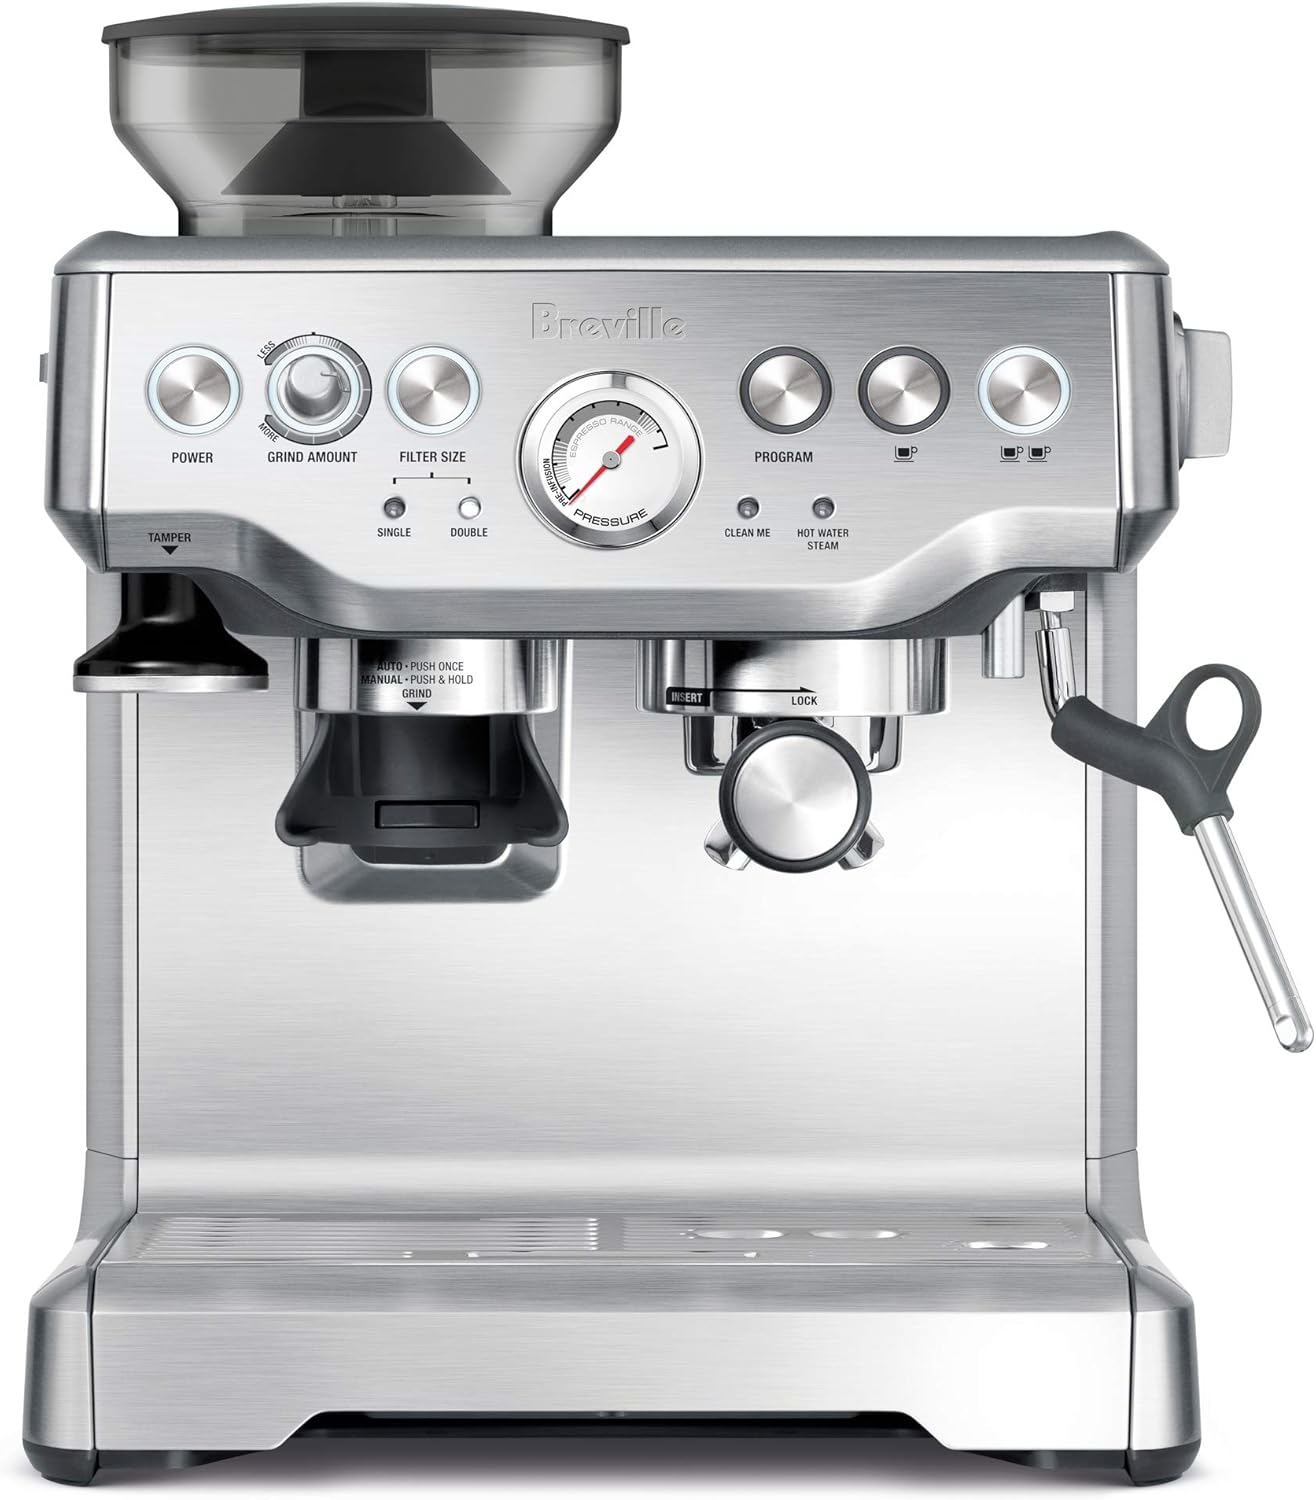
1: Breville Barista Express BES870XL
The Breville Barista Express remains the best all-in-one espresso machine you can buy under $500, and it is our top recommendation for anyone who wants a complete setup without buying separate equipment.
The built-in 16-setting conical burr grinder is the reason this machine dominates its price range. It doses and grinds fresh beans directly into the portafilter, which means you skip the $100–$200 cost of a standalone grinder and save counter space. During testing, I found the grinder handles medium to dark roasts well, though very light roasts can be tricky — the adjustment range is not quite fine enough for ultra-light single origins. For most home users, this will not be an issue.
The extraction uses low-pressure pre-infusion followed by 9-bar pressure — the same profile used in commercial machines. When I dialed in a medium roast at grind setting 5 with an 18-gram dose, the Barista Express pulled a balanced, full-bodied shot with good crema in about 25–28 seconds. Shot-to-shot consistency was excellent, thanks to Breville’s digital PID temperature control, which keeps water at the optimal temperature throughout extraction. Temperature stability is one of the biggest factors in getting the most out of your espresso beans.
The manual steam wand produces genuine microfoam — not the bubbly froth you get from automatic frothers. After about a week of practice, I was getting silky textured milk suitable for basic latte art. If you are making macchiatos, cappuccinos or flat whites, this wand handles all of them.
The stainless steel build feels solid and looks professional on any counter. The machine includes a cleaning kit, and regular descaling is essential for maintaining both flavor and machine longevity.
What I liked:
- Built-in 16-setting conical burr grinder eliminates the need for a separate grinder
- Low-pressure pre-infusion with 9-bar extraction for balanced, consistent espresso
- Digital PID temperature control — noticeably better consistency than machines without it
- Manual steam wand produces real microfoam for latte art
- Stainless steel construction with included cleaning kit
What could be better:
- Grinder struggles with very light roasts — not fine enough at the lowest settings
- The hopper is small, so you will refill frequently if you drink several shots a day
- At ~$350, it sits at the top of the “budget” range
Bottom line: If you want one machine that does everything and you do not want to shop for a separate grinder, the Barista Express is the move. It is the kind of machine you grow into, not one you outgrow in six months.
2: Breville Bambino BES450

The Breville Bambino is the machine virtually every espresso expert and review site recommends in the under-$300 category, and after testing it extensively, I understand why. It delivers the same 54mm portafilter and 9-bar extraction as more expensive Breville models, which means you get real espresso performance in a machine that costs significantly less than the Barista Express.
The standout feature is Breville’s ThermoJet heating system, which reaches brewing temperature in approximately 3 seconds. That is not marketing exaggeration — I timed it repeatedly, and the machine is genuinely ready to brew almost the moment you press the button. For anyone who wants espresso as part of a fast morning routine, this speed is transformative.
During testing, I pulled consistently good shots using freshly ground beans in the non-pressurized basket. The flavor was clean, balanced, and had good body. Switching to the included pressurized basket with pre-ground espresso, the results were still respectable — not as nuanced, but far better than what pod machines produce. This flexibility makes the Bambino excellent for beginners who want to start with pre-ground and graduate to freshly ground beans as their skills improve.
The manual steam wand is capable of producing smooth microfoam, though it takes a bit more practice than the automatic wand on the Bambino Plus. With whole milk, I was getting good texture within a few days. Oat milk required more technique but was still workable.
The main tradeoff is the grinder. The Bambino does not include one, so you will need a separate espresso grinder for best results. A burr grinder is strongly recommended over a blade grinder for espresso — the consistency of the grind affects your shot more than almost any other variable. If you want to keep initial costs down, the pressurized basket and pre-ground coffee is a perfectly fine starting point.
The machine is also extremely compact. It fits easily in small kitchens, dorm rooms, or offices — a real advantage if counter space is limited.
What I liked:
- ThermoJet heating — genuinely ready to brew in 3 seconds
- 54mm portafilter with 9-bar extraction (same as higher-end Breville machines)
- Compact footprint fits easily in small spaces
- Includes both pressurized and non-pressurized baskets — start easy, level up later
- Manual steam wand for microfoam
What could be better:
- Requires a separate grinder (budget $100–$200 for a decent burr grinder)
- Accessories feel slightly cheaper than the Barista Express — the tamper is basic
- Single boiler means you cannot brew and steam simultaneously
Bottom line: The Bambino is the best espresso machine under $300, period. If you already have a grinder or are willing to buy one, this machine punches well above its price.
3: Casabrews 3700 Essential
The Casabrews 3700 Essential is the budget espresso machine that has taken the coffee world by surprise. At under $130 — and frequently on sale closer to $95 — it delivers performance that has no business existing at this price point.
The machine uses a 20-bar pump (which delivers effective pressure through its pressurized basket) and a 1350W heating system. When I pulled shots with freshly ground beans, I got a shot with decent crema, balanced flavor, and noticeably better body than I expected. The pressurized basket is forgiving of grind inconsistencies, which is exactly what you want at this price point — most buyers will not have a high-end grinder to pair with it.
The stainless steel steam wand surprised me the most. For a sub-$130 machine, I was able to produce passable microfoam with whole milk after a few practice sessions. It is not Breville-level performance, but it is leagues ahead of the automatic frothers on machines like the Mr. Coffee. With practice, you can make a respectable cappuccino.
The machine’s footprint is tiny — just 5.7 inches wide. If you are in a small apartment or dorm and counter space is at a premium, the Casabrews fits almost anywhere.
The honest downsides: the included accessories are cheap. The portafilter and tamper feel plasticky, and removing spent coffee pucks can be annoying. The machine is also lightweight enough that it can shift on the counter when you lock in the portafilter — I started keeping a hand on it during that step. These are the tradeoffs you accept at this price.
If you are willing to spend an extra $30–$40 on a better bottomless portafilter and a proper tamper, the 3700 Essential transforms from a beginner machine into something genuinely capable.
What I liked:
- Unbeatable price — real espresso performance for under $130
- Compact design at just 5.7 inches wide
- Stainless steel steam wand produces decent microfoam
- Pressurized baskets are forgiving for beginners
- 43.9 oz removable water tank — generous for the size
What could be better:
- Included accessories (portafilter, tamper) feel cheap and are worth upgrading
- Machine is lightweight and can shift when locking in the portafilter
- Temperature can fluctuate — less consistent than PID-equipped machines
- 51mm system limits aftermarket accessory options
Bottom line: The Casabrews 3700 Essential is the best entry point into espresso if your budget is tight. For the price of a couple of weeks of coffee shop visits, you get a machine that genuinely pulls real espresso.
4: Flair Classic Espresso Maker
Here is a pick most budget espresso lists overlook: the Flair Classic is a fully manual lever espresso maker, and it produces shots that can genuinely compete with machines costing five or ten times as much. No electricity, no pump, no boiler — you heat water in a kettle, add ground coffee, and press a lever to generate pressure. That is it.
The shot quality from the Flair is, frankly, the best on this entire list. Because you control the pressure profile manually — ramping up slowly, holding steady at 6–9 bars, then easing off — you can extract flavors that pressurized pump machines cannot. During testing with a medium-light roast, I pulled shots with clarity, sweetness, and complexity that surprised me. The 18-gram basket allows a full dose, and the portafilter uses standard non-pressurized baskets, so you get real espresso extraction without any shortcuts.
The tradeoff is workflow. There is no steam wand, so milk drinks require a separate frother or stovetop steaming. The preheating process takes a few minutes (you need to warm the brew chamber with hot water to avoid temperature loss during extraction). And you absolutely need a good grinder — the Flair has zero forgiveness for bad grinds. Without a pressurized basket to compensate, uneven or too-coarse grounds will produce a sour, watery shot.
The Flair is also completely portable. It breaks down, fits in a carrying case, and works anywhere you have access to hot water. I have used it while traveling and camping, and it pulls the same quality shots as it does on my kitchen counter.
This machine is for a specific person: someone who enjoys the ritual of making espresso, wants the best possible shot quality on a budget, and does not mind a slower, more hands-on process. If that sounds like you, the Flair Classic is unbeatable at this price.
What I liked:
- Best shot quality of any machine on this list — manual pressure profiling is a real advantage
- Completely portable — no electricity required, fits in a travel case
- 18-gram non-pressurized basket for genuine espresso extraction
- Beautiful, durable build — all metal construction
- No plastic parts touching the brew path
What could be better:
- No steam wand — you need a separate solution for milk
- Requires preheating the brew chamber (adds 2–3 minutes to workflow)
- Absolutely requires a quality burr grinder — zero forgiveness for bad grinds
- Only makes one shot at a time — not ideal for multiple drinks back to back
Bottom line: If you prioritize shot quality above all else and enjoy the hands-on process, the Flair Classic is the best-tasting espresso you can make for under $200. Just budget for a good grinder.
5: De’Longhi Stilosa EC260BK
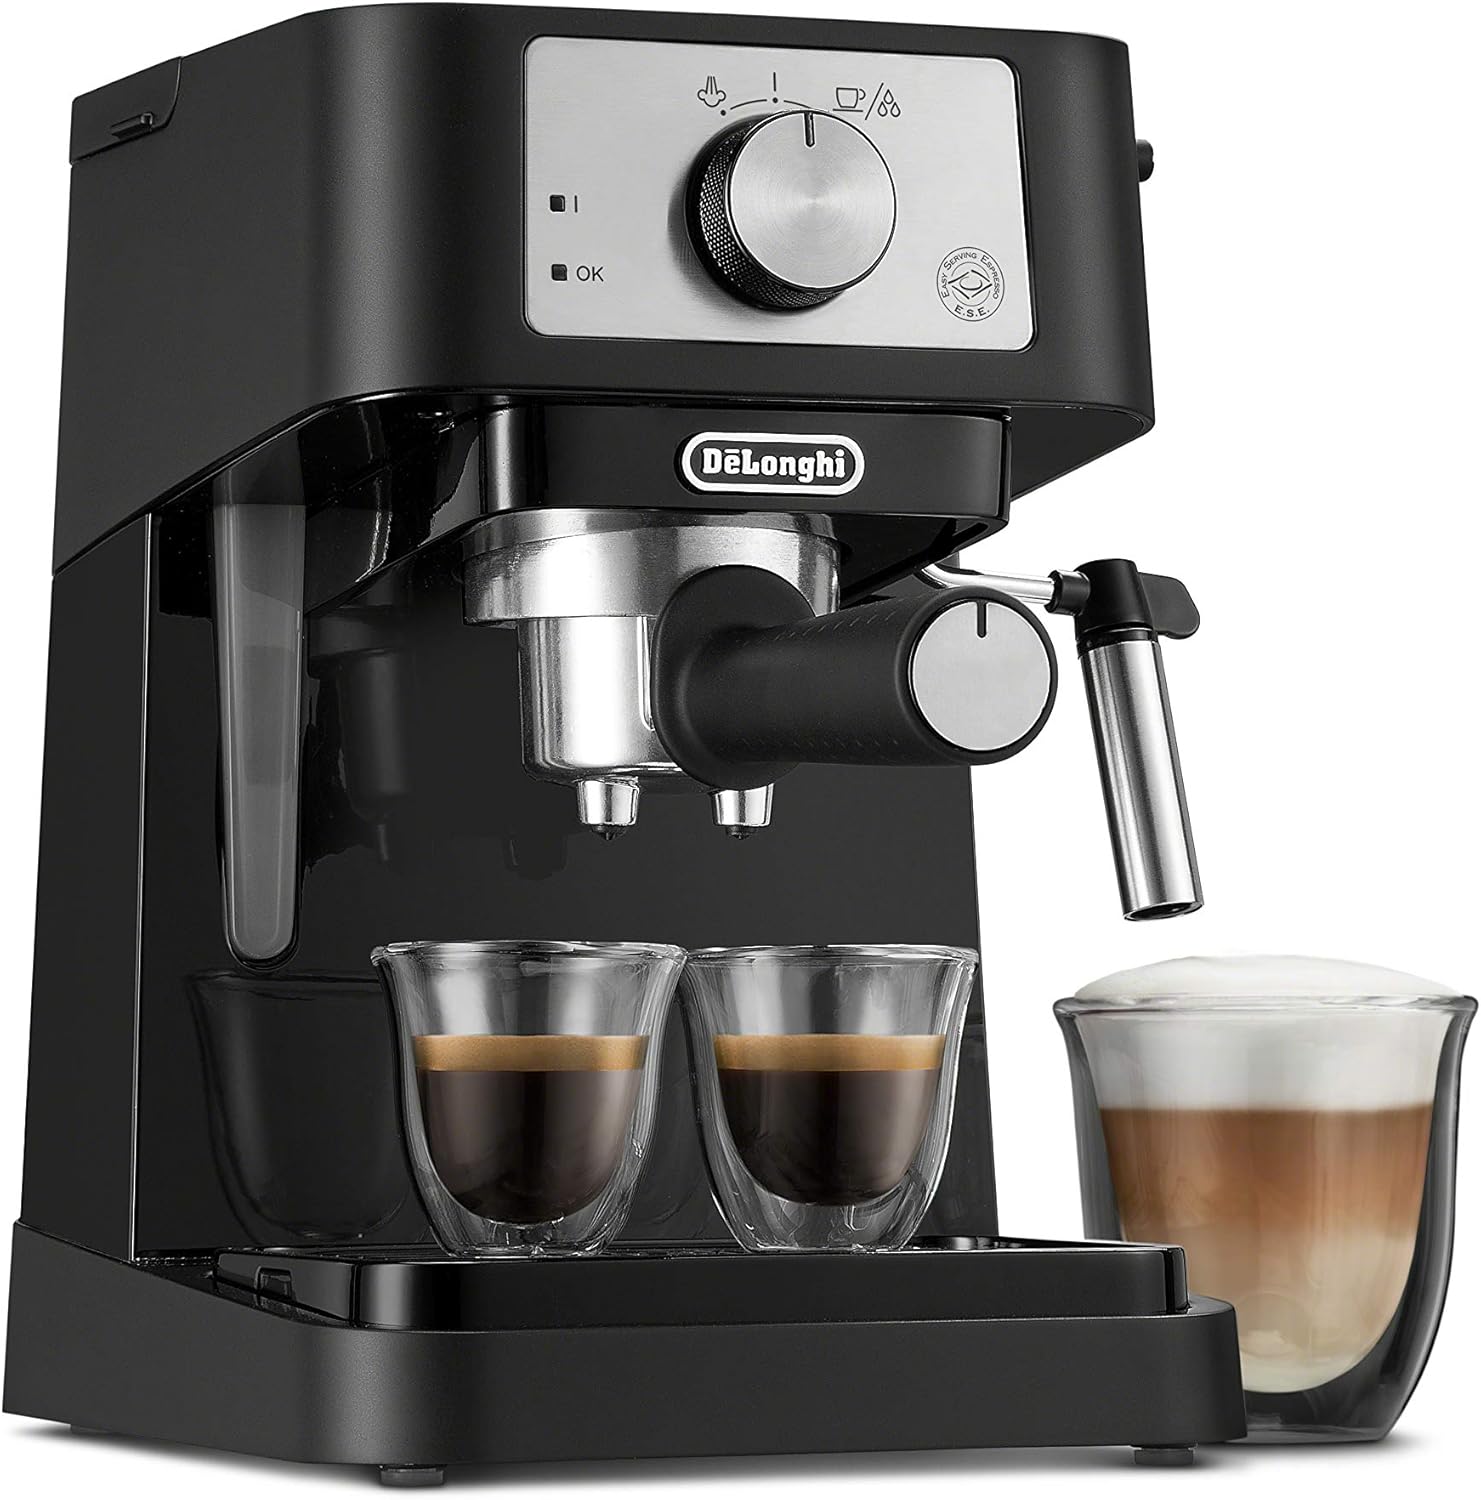
At roughly $150, the De’Longhi Stilosa is one of the most affordable portafilter espresso machines you can buy. It is not a pod machine or a toy — it is a real espresso maker with a 15-bar pump and a manual steam wand for frothing milk.
During testing, I found the Stilosa needed more dialing in than the Breville machines. The first few shots ran fast and tasted sharp, but once I adjusted my grind finer and tamped more firmly, the results improved significantly. After about three days, I was pulling smooth, balanced shots with light crema and gentle chocolate notes. The stainless steel boiler delivers consistent heat, and the manual steam wand has a good range of motion — unusual for a machine at this price.
The honest reality: the 15-bar pump is higher than the ideal 9 bars for espresso extraction. The Stilosa does not have an overpressure valve (OPV) to regulate this down, which means the pressurized baskets are doing the work of managing pressure. This is fine for most beginners, but if you upgrade to non-pressurized baskets later, you may notice over-extraction with certain beans. Some users modify the OPV themselves, but that is beyond what most beginners will want to do.
The portafilter and accessories are where De’Longhi cut costs — the plastic construction feels noticeably cheaper than the Breville or even the Casabrews. You will also want a separate coffee grinder for best results, though the pressurized baskets work reasonably well with pre-ground espresso.
The Stilosa is a solid first machine for someone who wants to learn the fundamentals of espresso making without a big investment. It also makes a quick espresso martini without needing a more expensive setup.
What I liked:
- Approximately $150 — one of the most affordable real espresso machines
- Stainless steel boiler for durability and consistent heat
- Manual steam wand with good range of motion
- Compact and lightweight — fits in small kitchens, dorms, and offices
- Includes portafilter, tamper, and single/double filters
What could be better:
- No OPV — 15-bar pressure is higher than ideal for non-pressurized baskets
- Portafilter and accessories feel cheap (plastic construction)
- No PID temperature control — shot consistency requires more user attention
- Basic tamper needs upgrading for serious use
Bottom line: The Stilosa proves you do not need to spend $300+ to start learning real espresso. It takes more practice to pull great shots, but the capability is there — and the price makes it a low-risk entry point.
6: Mr. Coffee Cafe Barista Espresso and Cappuccino Machine
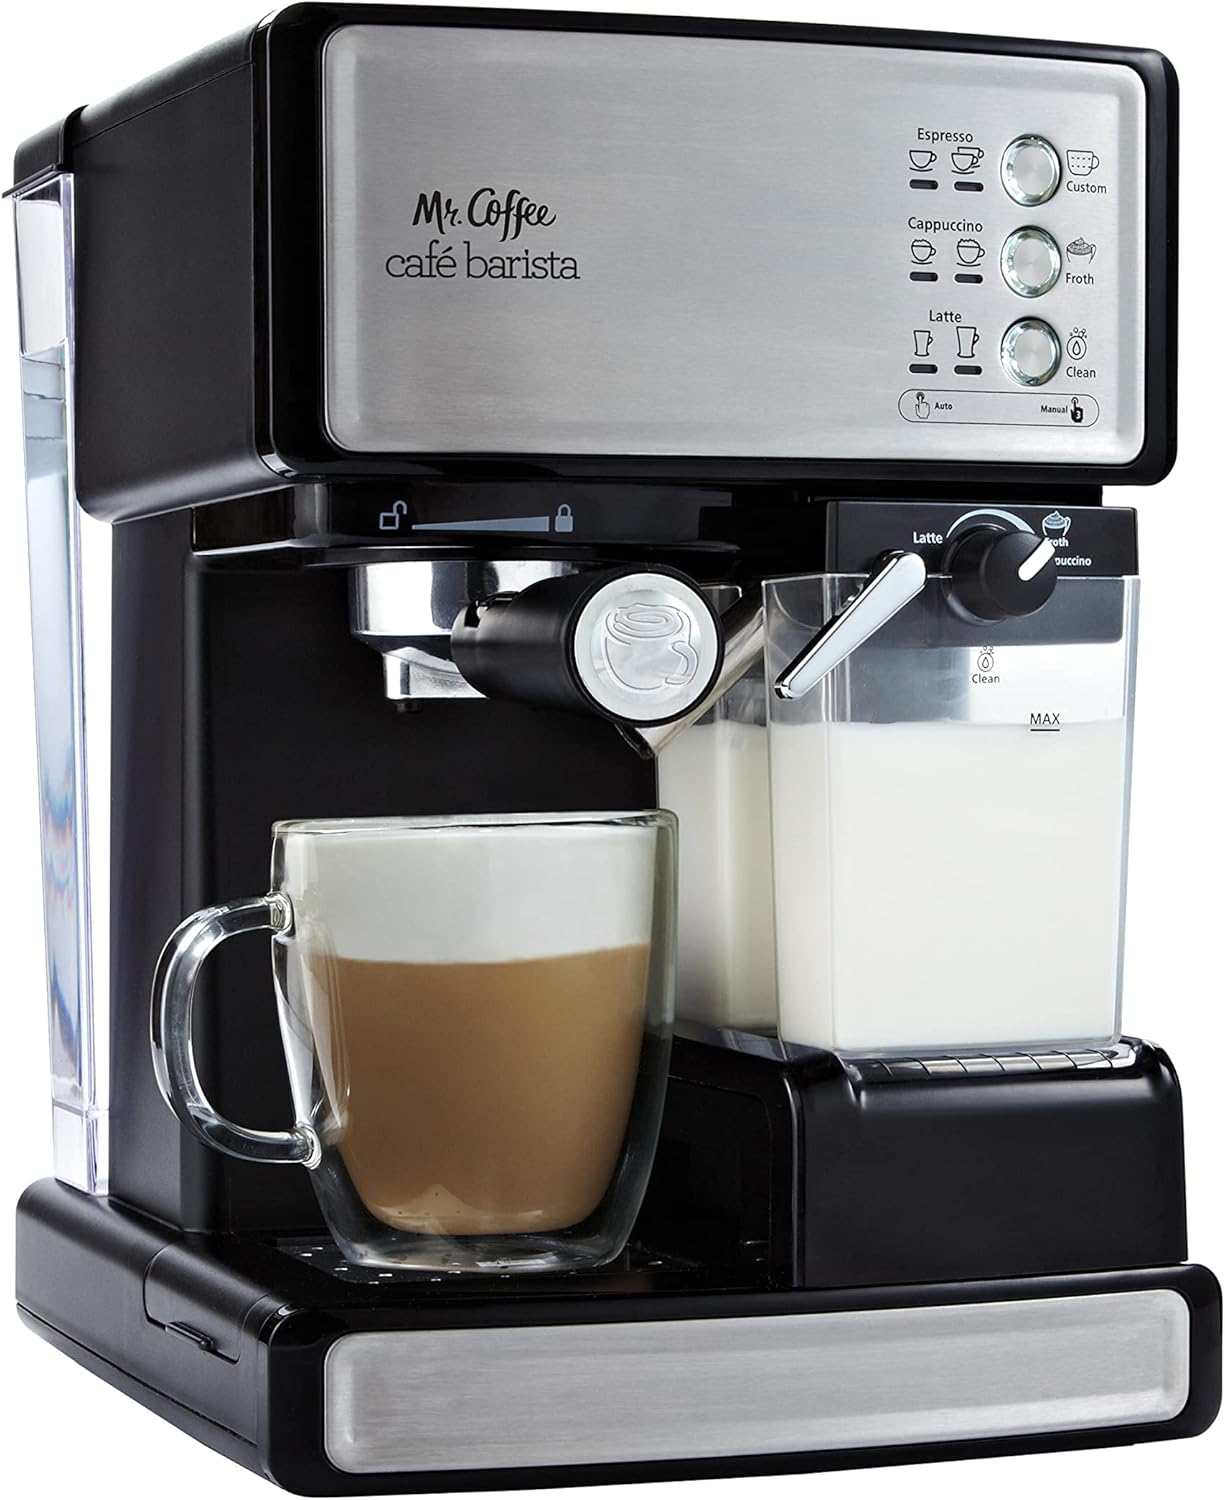
Mr. Coffee has been making coffee machines for decades, and the Cafe Barista is designed to make espresso as simple as possible. One-touch buttons for espresso, cappuccino, and latte — select your drink, and the machine handles the rest, including automatic milk frothing from a removable reservoir that can be stored in the fridge.
During testing, I found the Cafe Barista genuinely delivers on its promise of simplicity. The three-button interface has zero learning curve. I pulled a double espresso, made a cappuccino, and had a latte within the first 15 minutes of setup — no YouTube tutorials, no grind adjustments, no technique required. For someone who wants a flat white or Spanish latte every morning without thinking about extraction variables, this machine gets it done.
The 15-bar pump pulls respectable shots — not as nuanced as the Breville machines, but full-bodied and strong enough for milk drinks. The automatic milk frother is the star feature for convenience, though the foam leans more bubbly than silky. If you want true microfoam for latte art, this is not the machine for that.
The milk reservoir being removable and fridge-safe is a thoughtful design detail. After making a few drinks, you just pull the reservoir off, cap it, and put it back in the fridge. Cleanup is straightforward.
What I liked:
- One-touch buttons for espresso, cappuccino, and latte
- Automatic milk frother with removable, fridge-safe reservoir
- 15-bar pump pressure
- Simple 3-button interface — genuinely no learning curve
- Removable water reservoir for easy refills
What could be better:
- Automatic frother produces bubbly foam, not silky microfoam
- Limited control over shot quality — no temperature or pressure adjustments
- Not a machine you will “grow into” — skills plateau quickly
- Build quality is average for the price
Bottom line: The Mr. Coffee Cafe Barista is the best choice for someone who wants espresso-based drinks with the least possible effort. It is an excellent first machine or a gift for a casual coffee drinker.
How to Choose the Right Cheap Espresso Machine
The best budget espresso machine for you depends on two things: how much control you want over the process and how much time you are willing to invest in learning.
If you want to learn and grow as a home barista, a semi-automatic machine like the Breville Barista Express or Bambino gives you hands-on control over dosing, tamping, extraction, and milk steaming. These machines teach you the most and produce the best espresso once you dial in your technique. Pair them with quality espresso beans and a burr grinder, and you will be pulling cafe-quality shots at home.
If you want the best possible shot quality on a budget, the Flair Classic is the answer. Manual lever machines give you more control over pressure profiling than any pump machine at this price, and the shot quality reflects it. The tradeoff is a slower, more hands-on workflow and no built-in milk steaming.
If convenience is your top priority, the Mr. Coffee Cafe Barista removes the learning curve entirely. You give up control, but you gain push-button simplicity for lattes, cappuccinos, and espressos every morning.
If your budget is truly tight, the Casabrews 3700 Essential at under $130 is the best value in budget espresso right now. It pulls real shots, has a functional steam wand, and costs less than most people spend on coffee shop drinks in a single month.
The grinder matters more than the machine
This is the single most important thing to understand about espresso. A cheap machine paired with a great grinder will outperform an expensive machine paired with a bad grinder. If you buy any semi-automatic machine on this list (Bambino, Barista Express, Stilosa, or Casabrews), invest in the best burr grinder you can afford. The Baratza Encore ESP (~$150) is the most commonly recommended entry-level espresso grinder, and it pairs well with all of these machines.
Water quality matters more than you think
The minerals in your tap water can cause scale buildup inside your machine, affecting both flavor and longevity. Using the right water for espresso and descaling your machine regularly are two of the simplest things you can do to keep your espresso tasting its best and your machine running for years.
Start with the pressurized basket
Most budget machines include both a pressurized and non-pressurized basket. The pressurized basket compensates for inconsistent grinds and imperfect tamping — it is much more forgiving. Start there, learn the basics, and switch to the non-pressurized basket once you have a good grinder and consistent technique.
Frequently Asked Questions
Is a cheap espresso machine worth it?
Yes — if you set realistic expectations. A machine under $300 will not produce shots identical to a $2,000 dual boiler, but machines like the Breville Bambino and Casabrews 3700 Essential pull genuine espresso with good crema and balanced flavor. The biggest factor in shot quality at this level is actually the grinder, not the machine.
Do I need a grinder with a budget espresso machine?
It depends on the machine. The Breville Barista Express has one built in. Every other machine on this list requires a separate grinder for best results. You can start with pre-ground espresso and a pressurized basket — it is a perfectly acceptable way to learn — but freshly ground beans from a burr grinder will produce noticeably better shots.
What is the difference between 15-bar and 9-bar espresso machines?
Optimal espresso extraction happens at approximately 9 bars of pressure. Many budget machines advertise 15-bar or 20-bar pumps, but this refers to the pump’s maximum capability, not the pressure at the coffee puck. Higher-end machines use an overpressure valve (OPV) to regulate down to 9 bars. Budget machines often rely on pressurized baskets to manage pressure instead. Both approaches work, but OPV-equipped machines (like the Breville models) offer more consistency.
Can I make latte art with a cheap espresso machine?
Yes, but it depends on the steam wand. Machines with manual steam wands (Bambino, Barista Express, Casabrews, Stilosa) can produce microfoam suitable for basic latte art with practice. Machines with automatic frothers (Mr. Coffee Cafe Barista) produce foam that is too bubbly for latte art.
How long do budget espresso machines last?
With proper maintenance — regular descaling, cleaning the portafilter and shower screen after each use, and using good water — budget machines from reputable brands typically last 3–5 years of daily use. The Breville machines tend to last longer due to better build quality and more durable components.
What is the cheapest way to make real espresso at home?
The Casabrews 3700 Essential (~$95–$130) paired with a hand grinder like the 1Zpresso JX (~$70) gives you genuine espresso for around $170–$200 total. Alternatively, the Flair Classic (~$130) with the same hand grinder gets you arguably better shot quality for a similar total investment, though without milk steaming capability.
Conclusion
The Breville Barista Express BES870XL is our top recommendation for most people. The built-in grinder, PID temperature control, and genuine 9-bar extraction make it the best value for someone who wants a complete espresso setup in one machine. It is the kind of machine you can grow into — not one you will outgrow in six months.
For budget-conscious buyers, the Breville Bambino delivers the same extraction quality in a smaller, more affordable package — just add a grinder. If you want the absolute cheapest way into real espresso, the Casabrews 3700 Essential is an incredible value under $130. And if you care about shot quality above all else, the Flair Classic is the hidden gem of budget espresso.
Our Top Pick: Breville Barista Express BES870XL
No matter which machine you go with, the key to great espresso at home is using freshly ground, quality beans and keeping your equipment clean. If you need help choosing the right beans for your setup, check out our guides on the best coffee beans for espresso and the best coffee beans for lattes.
10 Coffee Grinders That Unlock Strong, Bold Flavor (And Which One’s Perfect for You)
You can buy the darkest roast on the shelf, use twice as many scoops, and let your coffee steep until it’s jet-black… but if your grinder isn’t up to the job, your coffee will still taste weak.
That’s because grind consistency is the hidden key to bold, strong flavor. A good grinder ensures every particle extracts evenly, giving you all the richness and intensity your beans have to offer. The wrong grinder? It leaves you with a cup that’s either watery or bitter — and neither screams “strong.”
In this guide, we’ll break down the 10 best coffee grinders for strong coffee — whether you brew punchy espresso, bold French press, or smooth pour-over. By the end, you’ll know exactly which grinder belongs on your counter.
The 10 Best Grinders for Strong Coffee
1. Baratza Encore ESP – The Everyday Hero for Strong Coffee
The Encore ESP is a barista-approved classic. With 40 grind settings — including fine adjustments for espresso — it’s versatile enough for any brewing style.
Why it’s great for strong coffee:
- Consistent burrs deliver uniform grounds.
- ESP micro-settings make it perfect for concentrated espresso shots.
- Durable build with easy-to-replace parts.
Best for: Everyday strong coffee drinkers, especially espresso lovers.
Price: Mid-range (~$200)
2. Baratza Virtuoso+ – Precision with Digital Control
A step up from the Encore, the Virtuoso+ adds a digital timer for dosing accuracy. That means you can recreate the same bold flavor cup after cup.
Why it’s great for strong coffee:
- Digital timer ensures exact dosing for consistent strength.
- Commercial-grade burrs for uniform particle size.
- Handles everything from pour-over to espresso.
Best for: Serious coffee fans who want repeatable, strong results.
Price: Mid-premium (~$250)
3. Breville Smart Grinder Pro – Feature-Rich and Espresso-Ready
This grinder offers 60 precise grind settings and a clear LCD interface. At around $200, it’s one of the best value grinders for strong espresso or bold moka pot brews.
Why it’s great for strong coffee:
- Fine grind adjustments ideal for espresso.
- Digital controls make strength easy to dial in.
- Wide range covers espresso to French press.
Best for: Espresso drinkers who want control without breaking the bank.
Price: Mid-range (~$200)
4. OXO Brew Conical Burr Grinder – Budget Strong Coffee Solution
Affordable, compact, and reliable — this is the go-to entry-level grinder for those who want bold coffee on a budget.
Why it’s great for strong coffee:
- Produces a consistent grind at an affordable price.
- 15 grind settings cover most brew methods.
- Great for French press, drip, and pour-over.
Best for: Budget-conscious coffee drinkers who still want big flavor.
Price: Budget (~$100)
5. Fellow Ode Brew Grinder Gen-2 – Sleek Power for Bold Brews
A design favorite, the Ode Gen-2 is whisper-quiet and engineered for precision. It’s best suited for filter coffee, French press, and cold brew — all of which highlight bold, strong flavors.
Why it’s great for strong coffee:
- Flat burrs deliver ultra-consistent grinds.
- Quiet motor makes mornings smoother.
- Beautiful minimalist design.
Best for: Design-minded brewers who love French press or pour-over strength.
Price: Premium (~$345)
6. Timemore Chestnut C2S (Manual) – Strong Coffee Anywhere
Compact, portable, and surprisingly powerful, this manual grinder punches way above its price point.
Why it’s great for strong coffee:
- Steel burrs give precise, strong results.
- Lightweight and portable for travel.
- Affordable without sacrificing quality.
Best for: Travelers, campers, or minimalists chasing strong coffee on the go.
Price: Budget (~$60)
7. Wilfa Svart Aroma Precision – Scandinavian Strength
This Norwegian grinder balances style and performance, with 32 grind settings and a UV-protected hopper to keep beans fresh.
Why it’s great for strong coffee:
- UV protection keeps beans flavorful.
- Wide range of settings for bold brews.
- Consistent for French press and pour-over.
Best for: European design lovers who want consistent, bold coffee.
Price: Mid-range (~$150)
8. ProCook Burr Grinder – Affordable Entry with 30 Settings
This budget-friendly grinder is a solid pick for beginners who want better than blade-grinder results without overspending.
Why it’s great for strong coffee:
- 30 settings for flexible brewing.
- Easy to use and clean.
- Surprisingly strong performance at this price.
Best for: Beginners stepping up from a blade grinder.
Price: Budget (~$79)
9. Lelit William PL72 – Espresso Lover’s Dream
If espresso strength is your priority, this grinder’s precision dosing system and ultra-fine adjustments make it worth the splurge.
Why it’s great for strong coffee:
- Digital timer for precise shot dosing.
- Built for espresso perfection.
- Heavy-duty build quality.
Best for: Espresso fanatics chasing café-quality strength.
Price: Premium (~$500)
10. KINGrinder K6 (Manual) – Budget Manual Powerhouse
An under-$100 manual grinder with exceptional consistency. Great for strong brews without plugging anything in.
Why it’s great for strong coffee:
- Micro-adjustable grind settings.
- Sturdy build, travel-friendly.
- Consistency rivals pricier models.
Best for: Budget-minded coffee lovers who don’t mind cranking by hand.
Price: Budget (~$90)
Choosing the Right Grinder for Your Style of Coffee
- Espresso strength seekers: Baratza Encore ESP, Breville Smart Grinder Pro, Lelit William PL72.
- French press / cold brew boldness: Fellow Ode Gen-2, Wilfa Svart, OXO Brew.
- Travel & minimalism: Timemore C2S, KINGrinder K6.
- Everyday flexibility: Baratza Virtuoso+, ProCook Burr Grinder.
FAQs About Grinders & Strong Coffee
Why is a burr grinder better than a blade grinder for strong coffee?
Burr grinders produce uniform grounds, which extract more fully — giving you stronger, richer flavor.
Do flat burrs or conical burrs make stronger coffee?
Flat burrs = ultra-consistent (great for espresso). Conical burrs = quieter and more forgiving. Both can make strong coffee.
Do I need to spend $200+ to get a strong grinder?
Not always. Budget models like the OXO Brew can still produce bold coffee, but premium grinders offer better precision and repeatability.
How do I adjust a grinder for stronger coffee?
Grind slightly finer than usual. This extracts more flavor compounds and creates a stronger brew — just don’t overdo it or you’ll hit bitterness.
Are manual grinders strong enough?
Yes. A well-built manual grinder can rival a $200 electric grinder for consistency. They just require more effort.
Pro Tips for Strong Coffee with Any Grinder
- Always grind fresh. Pre-ground coffee loses strength quickly.
- Go a notch finer. Finer grinds increase extraction and strength.
- Weigh your beans. Strength comes from consistent ratios.
- Clean your grinder. Oils and old grounds dull flavor.
- Experiment. Try different ratios (1:15 vs 1:12 coffee:water) for boldness.
Conclusion: The Grinder = Your Coffee’s Secret Weapon
If you want strong coffee, stop blaming the beans and start with your grinder. Whether you invest in a reliable workhorse like the Baratza Encore ESP, a stylish powerhouse like the Fellow Ode Gen-2, or a budget gem like the Timemore Chestnut C2S, you’ll taste the difference immediately.
How to Clean, Prevent, and Upgrade Your Coffee Station
You wake up craving that first hot cup of coffee, only to find fruit flies buzzing around your coffee maker. It’s gross, it’s frustrating, and it might even make you question if your coffee is safe to drink. Don’t worry—you’re not alone. Fruit flies in and around coffee stations are a surprisingly common issue, but the good news is that it’s completely preventable. In this guide, we’ll show you why fruit flies are attracted to your machine, how to clean it properly, steps to keep them from coming back, and even when it might be time to upgrade your coffee setup.
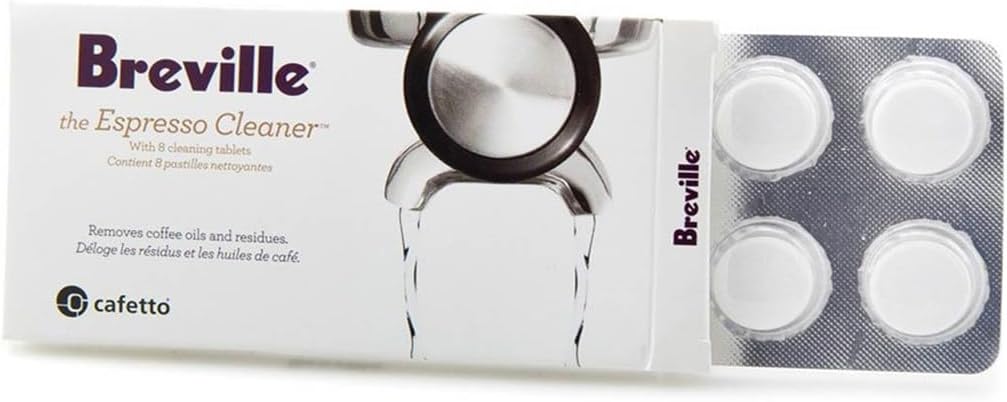
My Favorite Towels To Clean Bugs With
Why Fruit Flies Love Coffee Makers
Fruit flies thrive in damp, sugary environments, and your coffee station is often the perfect breeding ground. Here’s why:
- Leftover coffee grounds: Damp grounds left overnight provide an ideal habitat.
- Drip trays and water reservoirs: Small pools of water or residue attract flies quickly.
- Sugar and syrups: Spills from creamers, syrups, or flavored coffee add an irresistible draw.
- Nearby trash bins: Open or unsealed bins can become a secondary source of infestation.
If not cleaned regularly, fruit flies can even lay eggs in hard-to-see areas like inside drip trays or tubing. This makes consistent cleaning essential.
Step-by-Step Cleaning Guide
Daily Habits
- Empty used coffee grounds immediately after brewing.
- Rinse filters, baskets, and carafes.
- Wipe down countertops and machine surfaces to remove spills.
Weekly Routine
- Clean and dry drip trays and reservoirs.
- Wash removable parts with warm, soapy water.
- Check hidden spots for moisture buildup.
Monthly Deep Clean
- Run a descaling cycle using vinegar or an approved descaling solution.
- Scrub removable parts with a soft brush.
- Replace charcoal water filters if your machine uses them.
Helpful Tools: Cleaning tablets, microfiber cloths, machine-specific brushes. These not only make cleaning easier but also prolong the life of your coffee maker.
How to Prevent Fruit Flies From Coming Back
- Proper storage: Keep beans and syrups in airtight containers.
- Seal your waste: Use covered trash bins or compost containers near your station.
- Control humidity: Consider an air purifier or dehumidifier if your kitchen runs damp.
- Protect fruit bowls: Cover or store fruit away from the coffee station.
- Use natural traps: Place a vinegar trap nearby as a backup solution.
Preventing fruit flies is often as much about the surrounding area as it is about the machine itself.
When It’s Time to Upgrade Your Coffee Setup
Sometimes, constant cleaning is a sign it may be time for a better solution. Upgrading your coffee setup can help minimize maintenance and keep pests away.
Signs it’s time to upgrade:
- Persistent buildup of mold or residue despite cleaning.
- Parts that are difficult or impossible to remove for cleaning.
- Desire for more convenience and hygienic features.
High-Ticket Options to Consider:
- Self-cleaning espresso machines with built-in maintenance cycles.
- Smart coffee makers with sealed water systems.
- Luxury coffee bars with built-in waste storage.
Add-ons for a Cleaner Setup:
- Touchless trash cans.
- Under-sink water filtration systems.
- UV sanitizing devices for kitchen hygiene.
These upgrades not only improve your coffee experience but also reduce the likelihood of ever seeing fruit flies around your machine again.
My Favorite Towels To Clean Bugs With
FAQs About Fruit Flies & Coffee Makers
Why are fruit flies attracted to my coffee maker?
They’re drawn to moisture and sugar found in used grounds, drip trays, and syrup spills.
Is it safe to drink coffee if fruit flies are nearby?
A single fly landing isn’t harmful, but if they’ve been breeding inside the machine, it’s best to deep clean before using it again.
How do I clean fruit flies out of a coffee machine?
Run a descaling cycle, scrub removable parts, and sanitize drip trays and reservoirs.
Do premium machines prevent fruit flies?
Yes, higher-end machines with sealed systems and self-cleaning functions make it harder for fruit flies to find food or moisture.
What if fruit flies keep coming back?
Check your kitchen for other sources—garbage bins, compost, and uncovered fruit bowls are often the real culprit.
Conclusion
Fruit flies don’t have to ruin your morning coffee ritual. With regular cleaning habits, smart prevention steps, and the right upgrades, you can keep your coffee maker (and kitchen) pest-free. A clean coffee station means better-tasting coffee, a healthier home environment, and peace of mind.
The Ultimate Guide to Starbucks Refrigerated Coffees
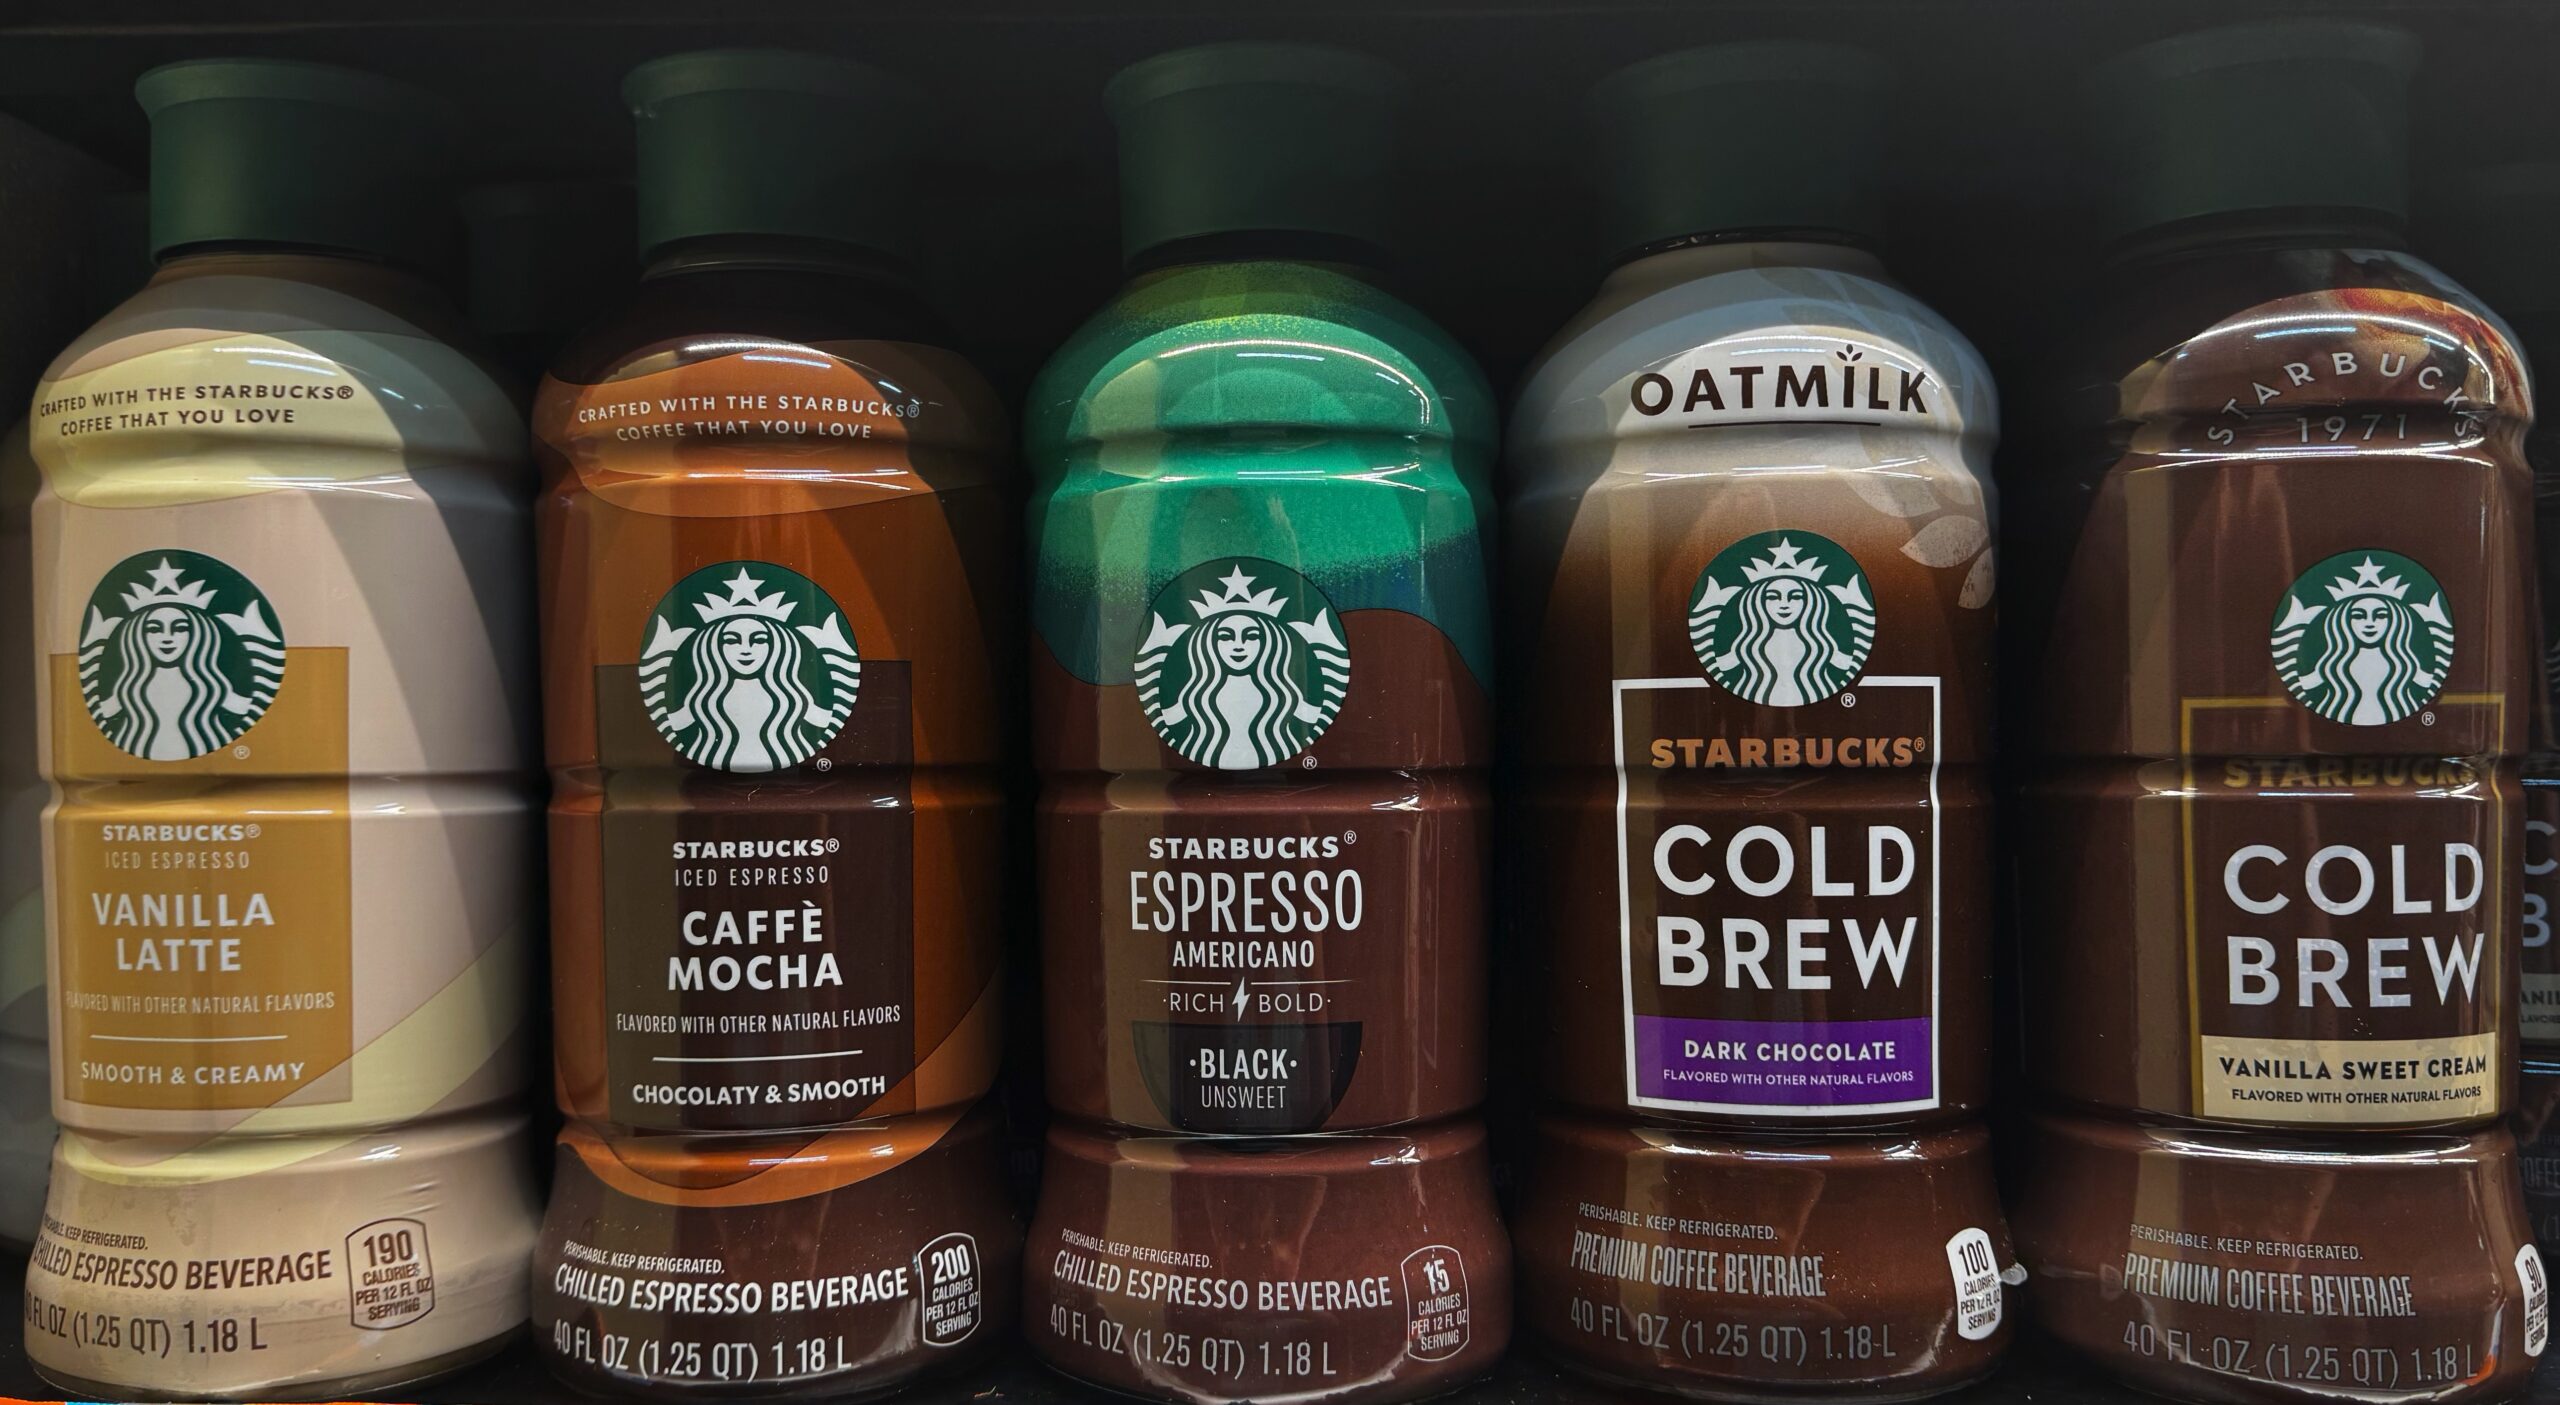
If you’ve walked through the refrigerated section of your local grocery store, you’ve probably spotted those sleek Starbucks bottles sitting next to creamers and juices. These aren’t just single‑serve Frappuccinos—they’re multi‑serve 40 fl oz bottles designed to bring the Starbucks café experience right into your fridge.
In this guide, we’ll break down what each variety offers, share the pros and cons, and highlight what real coffee drinkers are saying.
1. Starbucks Vanilla Latte (Iced Espresso)
Flavor Profile: Smooth, creamy, and lightly sweetened with vanilla.
- Pros:
- Convenient and ready to pour over ice.
- A sweeter, approachable option for those who prefer latte‑style drinks.
- Strong vanilla notes with a creamy finish.
- Cons:
- High in sugar (about 30g per 12 oz serving).
- Some reviews say the flavor has changed over time—tasting a little watered down.
- Reviews: Many fans love it as a go‑to morning coffee at home, while others feel it’s too sweet for daily drinking.
2. Starbucks Caffè Mocha (Iced Espresso)
Flavor Profile: A chocolate‑forward espresso beverage with a dessert‑like richness.
- Pros:
- Perfect for mocha lovers who enjoy chocolate in their coffee.
- Smooth texture, similar to ordering a mocha at Starbucks.
- Cons:
- Very sweet—best enjoyed as an occasional treat.
- Higher calories per serving compared to other options.
- Reviews: Fans describe it as “a drinkable dessert in a bottle.” Some say it’s too indulgent for everyday sipping.
3. Starbucks Espresso Americano (Unsweetened)
Flavor Profile: Bold, black espresso with no sugar or cream.
- Pros:
- Very low calories (~10 per serving).
- Great for those who like strong, unsweetened coffee.
- Can be used as a base for custom drinks at home.
- Cons:
- Too plain for those who prefer sweetness or cream.
- The strong taste isn’t for everyone.
- Reviews: Praised by minimalists and calorie‑counters, but casual coffee drinkers may find it too bitter.
4. Starbucks Cold Brew with Oatmilk (Dark Chocolate)
Flavor Profile: Plant‑based cold brew with oatmilk and a hint of dark chocolate.
- Pros:
- Dairy‑free option for those avoiding milk.
- Balanced chocolate flavor that isn’t overly sweet.
- Cons:
- Slightly higher in calories than the black cold brew.
- Oatmilk texture isn’t for everyone.
- Reviews: Well‑received by oatmilk fans and people looking for a smoother, less acidic cold brew.
5. Starbucks Cold Brew (Vanilla Sweet Cream)
Flavor Profile: Smooth cold brew paired with a touch of sweet vanilla cream.
- Pros:
- Creamy yet still maintains the boldness of cold brew.
- Sweeter than black cold brew but lighter than the lattes.
- Cons:
- Still contains added sugar and calories.
- Cream can separate if not shaken before pouring.
- Reviews: A favorite among those who want café‑style cold brew at home without the bitterness.
Which One Should You Try?
- Best for sweet tooths: Vanilla Latte or Caffè Mocha.
- Best low‑calorie choice: Espresso Americano.
- Best plant‑based option: Cold Brew with Oatmilk Dark Chocolate.
- Best balance of coffee + cream: Cold Brew Vanilla Sweet Cream.
Click For My Favorite Starbucks Cold Brew Concentrate
Final Thoughts
Starbucks’ refrigerated coffee bottles are a convenient way to enjoy café‑quality drinks at home. They range from bold, unsweetened espresso to creamy, flavored cold brews—so there’s something for every taste preference.
If you’re after convenience and flavor, the lattes and cold brews are great staples. If you want control over sweetness or calories, stick with the Americano and add your own cream or sweetener.
Whichever you choose, these bottles make it easy to skip the drive‑thru while still getting your Starbucks fix.
Lavazza Pod Machines Compared: The Hidden Differences Nobody Talks About
Click For Best Budget Espresso Machine
Lavazza is one of Italy’s most respected coffee brands, and their lineup of pod-based espresso machines has gained a loyal following worldwide. Unlike some competitors, Lavazza doesn’t rely on a single pod system. Instead, they’ve built three separate ecosystems — each with its own machines, capsules, and strengths. That’s great for variety, but it also means buyers need to know what they’re getting into before choosing a machine.
This guide breaks down Lavazza’s systems, compares the most popular machines, highlights user experiences, and helps you decide which model best fits your needs.
The Lavazza Pod Ecosystem Explained
Before picking a machine, it’s critical to understand Lavazza’s three non-interchangeable pod systems:
| Pod System | Target Market | Capsule Shape | Coffee Content | Example Machines |
|---|---|---|---|---|
| A Modo Mio | Home use | Shallow, soft plastic (~47mm x 17mm) | ~7.5 g (more than Nespresso’s 5–6 g) | Jolie, Desea, Tiny Eco |
| Lavazza BLUE / Expert | Business & small office | Tub-shaped, taller (~47mm x 27mm) | 7–13 g | Classy Mini, Classy Plus |
| Nespresso / Dolce Gusto Compatible | Consumers who already own rival machines | Aluminum | 5–6 g | Works in Nespresso/Dolce Gusto machines |
💡 Key takeaway: Lavazza pods (check them out here) typically contain more coffee per capsule than Nespresso, resulting in a stronger and more authentic espresso.
Click To See Our Favorite Lavazza Espresso Point Machine Updated For This Year
Spotlight on the A Modo Mio Line
1. Lavazza Jolie (now the BLUE) – The Minimalist’s Espresso Maker
-
Pros: Compact, quiet (44 dB), one-button simplicity, quick heat-up (~30 sec).
-
Cons: No programmable features, tiny 0.6 L water tank, must manually stop pour.
-
Best for: Minimalists who want a no-fuss espresso maker.
2. Lavazza Desea (now the Classy Expert) – Premium With Built-In Milk Frother
-
Pros: Touch interface, milk frothing mug system, quiet operation, 1.1 L tank.
-
Cons: Reliability issues (leaks, stuck mug, descaling errors), high price.
-
Best for: Latte and cappuccino lovers who want café-style drinks at home.
3. Lavazza Tiny Eco – The Budget & Eco Choice
-
Pros: Made from 61% recycled plastic, extremely compact, heats in 10 sec.
-
Cons: Manual pour stop, durability concerns, limited repair options.
-
Best for: Value-focused users with small kitchens.
Spotlight on the Lavazza BLUE & Expert Line
4. Lavazza Classy Mini – Professional Espresso, Simplified
-
Pros: Affordable (often <$100), consistent espresso, programmable buttons, fast warm-up.
-
Cons: Pods harder to find in stores (must buy online).
-
Best for: Espresso purists and budget-conscious drinkers.
5. Lavazza Classy Plus – The All-in-One Workhorse
-
Pros: Makes espresso, lungo, drip coffee, and milk-based drinks. Automatic frother included. Large 1.1 L+ tank.
-
Cons: Expensive ($199–$329), pod availability limited, capsules pricey.
-
Best for: Coffee enthusiasts who want one machine to do it all.
What Users Love (and Don’t Love)
✅ Strength & Flavor – Lavazza’s extra grams of coffee deliver bolder espresso than many competitors.
✅ Quick & Convenient – Machines heat in ~30 seconds, easy to clean, and mostly quiet.
✅ Milk Frothing Systems – On Desea and Classy Plus, users rave about foam quality.
❌ Pod Availability – BLUE/Expert pods can be difficult to buy locally.
❌ Reliability Issues – Some A Modo Mio models (especially Desea) have recurring mechanical complaints.
❌ Limited Pod Variety – Fewer blends compared to Nespresso-compatible capsules.
Recommendations: Which Lavazza Machine Is Right for You?
-
For Espresso Purists & Budget Buyers: Go with the Lavazza Classy Mini. Strong espresso, low pod cost, simple operation.
-
For Latte & Cappuccino Fans: Choose the Lavazza Classy Plus. Expensive, but worth it for the versatility and built-in milk frother.
-
For Minimalists & Small Spaces: The Lavazza Jolie is compact, quiet, and easy to use.
-
For Eco-Minded Buyers: The Tiny Eco offers a sustainable entry point, though with some trade-offs in durability.
Final Thoughts
Lavazza’s pod machines stand out for their richer espresso flavor thanks to higher coffee content per pod. The trade-off? You’ll need to commit to one of Lavazza’s pod systems, and availability can sometimes be inconvenient.
If you prioritize strong espresso and Italian quality, Lavazza is a solid choice — just pick the machine that best matches your lifestyle.
Click To See Our Favorite Lavazza Espresso Point Machine Updated For This Year
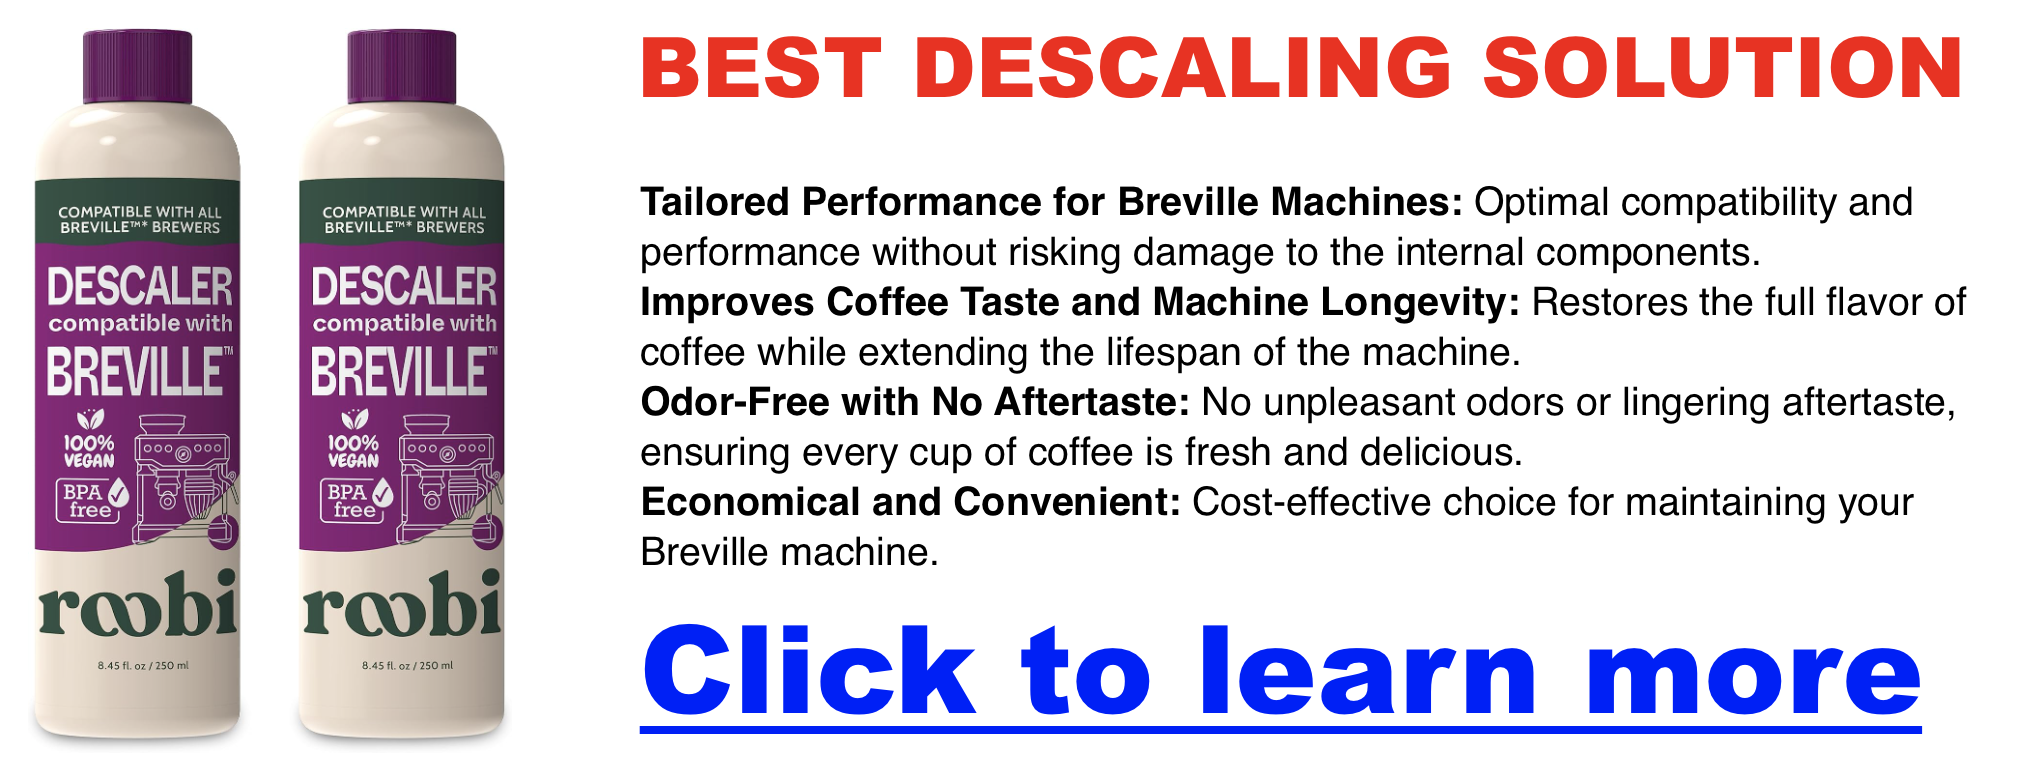
How To Descale Breville Bambino
Click Here For Our Favorite Bambino Descaler Solution
Maintaining your Breville Bambino espresso machine doesn’t just keep it in good condition—it ensures that every shot of espresso tastes its best. Over time, mineral deposits from hard water build-up inside the machine, affecting performance and flavor. Descaling is a must to avoid a drop in coffee quality and prevent costly repairs.
Why You’ll Need to Descaling Your Bambino
Mineral buildup can impact your Bambino’s performance, from slowing the water flow to creating irregular steam pressure. Over time, this buildup affects not only your espresso’s taste but also your machine’s longevity. Regular descaling can help maintain:
- Consistent Flavor Quality – Mineral-free water extracts espresso evenly, so every shot is full-bodied and balanced.
- Machine Longevity – Without buildup, your Bambino operates smoothly, reducing wear and tear.
- Better Performance – You’ll notice better steam pressure and overall functionality with a clean machine.
The ideal frequency for descaling varies depending on water hardness. Typically, once every 1-3 months is a good rule of thumb, but you can also contact Breville for personalized advice.
 Click here for the best descale product for a Bambino
Getting Ready to Descale Your Breville Bambino
Before you start, you’ll need some descaling powder and a large container to catch the water during the process. Let’s prepare your machine.
Step 1: Empty the Drip Tray and Water Tank
Begin by emptying the drip tray and placing it back in the machine. Fill the water tank up to the “Descale” line, then add the descaling powder. Mix it with warm water until it dissolves fully.
Step 2: Place a Container Under the Group Head and Steam Wand
Set a container (about 68 ounces for the Bambino Plus, or 2 liters for the Bambino) under both the group head and steam wand. This will catch the water and descaling solution as it flows through the machine.
How To Descale Breville Bambino
Click here for my favorite descale solution
Now that your machine is ready, it’s time to enter descale mode.
Step 3: Cool the Machine and Enter Descale Mode
Turn off the machine and let it cool down for a few minutes. Then, depending on your model, activate descale mode:
- For the Bambino Plus, press and hold the one-cup and steam buttons for 5 seconds.
- For the Bambino, with the machine off, press and hold the two-cup and steam buttons for 5 seconds.
Step 4: Begin the Descale Process
Start the descaling cycle by pressing the appropriate button for your model:
- For the Bambino Plus, press either the one-cup or steam button.
- For the Bambino, press either the two-cup or steam button.
As the machine runs through the descaling cycle, you’ll see the buttons flash to indicate it’s working.
Pausing, Refilling, and Resuming the Cycle
Once the descaling solution runs out, the machine will pause, allowing you to complete the next steps.
Step 5: Rinse and Refill the Water Tank
Remove the tank, rinse it thoroughly, and refill it with fresh water to the maximum line. This fresh water will help flush out any remaining descaling solution from the machine.
Step 6: Restart the Cycle with Fresh Water
Return the tank and container to their positions and restart the cycle:
- For the Bambino Plus, press either the one-cup or steam button.
- For the Bambino, press the two-cup button.
The machine will run again, clearing out any descaling solution to ensure it doesn’t impact your next brew.
Finishing Up
When descaling is complete, your machine will signal that it’s finished.
Step 7: Check for Completion Signals
- The Bambino Plus will have both the one-cup and steam buttons flashing simultaneously before going into standby mode.
- The Bambino will have the one-cup and steam buttons flashing alternately before switching to standby.
Step 8: Final Cleaning
Remove and empty the container used for waste water. Rinse and dry the drip tray and water tank thoroughly before placing them back in the machine. Your Breville Bambino is now clean and ready to brew!
Long-Term Maintenance Tips for Your Breville Bambino
Regular descaling is essential, but additional maintenance can help your machine run even better.
- Descale Consistently: Depending on your water quality, descaling every 1-3 months is recommended.
- Routine Cleaning: Wipe down external parts after each use, empty the drip tray daily, and purge the steam wand to remove milk residue.
- Water Quality: Consider using filtered water to reduce mineral buildup, especially if you live in an area with hard water.
Peppermint Mocha Espresso Recipe
A rich and festive holiday drink combining espresso, chocolate, and peppermint for the ultimate seasonal indulgence.
Peppermint Mocha Espresso Recipe
Click here for one-touch espresso drinks
Ingredients:
- Espresso: 1-2 shots of espresso (adjust based on your strength preference)
- Milk: 1 cup of steamed milk (dairy or plant-based options like almond, oat, or soy work well)
- Chocolate Syrup: 2 tablespoons of your favorite chocolate syrup, or substitute with melted dark chocolate for a richer flavor
- Peppermint Extract: 1-2 drops (start small as peppermint extract is very strong)
- Whipped Cream: Optional, for topping
- Crushed Candy Canes: Optional, for garnish
- Cocoa Powder or Chocolate Shavings: Optional, for garnish
Instructions:
Click Here to Brew Barista-Quality Espresso at Home
1. Brew the Espresso:
- Use an espresso machine, Moka pot, or Aeropress to make 1-2 shots of espresso. If you don’t have an espresso maker, you can use strong brewed coffee as a substitute, though the flavor won’t be as bold.
2. Prepare the Peppermint Chocolate Mixture:
- In your favorite mug or glass, add 2 tablespoons of your favorite chocolate syrup (or melted chocolate) and 1-2 drops of peppermint extract. Stir thoroughly to ensure the chocolate and peppermint are evenly combined.
3. Heat and Froth the Milk:
This is my favorite milk frother
- Heat 1 cup of whole or 2% milk in a small pan over medium heat, or use a microwave-safe container and heat for about 1-2 minutes until hot but not boiling. Froth the milk using a whisk or milk frother, or by shaking it and then microwaving for 30 seconds to stabilize the foam.
4. Combine the Espresso and Peppermint Chocolate:
- Pour the freshly brewed espresso into the mug with the chocolate-peppermint mixture. Stir to blend the flavors thoroughly.
5. Add the Steamed Milk:
- Slowly pour the milk into the mug, holding back the foam with a spoon. Once most of the milk is in, spoon the foam on top.
6. Decorate and Garnish:
- Add a smidge of whipped cream on top for a creamy finish.
- Sprinkle a little crushed candy cane on the whipped cream for a festive touch.
- For an extra flair, dust with cocoa powder or add a few chocolate shavings.
7. Serve and Enjoy:
- Serve immediately in a festive mug or glass. Pair with holiday cookies or enjoy as a standalone treat while cozying up by the fire.
Tips for Success:
- Custom Sweetness: Adjust the amount of chocolate syrup or peppermint extract to suit your taste preferences.
- Make It Iced: For an iced version, cool the espresso, mix with the peppermint chocolate, and pour over ice before adding cold milk and whipped cream.
Smeg Coffee Makers: A Blend of Retro Design and Modern Functionality
Smeg has earned a reputation for its iconic 1950s-inspired aesthetic, bringing a touch of vintage charm to modern kitchens. Among its wide range of appliances, Smeg coffee makers stand out for their blend of stylish design and practical features. This guide explores the key models, their unique characteristics, and what to consider when choosing the perfect coffee maker for your home.
- Smeg Drip Coffee Maker (Model DCF02)
Design
The DCF02 embodies Smeg’s retro design language, available in colors like cream, black, pastel blue, and pink, making it a stylish addition to any kitchen decor.
Features
- Aroma Intensity Selector: Customize your brew with ‘Delicate’ or ‘Intense’ settings to suit your taste.
- Auto Start Function: Program your coffee maker to begin brewing at a specific time, ensuring your coffee is ready when you are.
- Keep Warm Plate: Keeps your coffee warm for up to 60 minutes after brewing.
- User-Friendly Interface: An intuitive LED display and digital clock make operation simple.
Capacity
The 10-cup glass carafe makes this machine perfect for households or small gatherings.
Maintenance
Includes a descaling indicator light, simplifying maintenance and ensuring consistent performance.
- Smeg Fully-Automatic Coffee Machine (Model BCC02)
Design
Compact and sleek, the BCC02 maintains Smeg’s signature retro appeal while saving counter space.
Functionality
- Built-In Grinder: Enjoy the rich flavors of freshly ground beans for every cup.
- Thermoblock Heating System: Ensures precise water temperature and rapid coffee preparation.
- 19-Bar Pressure Pump: Delivers authentic espresso with a rich crema.
- Milk Frothing: The stainless steel steam wand creates creamy foam for lattes, cappuccinos, and more.
Beverage Options
Offers six coffee drinks, including espresso, Americano, and ristretto, along with hot water and steam functions for added versatility.
Maintenance
The removable brewing unit and water tank make cleaning simple and hassle-free.
- Smeg Built-In Coffee Machines
Integration
Designed for seamless kitchen setups, Smeg’s built-in coffee machines fit perfectly with other Smeg appliances for a cohesive look.
Features
- Beverage Variety: Prepare up to 13 different drinks, from espressos to cappuccinos and Americanos.
- Customization: Use either whole beans or pre-ground coffee to suit your preference.
Considerations for Potential Buyers
Aesthetic Appeal vs. Functionality
Smeg coffee makers are celebrated for their retro design, but they may lack some advanced features offered by competitors. For example, the DCF02 is great for drip coffee lovers but does not include a built-in grinder or temperature controls.
Price Point
Smeg coffee machines are often priced at a premium due to their iconic design and brand reputation. Consider whether their aesthetic value aligns with your budget and brewing needs.
Maintenance Needs
Certain models, like the DCF02, may require frequent descaling, particularly in areas with hard water.
How To Diagnose a Nespresso That Won’t Pump Water
Anyone who loves their morning coffee ritual knows the frustration of a Nespresso machine refusing to pump water. You press the button, hoping for that perfect espresso shot, but instead, you’re met with silence. Luckily, this is a common problem with several easy solutions, and you often don’t need to reach out to Nespresso’s customer service right away. By troubleshooting the issue yourself, you can save time and money, and get back to enjoying your favorite brew in no time.
Use Our Diagnostic Tool
Common Reasons Your Nespresso Isn’t Pumping Water
Understanding why your Nespresso isn’t pumping water helps you tackle the issue more effectively. Common reasons include:
- Airlocks: Air bubbles can block water flow, often after the machine hasn’t been used for a while.
- Insufficient Water: The water reservoir might be inadequately filled or improperly seated.
- Clogged or Dirty Lines: Minerals and coffee residue buildup can obstruct the flow.
- Technical Glitches: Software issues or incorrect settings may interfere with normal operations.

How to Fix a Nespresso Machine That Isn’t Pumping Water
Click here for the simple solution to your Nespresso fast
Step 1: Check the Water Reservoir
- Ensure your water tank is full.
- Confirm it’s properly seated.
- Tip: If you suspect an air bubble, remove and reinsert the tank several times.
Step 2: Fixing Airlock Issues
Method 1: Lift and Lower Technique
- Fill the reservoir with hot water.
- Insert and remove it repeatedly (4-5 times).
- This action helps release trapped air.
Method 2: Clearing the Inlet Valve
- Fill the reservoir with warm water.
- Use a straw or syringe to gently push water into the inlet valve, dislodging trapped air.
Step 3: Run a Cleaning Cycle
- Use hot water in the reservoir.
- Perform the machine’s standard cleaning or rinsing cycle to remove mineral deposits or coffee residue.
Step 4: Advanced Troubleshooting
Descaling Your Machine
- Hard water can cause internal buildup.
- Follow Nespresso’s recommended descaling process using the appropriate descaling solution.
Factory Reset (for certain models)
- Consult your Nespresso manual to find out if your machine supports factory resets, which can resolve minor software issues.
When to Call Nespresso Customer Service
If these troubleshooting steps fail, it may be time to contact Nespresso support. Persistent water flow issues could indicate internal pump problems requiring professional servicing.
Frequently Asked Questions (FAQs)
Why is my Nespresso making noise but not pumping water?
- The pump might be blocked by air bubbles or residue. Run cleaning cycles and check for airlocks.
How do I prime the pump on my Nespresso?
- Fill the reservoir, run the machine several times without a capsule, and remove/reinsert the reservoir to remove airlocks.
How often should I descale my Nespresso?
- Every three months or after approximately 300 capsules, depending on your water hardness.
Can a factory reset fix water pumping issues?
- Yes, a reset can help with software glitches that affect water flow, especially if incorrect settings were accidentally activated.
Tips for Preventing Future Issues
- Regular Maintenance: Run cleaning cycles weekly and descale quarterly.
- Keep Water Reservoir Filled: Regularly checking and refilling prevents airlock formation.
With these simple solutions, you can quickly restore your Nespresso’s water pump functionality, ensuring your daily espresso fix remains uninterrupted.
Fruit Flies in Coffee Maker
If your coffee machine has fruit flies around it, chances are that pleasant experience is marred by a swarm of tiny, gross fruit flies hovering in your face. It’s an all-too-common problem, but don’t fret! We’re here to help you reclaim your coffee haven and banish those pesky fruit flies for good. And if you’re not just trying to play catch-up on your cleaning, but want to get ahead of it, Here’s How to Clean (and Upgrade) Your Coffee Station
Why Are Fruit Flies Attracted to Coffee Makers?
Fruit flies, those tiny, winged nuisances, are drawn to a few key elements often found in and around coffee makers:
- Moisture: The damp environment inside a coffee maker, especially after brewing, is a prime breeding ground for fruit flies.
- Coffee Grounds Residue: Leftover coffee grounds can provide food for these pests.
- Sweetness: Any lingering sweetness from flavored coffee or sweeteners can also attract fruit flies.
Understanding what lures them is the first step to effectively eliminating and preventing infestations.

Solutions to Get Rid of Fruit Flies in Your Coffee Maker
Ready to evict those unwanted guests? Here’s how:
Deep Cleaning:
A thorough cleaning removes any attractants and eliminates existing eggs or larvae.
- Vinegar-Water Solution Cycle: Mix equal parts white vinegar and water. Fill the reservoir with the solution and run a brew cycle.
- Water Rinse Cycle: Run a second cycle with just water to rinse away any vinegar residue.
- Disassemble and Clean: If possible, disassemble the coffee maker’s removable parts, such as the carafe, filter basket, and water reservoir lid. Wash these parts thoroughly with hot, soapy water.
- Wipe: Use a damp microfiber cloth to clean the outside of the coffee maker, including the warming plate and surrounding countertop areas.
Products to help you: coffee machine cleaning tablets or powders, vinegar, a long-handled bottle brush, and microfiber cloths.
Here’s How to Clean (and Upgrade) Your Coffee Station
Trapping:
Traps are a great way to capture adult fruit flies, preventing them from reproducing and further infesting your kitchen.
- DIY Trap: Fill a small jar or bowl with apple cider vinegar and dish soap. Cover with Seran wrap and poke a few small holes in the top. The flies will naturally be attracted to the vinegar and trapped in the soapy solution.
- Store-Bought Traps: Alternatively, you can purchase ready-made fruit fly traps from your local hardware or grocery store.
Products to help you: Apple cider vinegar, dish soap, store-bought fruit fly traps.
Prevention is Key
Once you’ve killed or removed the fruit flies, prevent them from returning.
- Cleaning: Clean the maker regularly, especially after brewing flavored coffees or using sweeteners.
- Storage: Store coffee in an airtight container to minimize their appeal to fruit flies.
- Kitchen Hygiene: Keep the kitchen clean and store ripe fruits in the refrigerator.
Products to help you: Airtight coffee canister.