matt
Terra Kaffe TK-02 Problems: Common Issues, Error Codes, and What to Do
The Terra Kaffe TK-02 is a $1,595 super-automatic espresso machine that’s been heavily marketed through Instagram influencers and lifestyle publications. The machine looks great and promises one-touch convenience. But owner reports — from Amazon reviews, Reddit threads, Better Business Bureau complaints, and independent review platforms — tell a more complicated story.
This guide documents the most commonly reported TK-02 problems, explains what each error code means, and outlines your options when things go wrong.
The Most Commonly Reported TK-02 Problems
CB_RESET and System Error Messages
The CB_RESET error is the most frequently reported TK-02 issue. Owners describe the machine displaying this message and becoming unresponsive, sometimes within weeks or even days of purchase. The error typically indicates a communication failure between the machine’s control board and its mechanical components.
What you can try: Unplug the machine for 30 seconds, then plug it back in. Remove and reseat the water tank and drip tray. If the machine has WiFi connectivity, try disconnecting and reconnecting it. If the CB_RESET error persists after a full power cycle, it’s likely a hardware issue that requires contacting Terra Kaffe support.
Grinder Malfunction
Multiple owners report the grinder jamming, making grinding noises without producing grounds, or grinding inconsistently. Some report this happening within the first few weeks of use. Unlike machines from established brands like DeLonghi or Jura, the TK-02’s grinder cannot be easily accessed for cleaning or unjamming by the owner.
What you can try: Run the grinder purge cycle if your machine’s software offers one. Try switching to a different bean — very oily dark roasts can gum up any super-automatic grinder, but the TK-02 seems particularly sensitive to this. Beyond that, grinder issues typically require manufacturer support.
Water Tank Error or “Fill Water” When Tank Is Full
Some owners report the machine repeatedly displaying water-related errors even when the tank is full and properly seated. This suggests a sensor issue — either the water level sensor is malfunctioning or the tank isn’t making proper contact with the machine’s detection mechanism.
What you can try: Remove the water tank, dry the contact points on both the tank and the machine, and reseat firmly. Try using filtered or bottled water to rule out mineral buildup on sensors. If the problem persists, it’s a warranty issue.
Touchscreen Glitches and Freezing
The TK-02’s touchscreen interface has been reported to freeze, become unresponsive, or display garbled information. Some owners report the screen going completely black while the machine continues running.
What you can try: A full power cycle (unplug for 60 seconds) sometimes resolves screen freezes. If your machine is connected to WiFi, check whether a firmware update is available through the Terra Kaffe app. Persistent screen issues are a hardware problem requiring manufacturer service.
Milk Frother Problems
Reports of weak or inconsistent milk frothing, the milk system not drawing milk properly, and milk residue building up in areas that are difficult to clean. The TK-02’s milk system requires thorough cleaning after every use to prevent bacterial growth and clogging.
What you can try: Run the milk system cleaning cycle after every milk-based drink. Disassemble every removable milk component and soak in warm water weekly. If frothing power has degraded, mineral buildup in the steam system may be the cause — run a full descaling cycle.
Body Cracking and Physical Defects
A smaller but notable number of owners report physical cracking of the machine’s body, particularly around areas that experience thermal cycling (repeated heating and cooling). This suggests potential material quality issues in the housing.
What the BBB Complaints Reveal
Terra Kaffe has accumulated a significant number of Better Business Bureau complaints relative to its market presence. Common themes across BBB complaints include machines failing within days or weeks of delivery, slow customer service response times (email-only support with multi-day delays), difficulty obtaining replacements or refunds, and replacement machines developing the same issues.
This pattern is worth noting because BBB complaints tend to represent a fraction of total customer issues — most dissatisfied customers simply leave Amazon reviews or post on Reddit rather than filing formal complaints.
The Bigger Concern: No Repair Ecosystem
When a DeLonghi Magnifica or Jura E8 breaks, you have options: independent repair shops, third-party parts suppliers, iFixit guides, and active forum communities. When a Terra Kaffe TK-02 breaks, your only option is Terra Kaffe’s customer support team.
There are no independent repair shops that service Terra Kaffe machines. There are no third-party parts suppliers. There’s no repair community or DIY documentation. The machine hasn’t been on the market long enough for a support ecosystem to develop, and its DTC (direct-to-consumer) distribution model means traditional espresso repair shops have no relationship with the brand.
This matters because it means your repair cost is effectively binary: either Terra Kaffe fixes it under warranty, or you have a $1,595 paperweight. There’s no middle ground of affordable independent repair that exists for virtually every other brand. Understanding how brew group design affects long-term serviceability is essential context for anyone comparing the TK-02 against established competitors.
Terra Kaffe TK-02 Warranty Details
The TK-02 comes with a 2-year warranty (the original TK-01 had a shorter 1-year/3,000-brew warranty). Key things to know about the warranty: it covers manufacturing defects and mechanical failures under normal use, damage from using oily beans may not be covered, the warranty requires proof of purchase, and service is handled entirely through Terra Kaffe’s support email.
Some owners report that Terra Kaffe offers extended warranty or replacement options if you’re on their bean subscription program, but the specific terms appear to vary.
Is the TK-02 Worth Buying?
The Terra Kaffe TK-02 is a visually striking machine with genuine convenience features, including WiFi connectivity and a clean touchscreen interface. For owners whose machines work reliably, the experience is often positive.
However, the pattern of early-life failures, the absence of any repair infrastructure, and the higher-than-average complaint rate compared to established brands represent real risks at the $1,595 price point. At this price, you’re in the range of a DeLonghi Eletta Explore ($1,699) or a mid-range Jura, both of which come with decades of repair infrastructure, abundant parts availability, and well-documented troubleshooting resources.
If reliability, long-term serviceability, and predictable repair costs are priorities, established brands currently offer a more proven ownership experience. If you’ve already purchased a TK-02 and it’s working well, aggressive preventive maintenance — especially cleaning the milk system daily and avoiding oily beans — is your best strategy for keeping it running. And if your machine is experiencing issues, filing a warranty claim sooner rather than later is critical, since your options outside warranty are extremely limited.
For a deeper look at how the TK-02’s ownership costs compare to established alternatives over 3–5 years, watch for our upcoming total cost of ownership comparison.
Removable vs Non-Removable Brew Group: Why This One Feature Determines Your 5-Year Repair Bill
If you’re shopping for a super-automatic espresso machine, you’ll compare grinders, milk systems, touchscreens, and drink options. But there’s one feature that matters more than all of those for long-term ownership — and most review sites never mention it.
It’s whether the brew group is removable or sealed inside the machine.
This single design choice determines whether you can maintain the machine yourself or need to pay a professional $300–$850 every time something goes wrong. Over 5 years of ownership, this difference can add up to $1,000 or more in repair costs.
What Is a Brew Group?
The brew group (also called the brew unit or infuser) is the heart of every super-automatic espresso machine. It’s the mechanism that receives ground coffee from the grinder, compresses it into a puck, forces hot water through it under pressure, and then ejects the used grounds into the waste container. Every single cup passes through the brew group, making it the component that wears fastest and needs the most maintenance.
Removable Brew Group: What It Means for You
A removable brew group slides out of the machine through a service door, usually on the side. Once removed, you can rinse it under warm water, clean coffee residue from the seals and pistons, apply food-safe lubricant to the O-rings, inspect for wear, and replace worn parts yourself.
This matters because brew group maintenance is the single most frequent service need on any super-automatic machine. With a removable unit, this becomes a 5-minute task you do weekly — not a $300+ shop visit you schedule annually.
Brands With Removable Brew Groups
| Brand | Models | Notes |
|---|---|---|
| DeLonghi | All ECAM, ESAM, and Dinamica models | Simple slide-out design, widely praised |
| Philips | All 800, 1200, 2200, 3200, 3300, 4300, 5400, 5500 series | Same mechanism as Saeco (Philips owns Saeco) |
| Saeco | All consumer models (Xelsis, PicoBaristo, etc.) | Same platform as Philips |
| Gaggia | Super-automatic models (Cadorna, Accademia, Brera) | Shared Saeco/Philips platform |
| Melitta | All consumer super-automatics | Less common in the US but removable |
Non-Removable (Sealed) Brew Group: What It Means for You
A sealed brew group is permanently installed inside the machine. You cannot access it without specialized tools — and in some cases, without proprietary screwdrivers designed specifically to prevent owner access (Jura’s oval-head screws are the most well-known example).
With a sealed brew group, your maintenance options are limited to running the machine’s built-in automated cleaning cycle and using manufacturer-specified cleaning tablets. You cannot visually inspect the brew group, manually clean accumulated coffee oils, check O-ring condition, apply lubricant, or replace worn seals yourself.
When the sealed brew group eventually needs service — and it will — you’re looking at a professional shop visit. For Jura machines specifically, this typically costs $380–$850 per service event.
Brands With Sealed/Non-Removable Brew Groups
| Brand | Models | Notes |
|---|---|---|
| Jura | All models (ENA, E-line, S-line, J-line, Z-line, GIGA) | Proprietary screws prevent access; requires special tool to open |
| Miele | All built-in and countertop models | Designed for professional in-home service |
| Krups | Most super-automatic models | Sealed design with limited parts availability |
| Terra Kaffe | TK-01 and TK-02 | No repair ecosystem exists; see our TK-02 problems guide |
The Real Cost Difference Over 5 Years
Here’s where the math gets compelling. A typical super-automatic machine needs brew group maintenance at least once a year for optimal performance. More realistically, the brew group needs attention every 6–12 months depending on usage volume.
| Scenario | Removable Brew Group (DIY) | Sealed Brew Group (Professional) |
|---|---|---|
| Annual maintenance cost | $10–$30 (O-rings, lube, DIY) | $380–$850 (professional service) |
| 5-year maintenance total | $50–$150 | $760–$1,700+ |
| Owner time investment | 5 min/week rinsing, 30 min/year rebuild | 1–3 weeks without machine during service |
| Downtime risk | None (you have the unit in hand) | Ship-out required for many brands |
The 5-year maintenance difference between a removable and sealed brew group can easily exceed the purchase price difference between mid-range and premium machines. A $650 DeLonghi Magnifica Evo with $150 in 5-year DIY maintenance costs less to own than a $2,800 Jura E8 even before you factor in the Jura’s $760–$1,700 in professional service costs.
But Jura Says Their Machines Are “Self-Cleaning”
Jura markets their sealed brew group as an advantage, positioning the automated cleaning cycle as sufficient maintenance. Their machines do run cleaning tablets and rinse cycles automatically, and this is genuinely convenient.
But automated cleaning has limits. It can’t remove physically trapped coffee grounds from behind seals. It can’t address O-ring degradation. It can’t clear mechanical binding from dried coffee oils. These issues accumulate over time regardless of how faithfully you run cleaning cycles — and when they reach a tipping point, professional service is your only option.
Think of it like a car with a sealed transmission versus one with a serviceable transmission. Both work fine initially, but when maintenance is eventually needed, one gives you options and the other gives you a large bill.
What About Semi-Automatic Machines?
Semi-automatic espresso machines (Breville, Gaggia Classic, Rancilio Silvia, and all E61 group head machines) don’t have brew groups in the super-automatic sense. Instead, they use a portafilter and group head design where the user manually loads ground coffee. Maintenance involves replacing the group gasket ($5–$15), cleaning the shower screen, and backflushing — all simple DIY tasks.
From a serviceability standpoint, semi-automatics are inherently more owner-friendly than any super-automatic, sealed or removable. If long-term repairability is your top priority, a machine like the Gaggia Classic Pro or Rancilio Silvia — with their simple, standardized components — offers the lowest possible lifetime repair costs.
Bottom Line: Check the Brew Group Before You Buy
Before spending $500–$5,000 on a super-automatic espresso machine, ask one question first: can I remove the brew group? If the answer is yes, you’re buying a machine you can maintain yourself for years. If the answer is no, you’re committing to professional service costs that will significantly increase your total cost of ownership.
Neither design is inherently bad — Jura makes excellent espresso and many owners happily pay for professional service. But you should make that commitment with your eyes open, not discover it after your first $500 repair bill.
DeLonghi Red Triangle Warning Light: What Every Error Symbol Means and How to Fix It
You walk up to your DeLonghi Magnifica, press the button for your morning espresso, and instead of coffee you get a blinking red triangle. No coffee. No explanation. Just a triangle.
DeLonghi owners call this the “red triangle of doom,” and it’s the single most common issue reported across the entire Magnifica, Dinamica, and Eletta lineup. The good news: most causes are fixable at home in under 10 minutes. This guide covers every trigger, organized from most common to least, with step-by-step fixes for each.
What the Red Triangle Actually Means
The red warning triangle on DeLonghi super-automatic machines is a general alert indicator — it doesn’t point to one specific problem. Think of it as the machine saying “something needs attention” rather than telling you exactly what’s wrong. The cause depends on which other lights are flashing alongside it and what the machine was doing when the warning appeared.
Most Common Causes (Fix These First)
1. The Brew Group Isn’t Seated Properly
This is the #1 cause and the easiest fix. DeLonghi super-automatics have a removable brew group that slides out for cleaning. If it’s not fully clicked back into position, the machine throws the red triangle.
To fix it: Open the service door on the side of the machine. Remove the brew group by pressing the release button and sliding it out. Check for any coffee grounds jamming the rails. Reinsert it firmly until you hear and feel a definitive click. Close the door and restart the machine.
If you haven’t cleaned the brew group recently, rinse it under warm water (no soap), let it air dry, and reinsert. A dirty or sticky brew group is the most common reason it won’t seat properly.
2. The Brew Group Is Jammed
If the brew group won’t slide out at all, it’s likely jammed in a mid-cycle position. This typically happens after a power interruption during brewing, or when grounds build up and block the mechanism.
To fix it: Unplug the machine. Open the service door. Try gently rocking the brew group back and forth while pressing the release. If it’s truly stuck, you may need to manually rotate the drive gear at the back of the brew group compartment to reset its position. There’s usually a small notch or opening where you can reach the gear mechanism.
If jamming happens repeatedly, the brew group O-rings likely need lubrication or replacement — a $10–$20 DIY job. Ongoing brew group issues are one of the most common espresso machine repairs, but on DeLonghi machines, they’re almost always owner-serviceable.
3. The Water Tank Needs Attention
The red triangle also appears when the water tank is empty, improperly seated, or when the machine can’t detect water. Remove the tank, refill it with fresh water, and reseat it firmly. Make sure the valve at the bottom of the tank isn’t blocked by mineral buildup.
If you use a DeLonghi water filter, check that it’s installed correctly and hasn’t expired. An improperly seated filter can create an air lock that prevents water flow.
4. The Drip Tray or Grounds Container Is Full
Both the drip tray and the used grounds container have sensors. If either is full — or removed — the red triangle activates. Empty both, wipe the sensors clean (they’re usually small float switches or contact points), and reinsert.
A less obvious cause: if you empty the grounds container while the machine is off, it may not register the reset. Empty it while the machine is on so the counter resets properly.
Less Common Causes
5. Descaling Required
When the descale indicator illuminates alongside the red triangle, the machine needs descaling. DeLonghi’s automatic descaling cycle takes about 30 minutes. Use DeLonghi’s EcoDecalk solution or a citric acid descaler — never vinegar, as it can damage internal seals and leave residual taste.
If you’ve descaled but the light won’t clear, you may need to run the descale cycle again. Some models require completing the full programmed cycle (not just running water through) for the indicator to reset.
6. Internal Blockage or Grounds Clogging
If grounds are packing too tightly or the coffee funnel (the chute between the grinder and brew group) is clogged, the machine will error out. Remove the brew group and look up into the funnel area inside the machine. If you see compacted grounds, use a long brush or wooden skewer to clear the blockage.
This issue is more common when using oily, dark roast beans. Super-automatic grinders aren’t designed for heavily oiled beans — the oils gum up the burrs and cause grounds to clump. Switching to a medium roast often resolves recurring clogs.
7. The Infuser Is Worn Out
After several thousand cycles, the brew group’s internal seals and pistons wear down. Symptoms include the red triangle appearing during brewing, weak or watery espresso, and visible water leaking from the brew group. A rebuild kit (new O-rings, piston, and seals) costs $15–$30 and takes about 30 minutes to install. DeLonghi-specific kits are widely available on Amazon and from specialty retailers.
When the Red Triangle Means Something Serious
8. Pump Failure
If you hear the pump running but no water flows, or if the pump makes a loud buzzing/humming noise without producing pressure, the pump may be failing. This is less common (typically after 5+ years of heavy use) and is one of the few DeLonghi issues that usually requires professional service. Expect $100–$175 for a professional pump replacement. See our complete repair cost guide for more detail.
9. Control Board Failure
The rarest cause. If the red triangle flashes in an unusual pattern, multiple unrelated indicators light up simultaneously, or the machine behaves erratically (starting and stopping, cycling through programs on its own), the main control board may have failed. This typically costs $200–$400 to replace professionally. At this point, it’s worth running the numbers on whether repair or replacement makes more financial sense.
How to Prevent the Red Triangle
Most red triangle events are preventable with basic maintenance. Remove and rinse the brew group under warm water every 1–2 weeks. Lubricate the brew group rails and O-rings with food-safe silicone grease monthly. Empty the grounds container before it’s completely full. Use filtered water and descale on schedule. Avoid oily, dark roast beans — medium roasts work best in super-automatics.
If you’re comparing DeLonghi’s maintenance requirements against other brands, the removable brew group is actually a major advantage. Machines with sealed brew groups (like Jura) can’t be maintained this way at all — learn why this matters for long-term ownership.
Espresso Machine Repair Cost: Complete Price Guide by Brand and Issue
Espresso machines are built to last, but eventually something will need fixing. Whether it’s a worn brew group gasket, a failed pump, or a dead control board, repair costs vary wildly depending on the brand, the issue, and whether you’re paying a shop or doing it yourself.
This guide breaks down what you’ll actually pay — by brand, by repair type, and by DIY vs. professional service — so you can make an informed decision before you hand over your machine or your credit card.
Quick Overview: What Espresso Machine Repairs Actually Cost
Before diving into the details, here’s the reality: most espresso machine repairs fall between $75 and $500 when done professionally. But certain brands and certain failures can push that number much higher — and many common repairs can be done at home for under $50 in parts.
| Repair Type | Professional Cost | DIY Parts Only | Difficulty |
|---|---|---|---|
| Brew group rebuild (O-rings, seals) | $150–$350 | $20–$50 | Moderate |
| Grinder burr replacement | $100–$250 | $30–$80 | Moderate–Hard |
| Pump replacement | $100–$200 | $25–$60 | Moderate |
| Thermoblock or boiler repair | $200–$400 | $80–$250 | Hard |
| Electronic control board | $200–$500 | $100–$300 | Hard |
| Solenoid valve replacement | $100–$200 | $30–$80 | Moderate |
| Group gasket and shower screen (semi-auto) | $15–$40 | $5–$15 | Easy |
| Descaling (professional) | $50–$100 | $5–$15 | Easy |
Repair Costs by Brand
Not all brands are created equal when it comes to repair costs. The biggest factor isn’t the complexity of the repair — it’s whether the manufacturer makes parts available and whether independent shops can work on the machine.
Jura Repair Costs: $380–$850 Per Service Event
Jura machines are among the most expensive to repair. The machines use a sealed, non-removable brew group and proprietary oval-head screws specifically designed to prevent owner access. Most independent repair shops charge a flat labor rate of $300–$350 plus parts. A typical Jura service event — which often includes brew group rebuilding, drainage valve replacement, and O-ring refresh — runs $380–$850 depending on the model and what’s needed.
Specialized Jura repair shops like ACM Repair Services and Jura-Parts.com are among the few third-party options. Jura’s own service centers exist but tend to be slower and similarly priced.
If you own a Jura and want to understand whether repair makes sense at these prices, our guide on deciding whether to fix or replace your espresso machine walks through the math.
DeLonghi Repair Costs: $75–$300
DeLonghi super-automatic machines are significantly cheaper to repair than Jura for one key reason: the brew group is removable. Owners can rinse, lubricate, and replace O-rings themselves for $10–$30 in parts. When professional service is needed, independent shops readily service DeLonghi machines because parts are abundant and affordable.
Common DeLonghi repairs include infuser rebuild ($75–$150 professional, $15–$30 DIY), pump replacement ($100–$175), and grinder calibration ($50–$100). The DeLonghi red triangle warning light is the most common issue owners face, and it’s often fixable without professional help.
Breville Repair Costs: $100–$400
Breville semi-automatic machines like the Barista Express fall in the middle. The most common failure — solenoid valve replacement — runs $100–$200 professionally or $40–$80 in parts for DIY. Breville sells some replacement parts directly through their website and through Fix.com, but availability can be inconsistent for older models.
The Breville Oracle series is notably more expensive to repair due to its automated grinding and tamping systems. Control board failures on the Oracle can run $300–$500.
Gaggia Classic and Rancilio Silvia: $30–$150
These semi-automatic workhorses are the cheapest machines to repair in the espresso world. Both use standardized components, have massive parts ecosystems, and are designed for owner serviceability. A complete annual maintenance kit (gaskets, shower screen, backflush disc) costs $15–$30. Even major repairs like pump replacement rarely exceed $150 professionally because parts are cheap and labor is straightforward.
E61 Group Head Machines (Rocket, Profitec, Lelit, ECM): $50–$300
Machines built around the E61 group head — a design standard since 1961 — benefit from universal parts interchangeability across brands. Gaskets, shower screens, cam levers, and even complete group assemblies are available from dozens of suppliers. This makes E61 machines among the most future-proof purchases from a repair cost perspective.
Terra Kaffe: Unknown and Concerning
Terra Kaffe is a relatively new DTC brand with no established repair ecosystem. There are no independent repair shops that service these machines, no third-party parts suppliers, and owner reports suggest slow email-only customer support. If your Terra Kaffe TK-02 develops problems, your options are essentially limited to warranty replacement or disposal.
The #1 Factor That Determines Your Repair Bill
More than brand prestige, more than machine price, the single biggest factor in repair costs is whether your machine has a removable or non-removable brew group.
Machines with removable brew groups (DeLonghi, Philips/Saeco, Gaggia super-automatics, Melitta) let you perform the most common maintenance tasks yourself: rinsing, lubricating, and replacing worn O-rings. This alone can save $150–$350 per service event compared to sealed-unit machines like Jura and Miele that require professional disassembly.
The Repair That Should Never Happen
The most expensive espresso machine repair — boiler failure from chloride damage — costs a minimum of $2,000 and is almost entirely preventable. Using proper water filtration (whether in-tank, in-line, or a simple pitcher filter) costs $20–$40 per year and dramatically extends your machine’s lifespan. Descaling on schedule is the second most important preventive measure.
If your water is particularly hard, the right machine and filter combination can make or break your ownership experience. We cover this in more detail in our upcoming guide to water treatment for espresso machines.
When Repair Doesn’t Make Sense
As a general rule, if a repair costs more than 50% of the machine’s current replacement value, replacement is usually the better financial decision — especially for machines older than 5 years. Budget machines under $300 (Ninja, Mr. Coffee, Cuisinart) are almost never worth repairing professionally because the labor cost alone exceeds replacement cost. For a detailed framework on this decision, see our fix-vs-replace decision guide.
Liquid I.V. vs. Coffee for Morning Energy: Which One Should You Reach For?
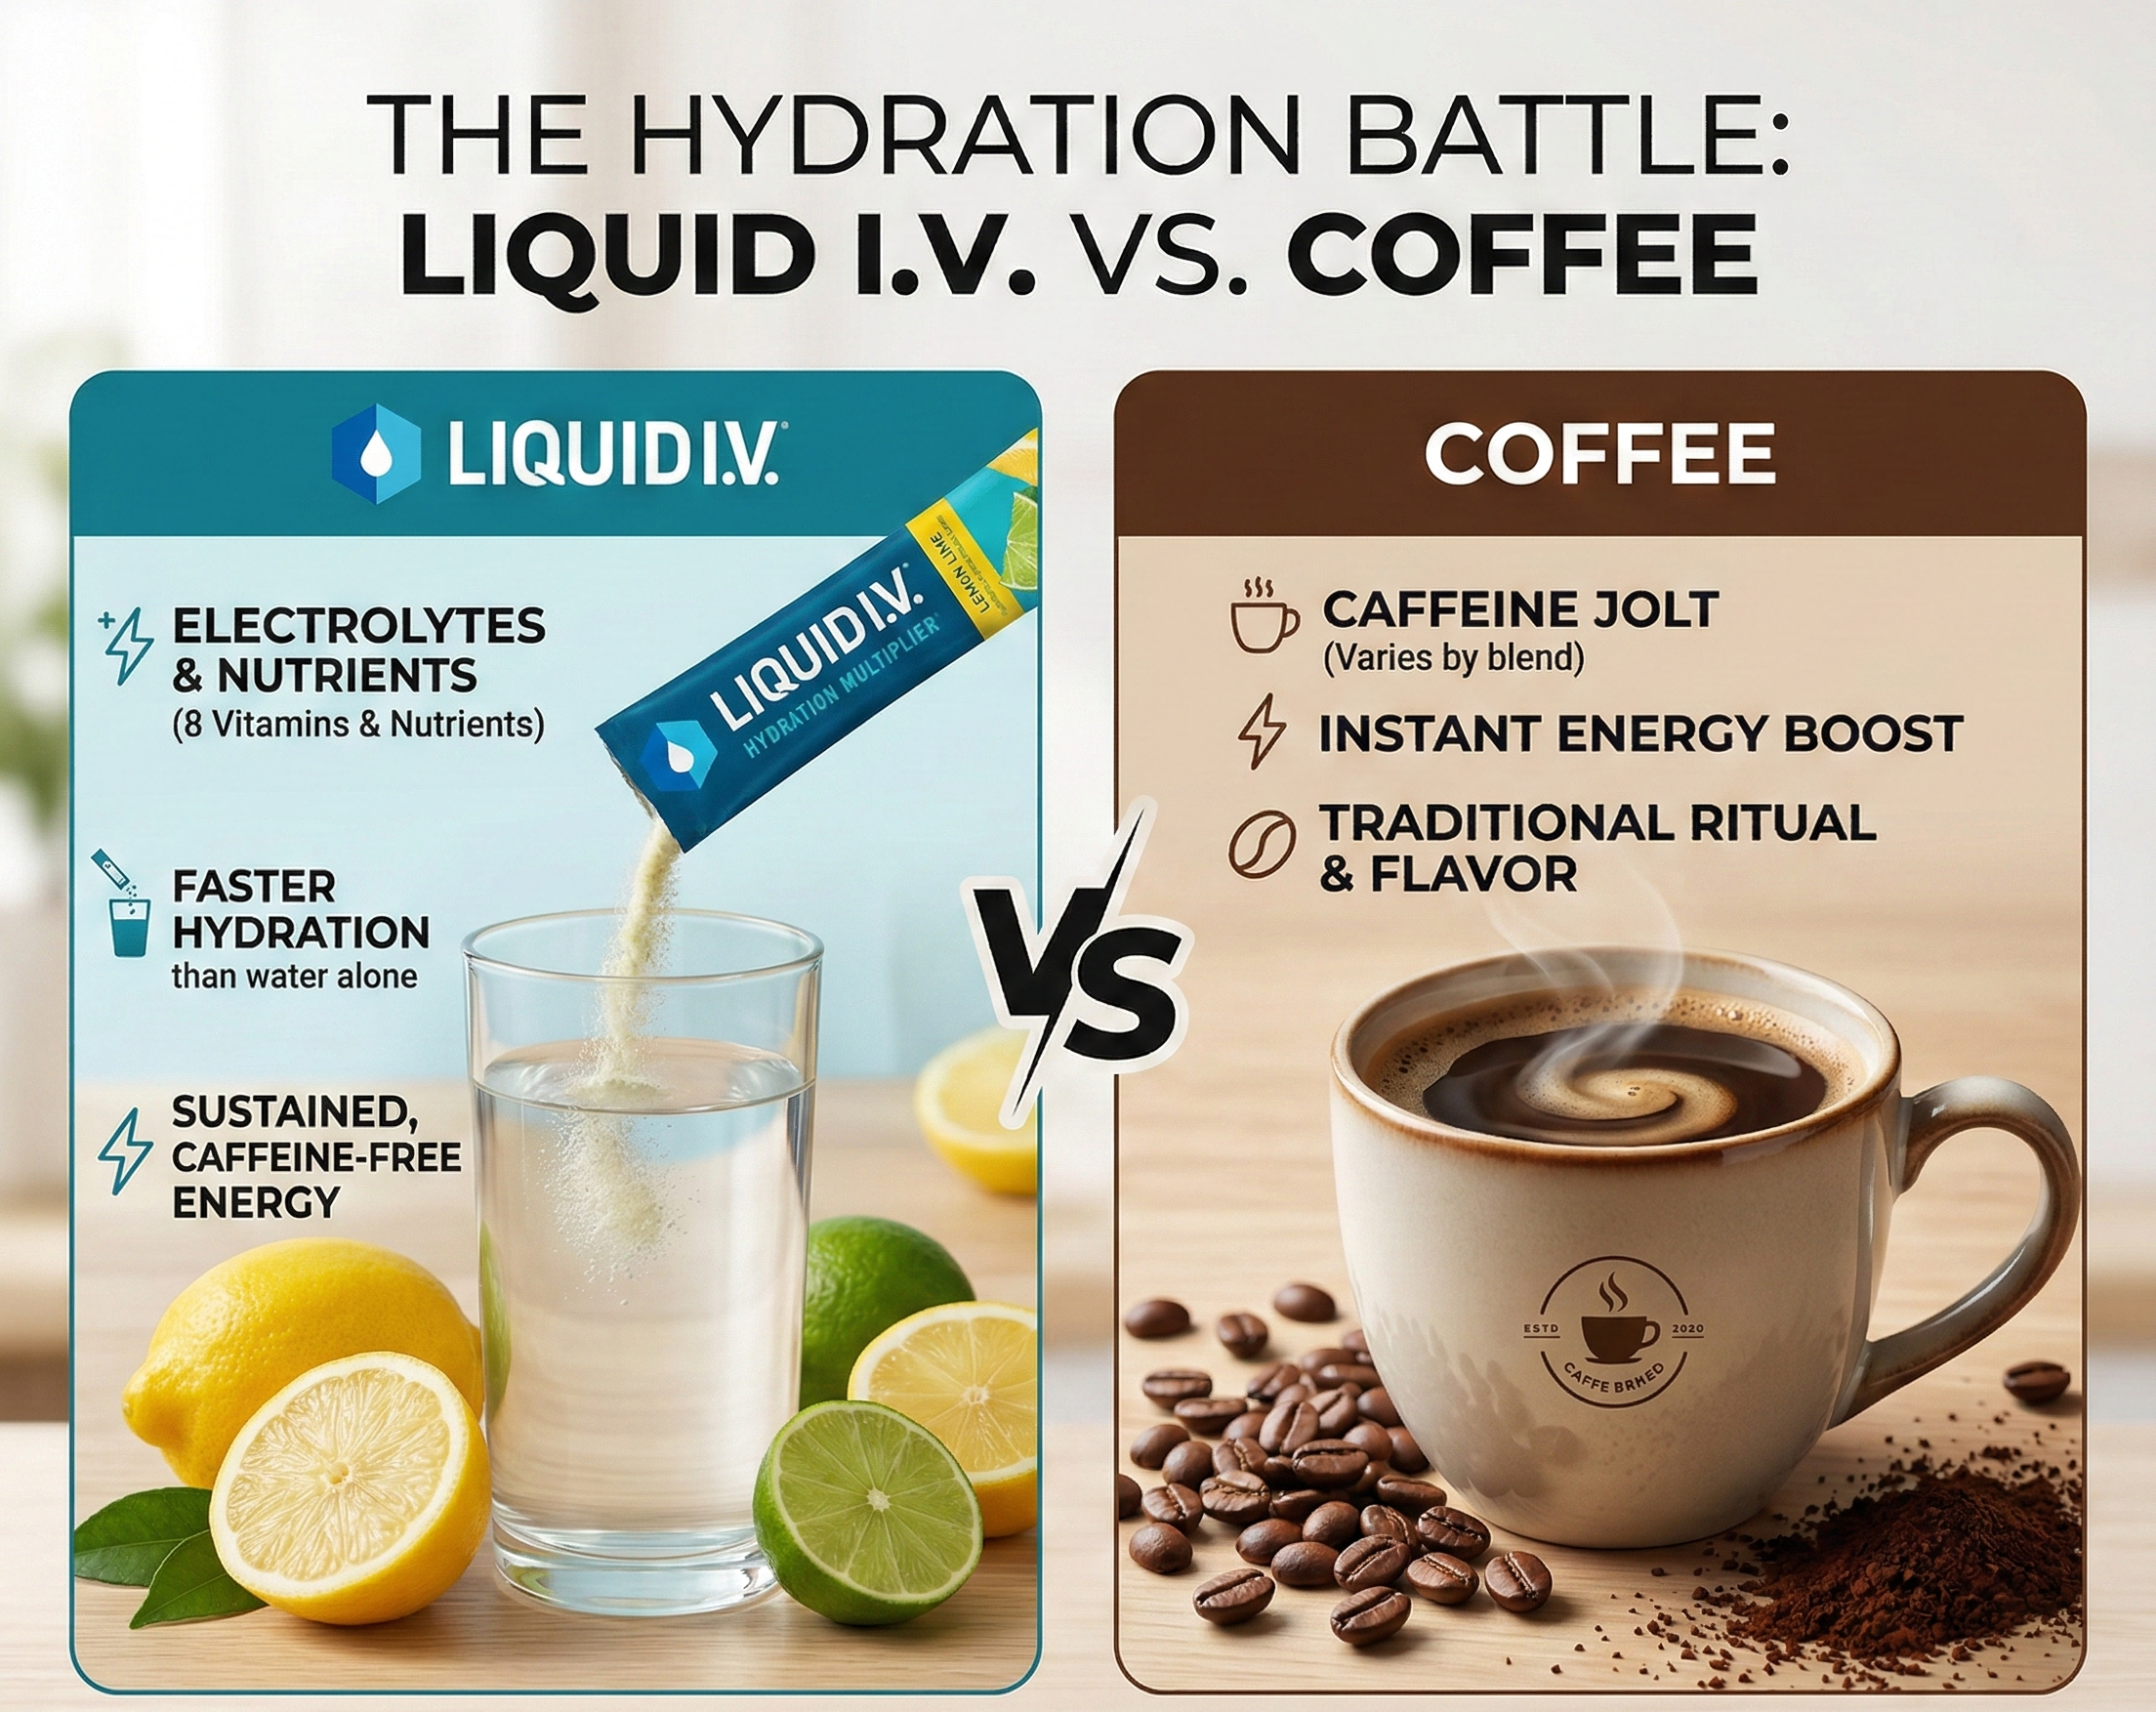
We’re a coffee site, so this might seem like a strange question for us to ask. But a lot of coffee drinkers are also reaching for Liquid I.V. these days — especially the Energy Multiplier, which packs 100mg of caffeine plus L-Theanine and electrolytes into a single packet. So let’s give this a fair comparison and settle when each one actually makes sense.
Short answer: they’re not really competitors. They serve different jobs. But if you want the longer answer — and when one genuinely wins over the other — keep reading.
New to Liquid I.V.? Our Liquid I.V. Complete Guide covers every product line, nutrition facts, and how to use it properly before you spend money on a box.
Caffeine: Closer Than You’d Think
The Liquid I.V. Energy Multiplier contains 100mg of natural caffeine per packet, sourced from Coffeeberry® extract (the fruit surrounding the coffee bean) in most flavors, or from Matcha and Guayusa in the Lemon Ginger variant. That’s roughly the equivalent of:
- An 8-oz cup of drip coffee (~95–100mg)
- Two standard espresso shots (~130–140mg combined — so actually slightly less)
- About 2.5x a standard green tea
So yes, a single Liquid I.V. Energy packet has meaningful caffeine — this isn’t a token amount. The new Sugar-Free Energy Multiplier (launched 2025) actually doubles down on the formula, pairing 100mg caffeine with 200mg L-Theanine and added magnesium for a more complete energy profile.
Your average medium-sized coffee from a café runs 150–250mg caffeine depending on how it’s brewed and what size you order. So if you drink a large coffee or multiple cups, Liquid I.V. has notably less caffeine per serving. That’s not necessarily a bad thing.
The Hydration Factor: Liquid I.V.’s Real Advantage
Coffee is a mild diuretic — the caffeine causes your kidneys to excrete slightly more water than usual. The effect is modest for habitual coffee drinkers whose bodies have adapted, but it’s real. Starting your morning with 2–3 cups of coffee on an empty stomach, after 7–8 hours of no fluids overnight, contributes to the mid-morning sluggishness a lot of people experience and wrongly blame on “needing more coffee.”
Liquid I.V. does the opposite. It uses a sodium-glucose co-transport mechanism (based on WHO oral rehydration science) to move water across your intestinal wall faster than plain water. A 2025 clinical study at the University of Memphis confirmed statistically significant improvements in net fluid balance compared to water alone at the 4-hour mark.
In plain terms: coffee energizes you; Liquid I.V. hydrates you. Those are related but genuinely different things. The dehydration that builds up overnight is real, and no amount of caffeine fixes it. It just masks the fatigue that dehydration causes.
How They Feel Different in Practice
Coffee delivers caffeine fast — most people feel the effect within 15–30 minutes of drinking it. The onset is clear, the energy is pronounced, and for many people it comes with a mild anxiety edge or heart rate increase, especially on an empty stomach.
The Liquid I.V. Energy Multiplier pairs caffeine with L-Theanine (100–200mg depending on the formula). L-Theanine is an amino acid found naturally in tea that promotes alpha brain wave activity — associated with calm focus without drowsiness. The combination of caffeine + L-Theanine is one of the most well-researched cognitive stacks in the supplement world. The result is a smoother, less spiky energy that most people describe as “focused and alert” rather than “wired.” You get the lift without as much of the jitteriness or crash.
The other difference is duration. Standard coffee caffeine peaks around 30–60 minutes and starts declining after 2–3 hours. The Energy Multiplier formula feels more sustained to most users, partly because the L-Theanine extends the useful portion of the caffeine curve and partly because rehydrating improves cognitive function on its own.
When Coffee Is the Better Call
You need a strong, fast hit of caffeine. If you’re tired and need to be functional in 20 minutes, a strong cup of coffee is still the fastest delivery vehicle for caffeine that actually tastes exceptional. No hydration powder competes with a well-made espresso for sheer pleasure and speed.
You’re already well hydrated. If you drink plenty of water, slept well, and are starting the day feeling fine, coffee is a great choice. The hydration advantage of Liquid I.V. is irrelevant if you’re not dehydrated.
Cost and convenience. A cup of home-brewed coffee costs pennies. A Liquid I.V. Energy packet runs $1.00–$1.56. Coffee wins economically unless you’re already buying specialty drinks.
You want ritual and flavor complexity. This one isn’t even close. Coffee has thousands of flavor profiles, brewing methods, origins, and preparation styles. Liquid I.V. Energy has four flavors. Coffee culture is irreplaceable for the people who care about it.
When Liquid I.V. Energy Wins
You wake up feeling dehydrated. If you wake up with a dry mouth, headache, or general grogginess — especially after alcohol, a late night, intense exercise the day before, or travel — Liquid I.V. addresses the actual cause of how you feel. Caffeine alone won’t fix dehydration-induced fatigue.
Afternoon slump without the sleep disruption. Coffee after 2pm can disrupt sleep for caffeine-sensitive people. The Energy Multiplier’s 100mg (versus 150–250mg in a large coffee) is a more measured afternoon dose that’s less likely to keep you up at 11pm.
Travel and no coffee access. Liquid I.V. packets are TSA-friendly, don’t require equipment, and dissolve in a water bottle. On long flights where the coffee is terrible, this is a genuinely useful alternative.
You don’t tolerate coffee well. Acid reflux, stomach sensitivity, anxiety, or heart palpitations from coffee are common complaints. Liquid I.V. Energy delivers caffeine from plant sources without the acidity or tannins that cause GI issues for many coffee drinkers.
You want jitter-free focus for creative or detail work. The L-Theanine combination consistently outperforms pure caffeine in tasks requiring sustained attention and reduced anxiety. Writers, designers, and developers often report preferring this combination over high-caffeine coffee for focused work sessions.
Can You Use Both? (Yes, and Here’s How)
The most practical approach for coffee people isn’t to choose — it’s to sequence them intentionally:
- Start with Liquid I.V. Hydration Multiplier (no caffeine) before your coffee. Mix a packet while your coffee brews. You rehydrate after overnight sleep, your coffee tastes better on a hydrated palate, and you don’t get the mid-morning crash that often comes from caffeine on an empty, dehydrated stomach.
- Use the Energy Multiplier as your afternoon option instead of a second coffee. You get enough caffeine to push through, the L-Theanine keeps it clean, and you’re less likely to disrupt evening sleep.
- Use the regular Hydration Multiplier as a post-workout or travel tool entirely separate from your coffee routine.
On a caffeine math note: if you have the Energy Multiplier (100mg) in the morning AND your usual coffee (150–200mg), you’re at 250–300mg total — still within the FDA’s generally recognized safe daily limit of 400mg, but something to be aware of if you’re caffeine-sensitive.
Verdict: Different Tools for Different Jobs
Coffee is better when you want a fast, strong, delicious caffeine experience and you’re already hydrated. Liquid I.V. Energy is better when you’re dehydrated and need sustained focus without jitters — and the non-caffeinated Hydration Multiplier is best for genuine rehydration situations that have nothing to do with caffeine at all.
As a coffee drinker, the best use of Liquid I.V. isn’t to replace your morning cup — it’s to make your whole day’s hydration better so your coffee actually hits the way it should.
If you want to know which Liquid I.V. flavors are worth trying, our full flavor ranking covers all 30+ options with honest reviews. And if you want the complete breakdown of every product line, nutrition facts, and pricing guide, that’s all in our Liquid I.V. Complete Guide.
Best Liquid I.V. Flavors Ranked (All 19+ Tested and Rated)
With nearly 30 flavors across the regular and sugar-free Hydration Multiplier lines alone, picking your first Liquid I.V. can feel like a coin flip. We’ve compiled ratings from professional taste reviewers, registered dietitians, and real consumer feedback to give you a clear answer on which flavors are actually worth buying — and which ones to avoid.
If you’re just getting started and want to understand the full lineup first, check out our Liquid I.V. Complete Guide for nutrition facts, product line breakdowns, and mixing tips.
Top Tier: Buy Without Hesitation
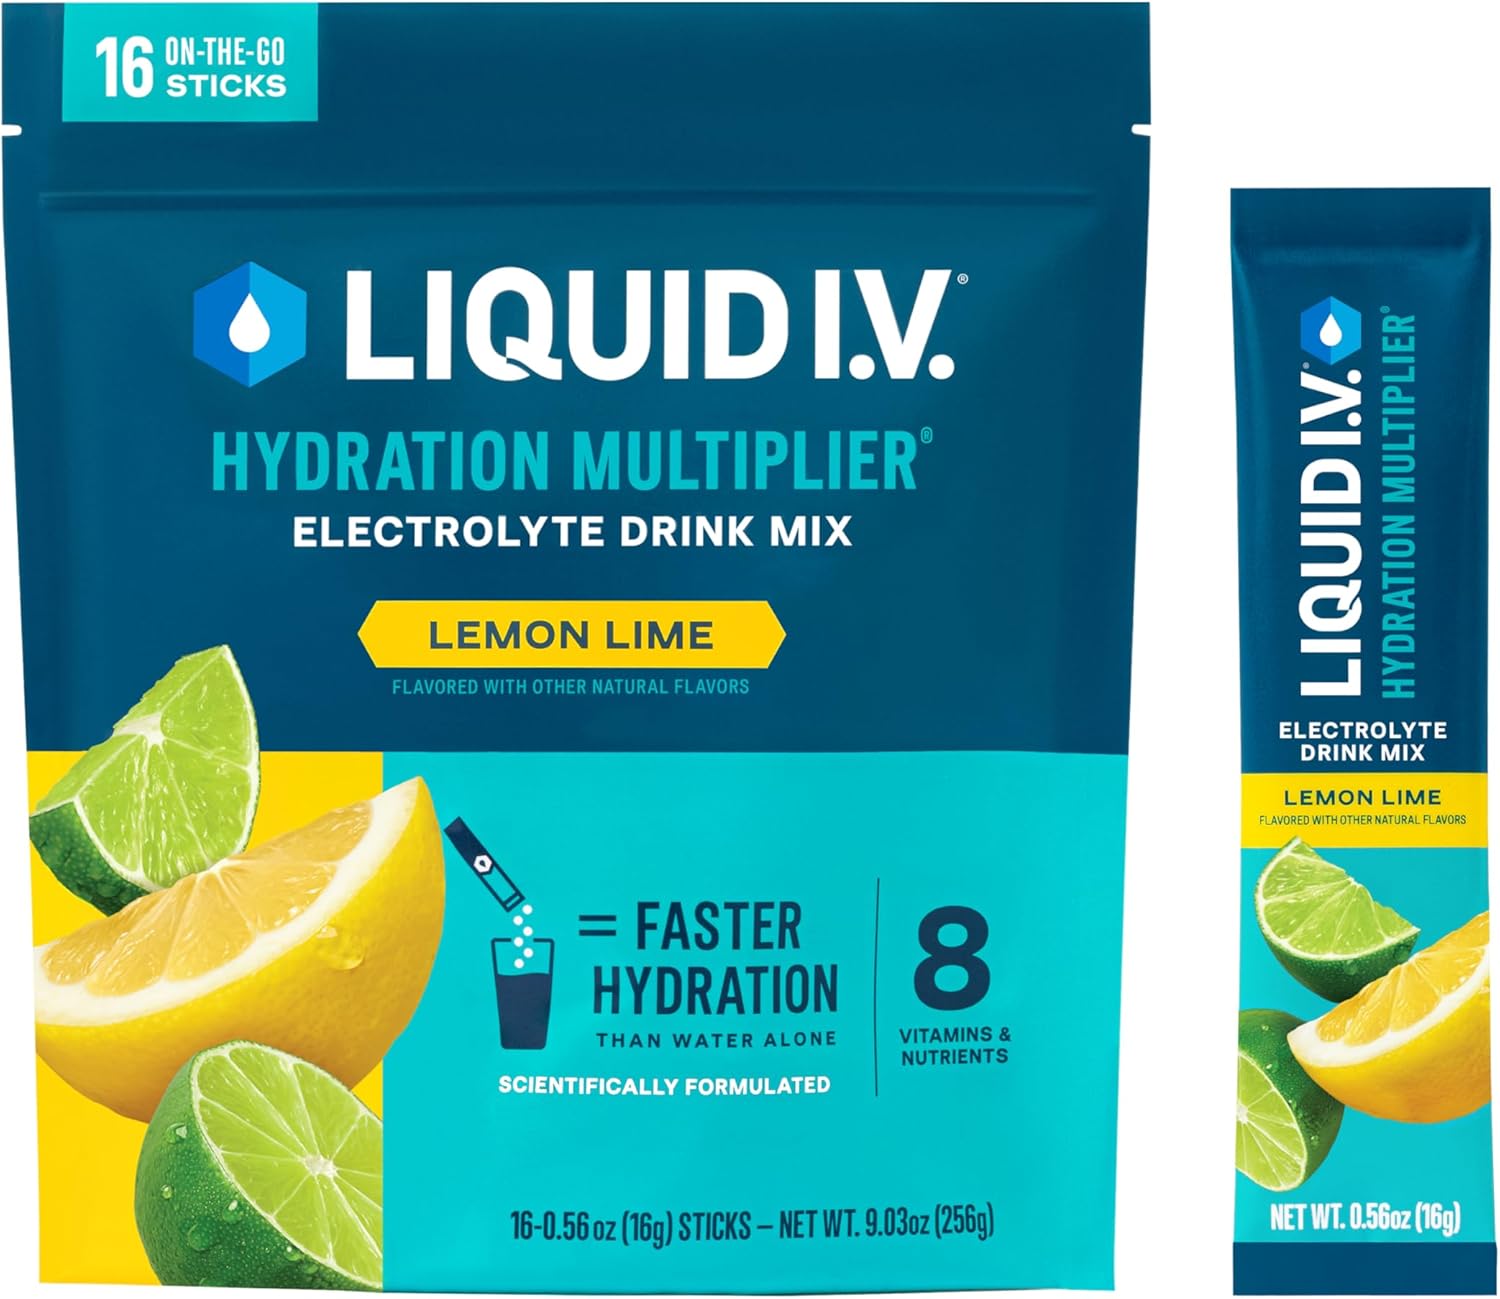
🥇 Lemon Lime — The Gold Standard
If Liquid I.V. only made one flavor, it would be Lemon Lime. Sporked gave it a 10/10, calling it the definitive benchmark for the entire brand. It tastes like a slightly sweeter, more electrolyte-forward Gatorade Lemon-Lime — clean, citrusy, and refreshing without being sharp or artificial. It dissolves easily and looks good cold over ice. This is the one to start with if you’ve never tried Liquid I.V. It’s also in virtually every variety pack, so you’ll always see it around.
Best for: First-timers, everyday hydration, post-workout, travel
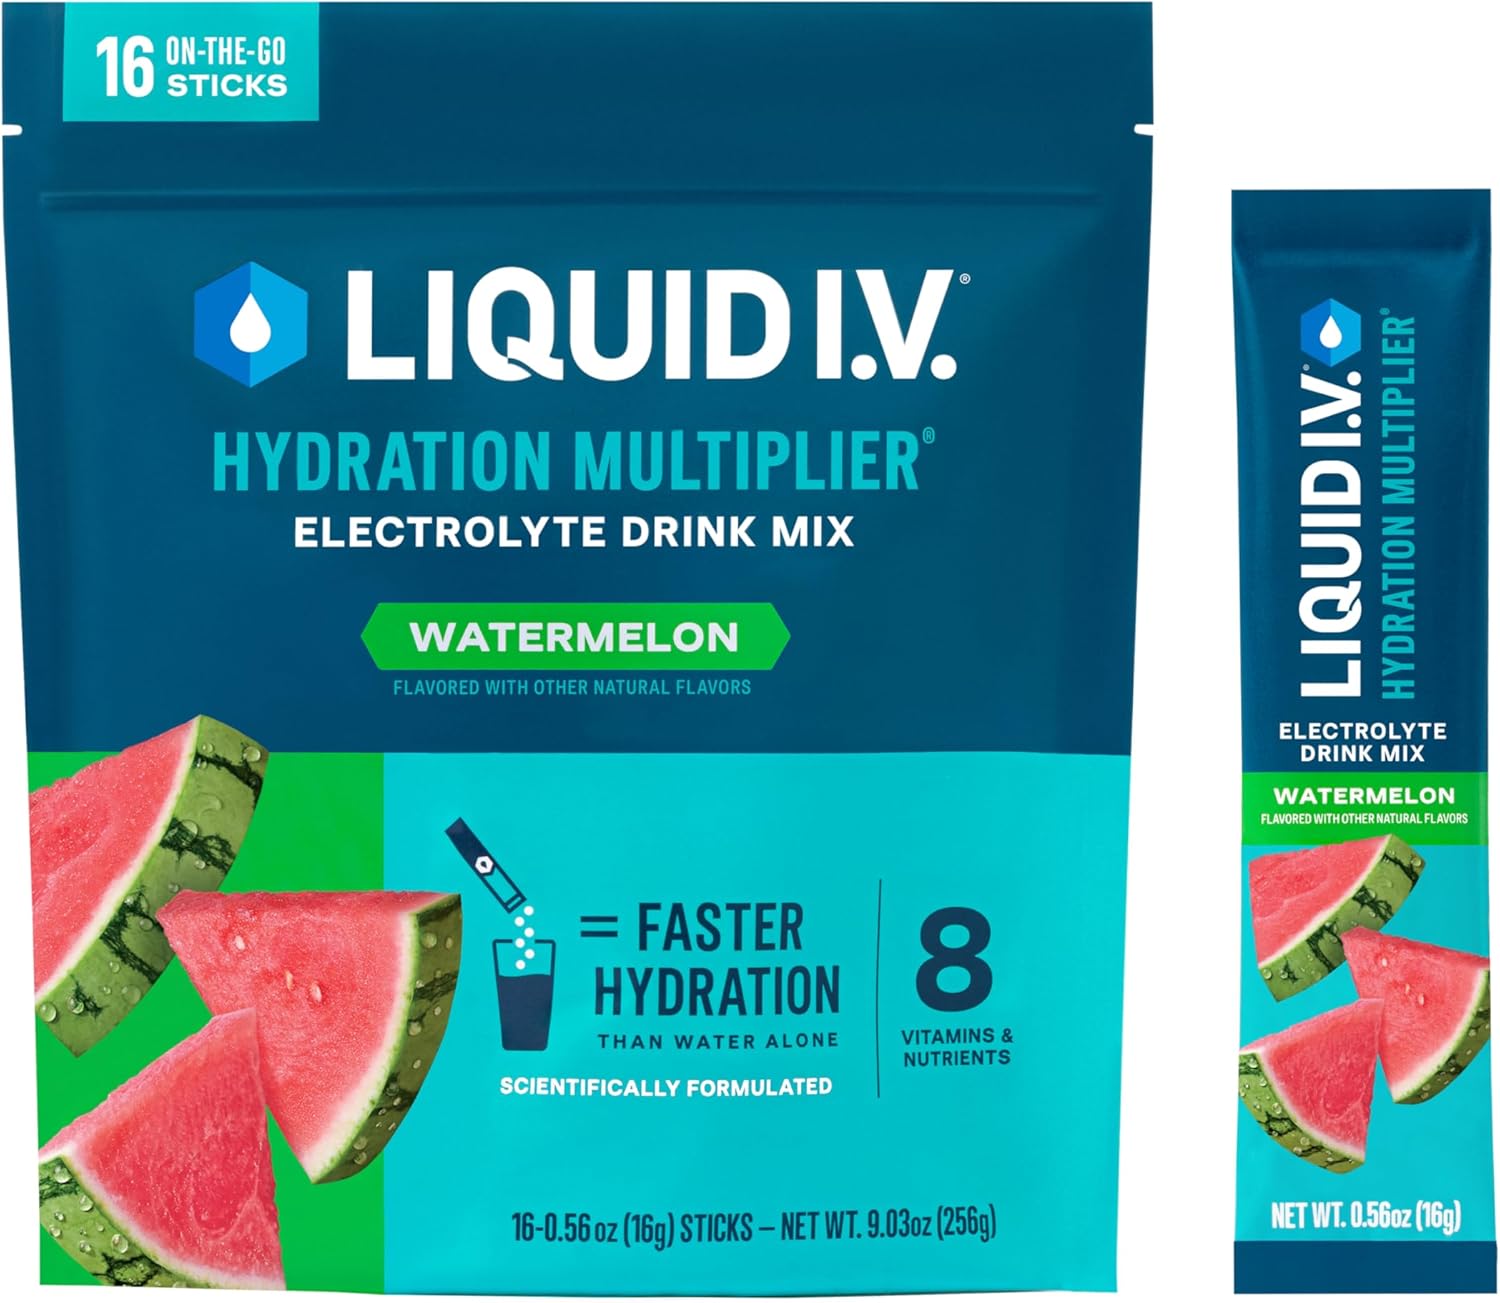
🥈 Watermelon — Most Refreshing
Consistently top 3 across every ranking we found. The watermelon flavor is authentic without being candy-like — light, genuinely refreshing, and one of the few flavors that doesn’t leave an aftertaste. Particularly popular in summer and for outdoor activities. If you find Lemon Lime too citrus-forward, Watermelon is your answer.
Best for: Hot weather, post-run, anyone who dislikes citrus
🥉 Passion Fruit — The Easy Daily Sipper
Smooth, tropical, and mellow. Passion Fruit hits a sweetness level that doesn’t overwhelm — it’s one of the least “intense” flavors in a good way. Reviewers often call it the most drinkable for daily use because it doesn’t feel like a commitment to finish a glass. One of the most reordered flavors among subscribers.
Best for: Daily hydration, people who want flavor without strong sweetness
Strawberry — The Safe Classic
A reliable, near-universally liked option. The strawberry flavor is sweet and clean, closer to a fruit punch than an artificial candy strawberry. Some reviewers find it a little one-dimensional compared to Lemon Lime or Passion Fruit, but it rarely disappoints.
Best for: Kids (adults), gifting, variety packs
Strawberry Lemonade — Bright and Balanced
A step up from plain Strawberry for people who want a little tartness. The lemon cuts through the sweetness well, making it feel less cloying over a full 16-oz glass. Consistently lands in the top half of every ranking.
Best for: Hot days, citrus fans who also like berry flavors
Solid: Good, With the Right Expectations
Tropical Punch
If you grew up on Hawaiian Punch, this will feel familiar. Sweet and fruit-forward, though some reviewers find it a bit generic. It’s a crowd-pleaser for mixed groups but not particularly distinctive. Still a reliable choice and widely available.
Açai Berry
Slightly tart and deeper than most Liquid I.V. flavors. The açai profile keeps it from being as sweet as Tropical Punch, which many people appreciate. Not as widely reviewed as the top flavors, but scores consistently in the middle-to-upper tier.
Popsicle® Firecracker
A limited collaboration flavor with Bomb Pop vibes — cherry, lemon-lime, and raspberry layered together. Beloved on TikTok and nostalgic in all the right ways. The challenge is availability: it sells out fast and doesn’t always restock. If you see it, grab it. Not the best everyday flavor, but a lot of fun.
Best for: Novelty seekers, Fourth of July, nostalgia
Mango
Good, not great. The mango flavor is accurate but leans sweet. Works well over ice. If you love mango-flavored drinks, you’ll like it. If you’re mango-neutral, Watermelon or Passion Fruit are more versatile picks.
Piña Colada
Genuinely tastes like its namesake — coconut and pineapple, no alcohol required. A polarizing genre of flavor in general, but if you enjoy tropical creamy-sweet drinks, this delivers. Reviewers note it can be cloying by the end of a glass. Better on a hot day than as a daily driver.
Polarizing: Either You Love It or You Don’t
Pear ⚡ The Most Divisive Flavor
Tasting Table ranked Pear as their #1 overall Liquid I.V. flavor. Chowhound ranked it dead last. It’s the single most divisive flavor in the entire lineup. The pear taste is subtle and sophisticated — fans call it elegant and light; detractors find it underwhelming or odd. Do not buy a 16-count until you’ve tried a single packet.
Arctic Raspberry
The “arctic” designation means it has a mild cooling sensation. Raspberry fans usually like it; people who don’t enjoy menthol-adjacent flavors should avoid it. Not widely reviewed but has a dedicated following.
Cotton Candy
Kids 4–12 go crazy for it. Adults are more divided — the sweetness is intense and there’s a slight metallic aftertaste that some people notice and others don’t. Originally limited-edition, became permanent due to demand from the younger audience. If you’re buying for kids, this is the move. For adults, it’s a toss-up.
Seaberry
One of the newer flavors. Seaberry (sea buckthorn) is earthy and slightly tart — unlike anything else in the lineup. People looking for something different love it. People expecting a conventional sweet hydration drink are confused by it.
Flavors With the Weakest Consensus
Guava
The most consistently criticized standard Liquid I.V. flavor. Reviewers across multiple platforms describe it as “medicinal” or “like cough syrup” — the artificial guava note doesn’t land the same way the real fruit does. For a brand that otherwise nails natural-tasting flavors, Guava is the outlier. Skip it.
Orange Vanilla Dream
Intended to taste like a Creamsicle. It does, to some. To others, it tastes like orange-flavored medicine. The vanilla component is where it goes wrong for most critics — it reads as artificial and cloying. If you love Creamsicles, maybe try one packet. Otherwise, Watermelon or Lemon Lime are safer.
Grapefruit
Not actively bad, but grapefruit is a difficult flavor to execute without bitterness, and reviewers note this leans more artificial than the citrus flavors in the lineup. Lemon Lime handles citrus better.
Best Sugar-Free Flavors
The sugar-free line uses allulose + stevia instead of cane sugar + glucose. The flavor is surprisingly close to the originals — reviewers put it at about 80–90% of the regular version. The main adjustment is a slight stevia aftertaste that some people notice in certain flavors.
Rainbow Sherbet SF — Best in Class
The sugar-free flavor that gets the most enthusiastic reviews. Sweet, fruity, and doesn’t have a noticeable stevia bite. If you’re switching from regular to sugar-free, this is the easiest transition.
Lemon Lime SF
The most directly comparable to a regular flavor — and it holds up well. The citrus notes carry through cleanly, and the allulose base keeps it from tasting artificial. If you love regular Lemon Lime and want to cut sugar, start here.
Raspberry Melon SF
A softer, less intense flavor that works well for daily sipping. The raspberry and melon balance each other, and neither overwhelms.
White Peach SF — Proceed With Caution
A dividing line in the sugar-free lineup. Some people find it delicate and pleasant; others find the peachy sweetness too strong with the allulose base. Try before you commit to a full box.
Best Energy Multiplier Flavors
Each Energy Multiplier packet contains 100mg caffeine — roughly the same as a standard 8-oz cup of coffee. For context on how that compares to your actual morning cup, we wrote a full breakdown: Liquid I.V. Energy vs. Coffee: Which Is Better for Your Morning?
Yuzu Pineapple — Top Pick
The most recommended Energy Multiplier flavor. Yuzu is a Japanese citrus with a complex tartness — combined with pineapple, the result is tropical and bright in a way that feels appropriate for a morning energy drink. The 100mg caffeine + L-Theanine kicks in smoothly.
Blackberry Peach
Softer and fruitier than Yuzu Pineapple. Good choice if you prefer less tartness. The blackberry note is authentic and the peach keeps it from being too sharp.
Mango Tamarind
The most adventurous Energy flavor — tamarind has a sweet-sour tang that’s unusual in the hydration space. Liquid I.V. fans who like interesting flavors gravitate toward this one. Less universally appealing than the other two.
Which Variety Pack Should You Buy?
If you’re new to Liquid I.V. and want to try before committing, here are the best starting options:
- Official site Classics Bundle (16-ct): Lemon Lime, Passion Fruit, Strawberry, Tropical Punch — all top-tier or solid flavors. The safest intro pack.
- Amazon Variety Pack (16-ct): Same four flavors. Comparable price, faster shipping for Prime members.
- Costco 30-ct Variety (on sale): Rotates seasonally but typically includes Lemon Lime and 2–3 others. Best value at $0.65–$0.73/packet.
- Sugar-Free Variety Pack: Raspberry Melon, Lemon Lime, White Peach, Green Grape. Good way to test whether the sugar-free formula works for you before committing to a full box.
The one variety pack to approach carefully: any pack that includes Guava or Orange Vanilla Dream as a significant portion of the contents.
For everything else you need to know about the brand — including nutrition facts, product line comparisons, and where to find the lowest prices — head to our Liquid I.V. Complete Guide.
Liquid I.V. Complete Guide: Flavors, Nutrition Facts, and How to Use It
If you’ve seen those colorful little packets at Costco, on TikTok, or at your gym and wondered whether they’re worth the hype — this guide has everything you need. We break down every product line, every flavor, the nutrition facts that matter, and exactly how to mix it for maximum effect.
Quick note: we’re a coffee site, so we’ll also be honest about when Liquid I.V. makes more sense than your morning cup — and when it doesn’t. (Spoiler: it’s more complementary than competitive.) If you want a direct comparison, check out our post on Liquid I.V. vs. Coffee for Morning Energy.)
What Liquid I.V. Actually Is
Liquid I.V. is an electrolyte powder you mix into water. But unlike Gatorade or a basic electrolyte tab, it’s built on a specific mechanism from the World Health Organization: the sodium-glucose co-transport system (SGLT1). When you have the right ratio of sodium and glucose present together in your gut, your small intestine pulls water across the intestinal wall much faster than water alone. It’s the same science behind oral rehydration solutions that have saved millions of lives from severe dehydration.
Liquid I.V. calls their version LIV HYDRASCIENCE™ (formerly “Cellular Transport Technology”). The fancy name aside, the core principle is decades old and well-validated. The company — now owned by Unilever and the #1 powdered hydration brand in the U.S. by value sales — has conducted over 15 clinical studies, including a 2025 study at the University of Memphis showing their formula significantly outperformed water alone in fluid retention over 4 hours.
All 8 Liquid I.V. Product Lines Explained
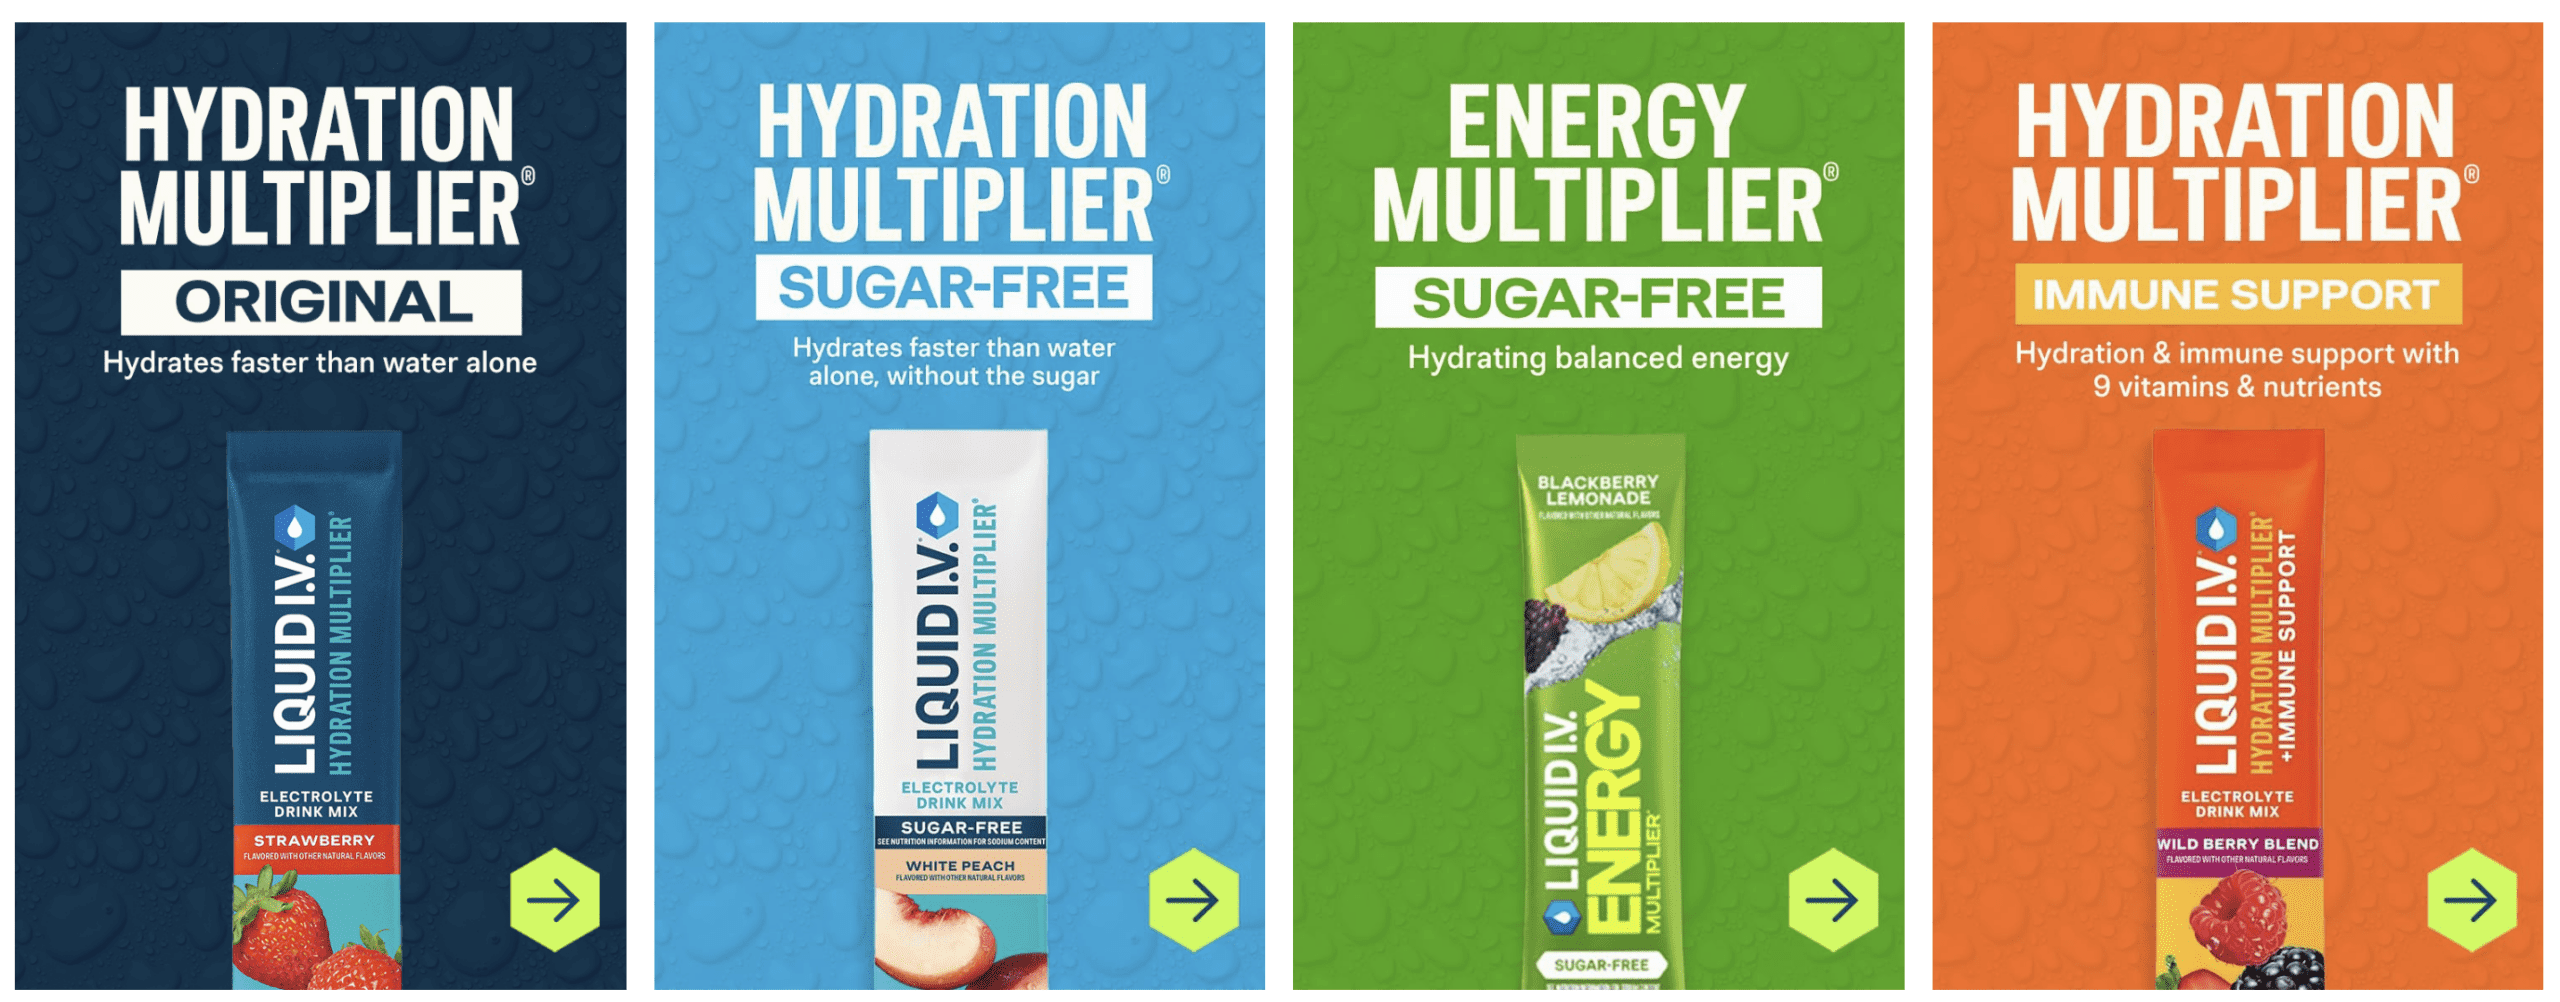
1. Hydration Multiplier (Flagship)
The original. Cane sugar + dextrose + electrolytes + B vitamins + Vitamin C. 45–50 calories, 11g sugar, ~500mg sodium per packet. This is what most people mean when they say “Liquid I.V.” It comes in the most flavors (19) and is the baseline everything else is compared to.
2. Hydration Multiplier Sugar-Free
Replaces glucose with an amino acid–allulose blend (L-glutamine + L-alanine). Zero sugar, ~20 calories, comparable electrolytes. Allulose is a naturally occurring rare sugar from figs that doesn’t raise blood sugar. The science shows it performs comparably to the regular version for hydration. Available in 9 flavors. This is what dietitians most often recommend for daily use.
3. Hydration Multiplier + Energy
The original caffeinated line. Still contains sugar. Adds 100mg natural caffeine from Coffeeberry® extract or Matcha/Guayusa (depending on flavor), plus L-Theanine for smooth, jitter-free energy. Available in 3–4 flavors including Yuzu Pineapple and Mango Tamarind. More on how this compares to coffee in our Energy Multiplier vs. coffee breakdown.
4. Sugar-Free Energy Multiplier
Launched in 2025 — the newest line. Combines zero sugar with 100mg caffeine, 200mg L-Theanine (double the regular Energy line), plus magnesium. Total electrolytes: ~995mg. 4 flavors: Blackberry Lemonade, Fruit Punch, Pomegranate Punch, Strawberry Kiwi.
5. Hydration Multiplier + Immune Support
Packs a serious vitamin punch: 504mg Vitamin C (560% DV) and 10.5mg Zinc (~95% DV), plus Wellmune® beta-glucan — a clinically studied immune-support ingredient from baker’s yeast. 3 flavors: Tangerine, Wild Berry Blend, Mango Passionfruit.
6. Hydration Multiplier for Kids
Same electrolyte science, designed for ages 4+. Cuts sugar to 6g (50% less than adult) and reduces sodium to ~250mg. 4 flavors: Cotton Candy, Concord Grape, Crisp Apple, Tropical Punch.
7. Hydration Multiplier + Sleep
Nighttime formula with 3mg melatonin, 50mg L-Theanine (Suntheanine®), and 175mg organic valerian root. Only 4g sugar, 25 calories, lower electrolytes. Mix into just 8 oz (not the standard 16 oz) about 30 minutes before bed. One flavor: Blueberry Lavender.
8. Hydration Multiplier + Gut Health
Adds 1 billion CFU of Probiotic BC30 (Bacillus coagulans) and fermented tea vinegar powder for digestive support. One flavor: Tart Green Apple. Primarily found at retail rather than the official website.
Nutrition Facts: What’s Actually in Each Packet
Here’s a direct comparison across the main product lines per serving:
| Metric | HM (Regular) | HM Sugar-Free | Energy (Regular) | SF Energy | Immune | Sleep |
|---|---|---|---|---|---|---|
| Calories | 45–50 | ~20 | 40–45 | ~20 | 45 | 25–30 |
| Sugar | 11g | 0g | 8–11g | 0g | 11g | 4g |
| Sodium | 500–560mg | ~530mg | 380–500mg | ~500mg | ~500mg | 360mg |
| Potassium | 370–380mg | ~380mg | 297–380mg | Included | 370mg | 195mg |
| Vitamin C | 73–80% DV | 70% DV | 60–80% DV | Present | 560% DV | — |
| Vitamin B12 | 275–280% DV | 240% DV | 220–280% DV | Present | 330% DV | — |
| Caffeine | 0 | 0 | ~100mg | ~100mg | 0 | 0 |
Ingredients in the flagship Hydration Multiplier: Pure Cane Sugar, Dextrose, Citric Acid, Salt, Potassium Citrate, Sodium Citrate, Dipotassium Phosphate, Silicon Dioxide, Rebaudioside-A (Stevia Leaf Extract), Natural Flavors, Vitamin C, Vitamin B3, Vitamin B5, Vitamin B6, Vitamin B12.
Key things to know: All Liquid I.V. products are Non-GMO, gluten-free, soy-free, dairy-free, vegan, and free of artificial sweeteners, colors, and preservatives. The regular line gets sweetness from cane sugar + stevia; the sugar-free line uses allulose + stevia. Neither contains artificial sweeteners like sucralose or aspartame.
A note on sodium
Each regular packet contains ~500mg sodium — about 22% of your daily value. That’s intentional (sodium is what drives the absorption mechanism), but it matters if you’re managing hypertension, kidney disease, or watching sodium intake overall. The Sleep and Kids lines run lower at 250–360mg.
Every Liquid I.V. Flavor Currently Available
Liquid I.V. has roughly 44 flavors across all product lines. For a full ranked breakdown of which ones are actually worth buying, see our dedicated post: Best Liquid I.V. Flavors Ranked.
Here’s the full flavor roster by line:
Hydration Multiplier (19 flavors)
Açai Berry, Arctic Raspberry, Concord Grape, Cotton Candy, Golden Cherry, Grapefruit, Guava, Lemon Lime, Mango, Orange Vanilla Dream, Passion Fruit, Pear, Piña Colada, Popsicle® Firecracker, Seaberry, Strawberry, Strawberry Lemonade, Tropical Punch, Watermelon
Sugar-Free Hydration Multiplier (9 flavors)
Green Grape, Lemon Lime, Mandarin Orange, Mango Pineapple, Rainbow Sherbet, Raspberry Lemonade, Raspberry Melon, Strawberry Watermelon, White Peach
Sugar-Free Energy Multiplier (4 flavors)
Blackberry Lemonade, Fruit Punch, Pomegranate Punch, Strawberry Kiwi
Energy Multiplier (3–4 flavors)
Blackberry Peach, Mango Tamarind, Yuzu Pineapple, Lemon Ginger (limited)
Immune / Sleep / Kids / Gut Health
Tangerine, Wild Berry Blend, Mango Passionfruit (Immune); Blueberry Lavender (Sleep); Cotton Candy, Concord Grape, Crisp Apple, Tropical Punch (Kids); Tart Green Apple (Gut Health)
How to Mix Liquid I.V. for the Best Flavor and Effectiveness
The official recommendation is: one packet into 16 oz (500 mL) of water. That ratio is calibrated for the absorption science to work correctly. Too little water makes it too salty and can cause stomach upset. Too much water dilutes the formula below the osmolarity needed for enhanced absorption.
Practical mixing tips:
- Use cold water. Officially recommended and makes a meaningful difference in taste — the flavor is noticeably brighter cold. Hot water is not recommended as it may affect nutrient stability (the Gut Health product is the exception).
- Shake, don’t stir. Closing the lid and shaking dissolves the powder more thoroughly than stirring.
- Add ice. Perfectly fine and enhances most flavors.
- Consume within 24 hours. Refrigerate if not drinking immediately.
- Don’t mix with juice or other drinks. Added sugars disrupt the formula’s carefully balanced osmolarity.
- The “too sweet” adjustment: The most common complaint is that it’s overly sweet. Many users stretch one packet across 20–32 oz of water. This does reduce absorption speed slightly, but it’s a reasonable trade-off if you find the standard dilution too intense.
- Sleep line is different: Mix into only 8 oz of water (not 16), about 30 minutes before bed.
The recommended dose is one packet per day, unless advised otherwise by a doctor.
Who Liquid I.V. Is Actually For
Liquid I.V. delivers the most benefit in situations where you’re genuinely losing or have lost fluids:
- Athletes and active people — especially during or after prolonged, sweaty exercise
- Illness recovery — vomiting, diarrhea, or fever all cause rapid fluid and electrolyte loss
- Hangover recovery — alcohol is a diuretic; electrolytes help restore balance
- Frequent travelers — cabin humidity can drop below 20% on long flights; packets are TSA-friendly
- Hot weather / outdoor activities — heat and sweating rapidly deplete electrolytes
- People who struggle to drink enough water — if Liquid I.V. makes you actually want to hydrate, that’s a real benefit
Who should be cautious: Anyone managing hypertension or kidney disease (high sodium per packet), diabetics using the regular (sugared) line, and pregnant women who should consult their OB-GYN. The Energy line contains 100mg caffeine — avoid in the evening and if caffeine-sensitive. Competitive athletes: Liquid I.V. is not certified NSF Safe for Sport or Informed Sport.
For healthy, adequately hydrated adults with a normal diet, plain water is sufficient for daily needs. Liquid I.V.’s daily-use value is largely about making water more enjoyable and getting extra vitamins.
Pricing and Where to Get the Best Deal
Standard retail is about $1.56/packet on the official website at full price. Here’s how to pay significantly less:
- Costco or Sam’s Club (30-count) on sale: $0.65–$0.73/packet — the best per-unit value when they run their $7–8 promotions
- Amazon Subscribe & Save with coupon stacking: ~$0.87–$1.00/packet
- Official site subscription + bundle deals: ~$0.76–$1.09/packet
- Walmart 15-count: ~$1.00/packet
Variety packs are available everywhere — the flagship Hydration Multiplier Variety Pack (Lemon Lime, Passion Fruit, Strawberry, Tropical Punch, 16-ct) is on Amazon and the official site. Costco’s 30-count variety packs rotate seasonally.
Bottom Line
Liquid I.V. is a well-formulated product built on legitimate, decades-old hydration science. It’s not magic and it’s not a daily necessity for healthy adults — but in the right situations (intense exercise, travel, illness, heat, or just wanting to drink more water), it genuinely works better than water alone.
If you’re new to it: start with Lemon Lime or Watermelon — they’re the most universally liked. Go sugar-free for daily use and stick to the regular for heavy sweat situations where glucose aids recovery. Buy at Costco when it’s on sale.
Want to know which specific flavors are worth the money? Read our full flavor ranking. Or if you’re wondering how the Energy Multiplier stacks up against just having another cup of coffee in the afternoon, we broke that down in our Liquid I.V. vs. Coffee for Energy comparison.
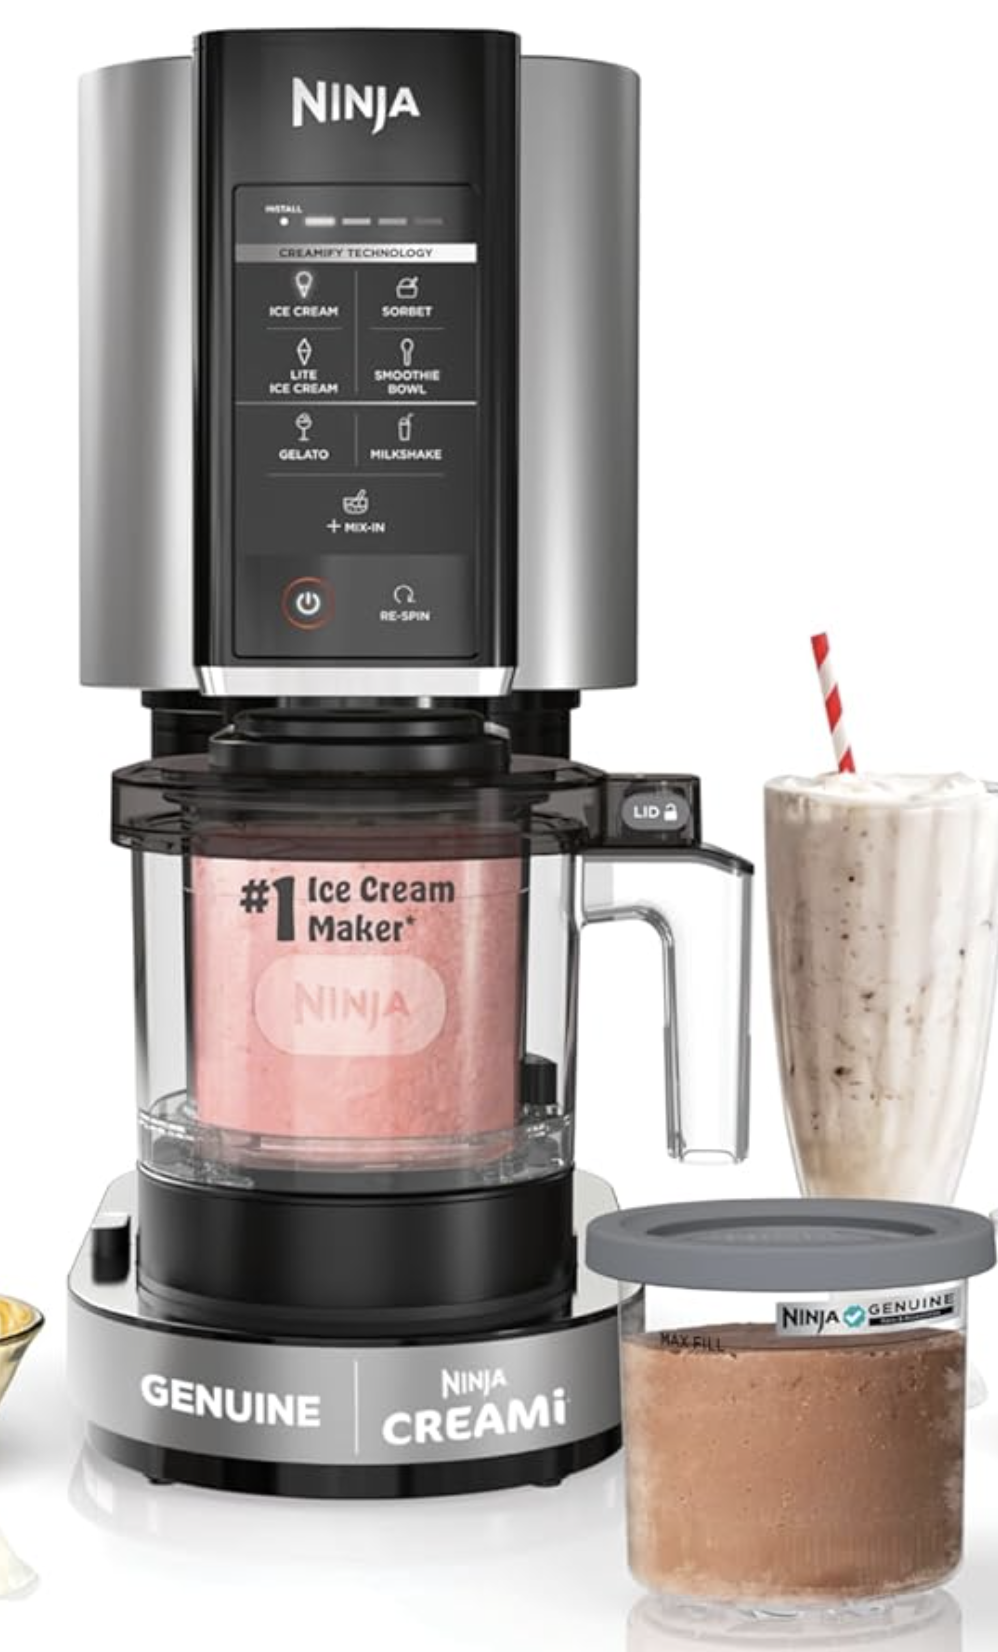
Ninja CREAMi Scoop & Swirl Review: A Coffee-Focused Look
The Ninja CREAMi Scoop & Swirl Ice Cream and Soft Serve Maker takes everything people liked about the original Ninja CREAMi and adds one major upgrade: true soft-serve dispensing.
For coffee lovers, this opens up a new category of drinks and desserts — from espresso soft-serve to coffee ice cream cones and affogato-style swirls — all made at home using real coffee or espresso.
NEED IT FOR CHRISTMAS? Click Here For FAST Delivery
Why the Scoop & Swirl Is Interesting for Coffee Drinkers
Coffee ice cream and frozen coffee drinks are notoriously hard to get right. Pre-made options often taste muted, overly sweet, or artificial. The Scoop & Swirl works differently.
Because you:
- Freeze your coffee base solid first
- Then process it into scoopable or soft-serve texture
You can use real brewed coffee, espresso, or cold brew concentrate and control the flavor strength precisely.
This makes it especially appealing if you care about:
- Strong coffee flavor
- Lower sugar recipes
- Espresso-forward desserts
- Protein or dairy-free coffee treats
Key Features & Comparison
| Feature | Ninja CREAMi (Original) | Ninja CREAMi Scoop & Swirl |
|---|---|---|
| Best For | Coffee ice cream, espresso gelato | Coffee ice cream and soft-serve coffee |
| Coffee Ice Cream | Yes | Yes |
| Soft-Serve Coffee | No | Yes |
| Frozen Latte Texture | Scoopable only | Scoopable + soft-serve |
| Affogato-Style Serving | Scoop + espresso | Soft-serve swirl + espresso |
| Coffee Flavor Control | Excellent | Excellent |
| Preset Programs | Fewer programs | More programs including soft-serve |
| Base Freezing Required | Yes (18–24 hours) | Yes (18–24 hours) |
| Batch Size | Pint-size | Pint-size (swirl-specific) |
| Add-Ins (Chocolate, Syrups) | Yes | Yes |
| Recipe Experimentation | Very good | Excellent |
| Counter Space | Smaller footprint | Larger footprint |
| Noise Level | Loud | Loud |
| Ease of Use | Very easy | Easy, with extra steps |
| Cleaning | Simple, some tight areas | More parts, dishwasher-safe |
| Coffee Dessert Variety | Moderate | High |
| Best Choice If You… | Want strong coffee ice cream | Want café-style soft-serve coffee desserts |
Soft-Serve Dispensing for Coffee Desserts
After processing the frozen base, the Scoop & Swirl lets you attach a dispensing lid and serve soft-serve directly into a bowl or cone.
This is ideal for:
- Soft-serve coffee ice cream
- Espresso frozen custard
- Coffee-vanilla swirl bases
- Affogato presentations with hot espresso poured over the top
Unlike the original CREAMi, you don’t need to scoop and reshape — the texture comes out smooth and airy.
Expanded One-Touch Programs
The Scoop & Swirl includes more preset programs than the original CREAMi, covering both scoopable and soft-serve styles.
For coffee recipes, this matters because:
- Denser coffee ice cream benefits from scoop-focused programs
- Milk-forward frozen lattes and soft-serve work better with the softer presets
- Low-sugar or protein coffee bases can be tuned more easily
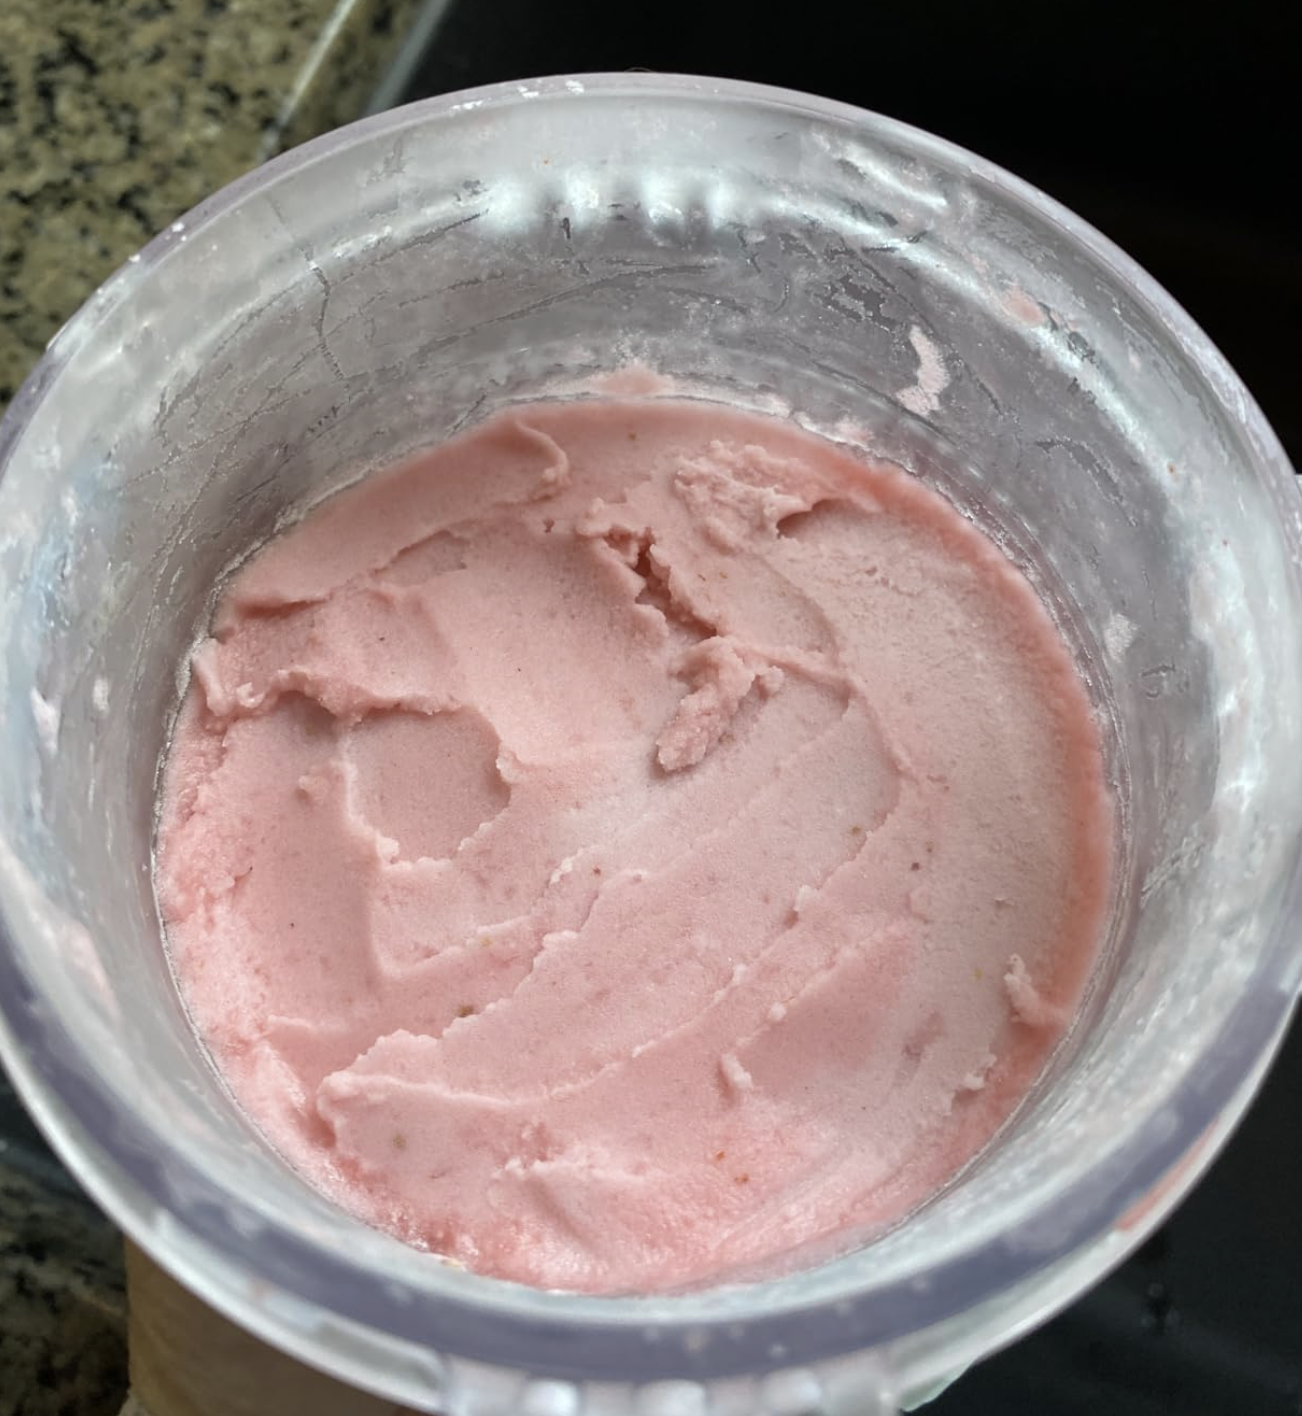
Same Creamify Process, More Control
Like all CREAMi machines, the Scoop & Swirl uses a blade system to shave and aerate frozen bases rather than churning liquid. You still need to freeze your coffee mixture overnight.
The benefit is control:
- Strong espresso doesn’t get diluted
- Cold brew stays smooth
- You can rebalance sweetness and fat after your first test spin
Coffee Ice Cream and Soft-Serve Ideas That Work Well
This machine shines when you lean into coffee.
Great options to try:
- Espresso soft-serve with milk and cream
- Coffee ice cream made with cold brew concentrate
- Mocha soft-serve with cocoa powder
- Protein coffee ice cream using a shake base
- Lightly sweetened coffee base for affogatos
Because the pints are small, it’s easy to experiment without wasting ingredients.
How It Compares to the Original Ninja CREAMi (for Coffee Recipes)
| Feature | Original CREAMi | Scoop & Swirl |
|---|---|---|
| Coffee Ice Cream | Yes | Yes |
| Soft-Serve Coffee | No | Yes |
| Affogato-Style Serving | Limited | Much better |
| Frozen Latte Textures | Scoop only | Scoop + soft-serve |
| Counter Space | Smaller | Larger |
If your goal is classic coffee ice cream, the original CREAMi is enough.
If you want soft-serve coffee, frozen espresso desserts, or café-style presentation, the Scoop & Swirl is the better fit.
Downsides to Know About
- You still need to plan ahead and freeze bases 18–24 hours
- It’s louder than most kitchen appliances
- Takes up more counter space than the original model
- Uses swirl-specific pints (not interchangeable)
None of these are dealbreakers, but they matter in smaller kitchens.
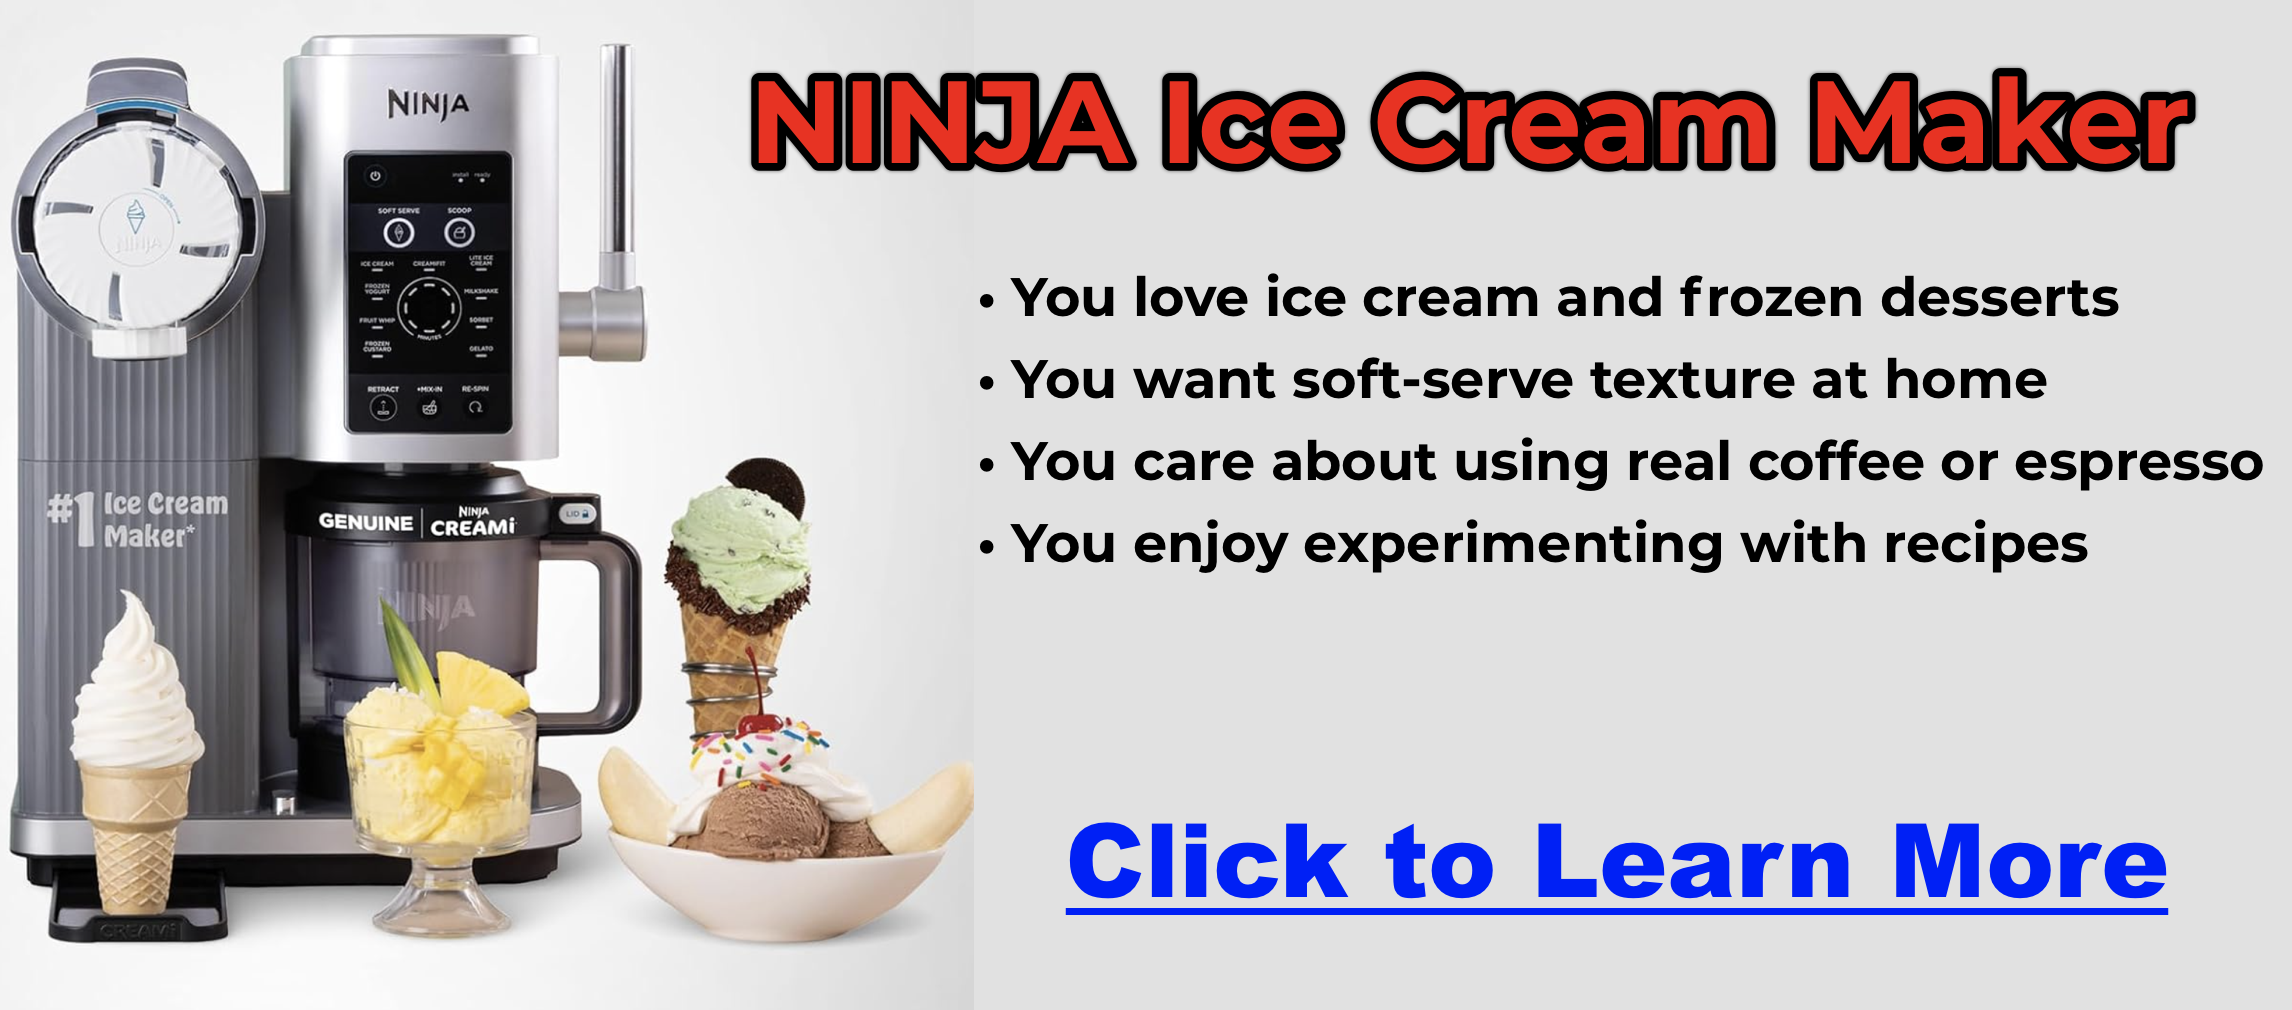
Final Verdict: Is It Worth It for Coffee Lovers?
The Ninja CREAMi Scoop & Swirl makes the most sense if:
- You love coffee ice cream and frozen coffee desserts
- You want soft-serve texture at home
- You care about using real coffee or espresso
- You enjoy experimenting with recipes
If you’re serious about coffee and like pushing beyond basic drinks, this machine feels less like a novelty and more like a coffee dessert tool.
The Best Cheap Espresso Machines: Top 5 Choices
Finding the right espresso machine can feel overwhelming — there are single boilers, dual boilers, super-automatics, manual machines, and everything in between. The truth is, you do not need to spend thousands of dollars to pull great espresso at home. Whether you are a complete beginner looking for something simple or you want a semi-automatic machine you can grow into, the models below deliver real espresso performance at prices that make sense.
We tested and researched the most popular machines across every budget tier. Below you will find our top picks, what makes each one stand out, and which type of coffee drinker each machine is best suited for.
Our Top Pick: Breville Barista Express BES870XL
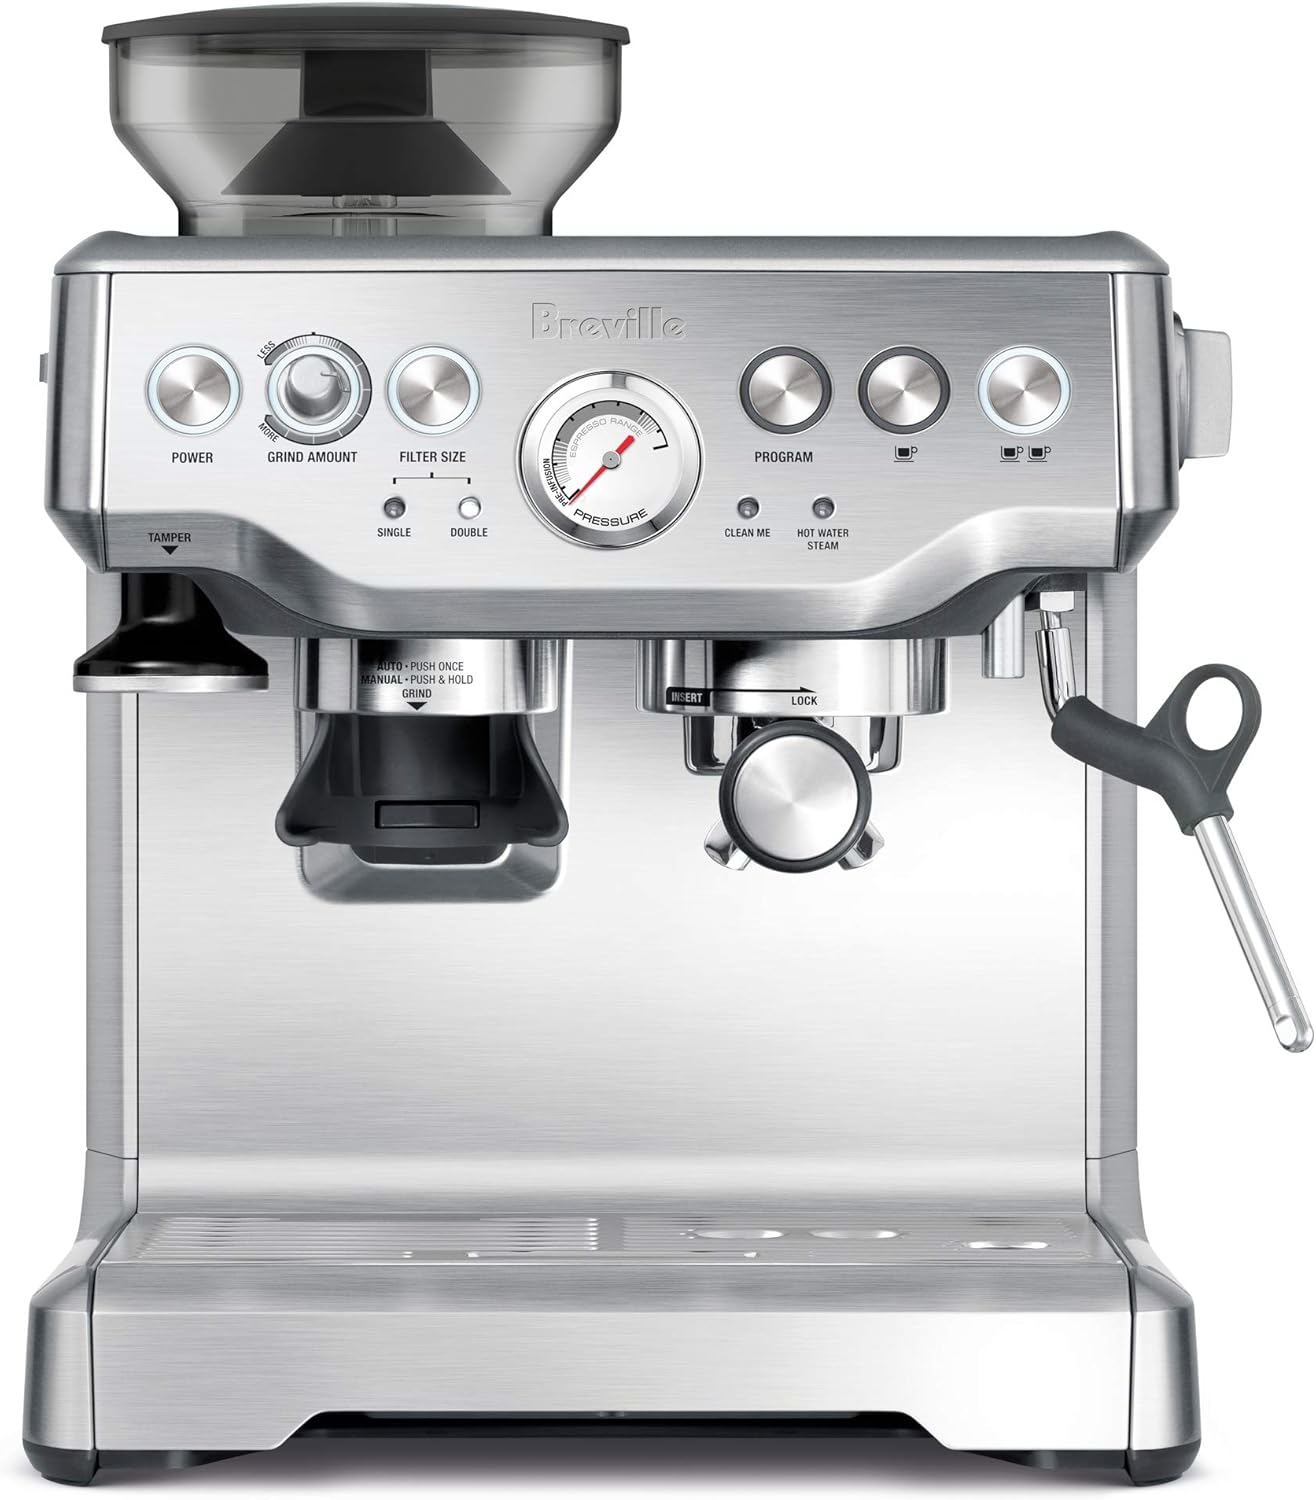
1: Breville Barista Express BES870XL
The Breville Barista Express remains one of the best all-in-one espresso machines on the market, and it is our top recommendation. It packs a 16-setting conical burr grinder directly into the machine, which means you can dose and grind fresh beans for every shot without buying a separate grinder. That alone saves you $100–$200 and valuable counter space.
The machine uses low-pressure pre-infusion followed by 9-bar extraction — the same pressure profile used in commercial espresso machines — to pull a balanced, full-bodied shot. Breville’s digital PID temperature control keeps the water at the optimal temperature throughout the extraction, which is one of the biggest factors in getting the most out of your espresso beans. The manual steam wand produces real microfoam for latte art, not just bubbly froth. If you are making macchiatos, cappuccinos or flat whites, this wand can handle it.
The stainless steel build looks great on any counter, and the machine comes with a cleaning kit so you can keep it running well. Regular descaling is important for maintaining flavor and machine longevity, and we have a full guide on that.
- Built-in 16-setting conical burr grinder — no separate grinder needed
- Low-pressure pre-infusion with 9-bar extraction for balanced espresso
- Digital PID temperature control for consistency shot to shot
- Manual steam wand for real microfoam and latte art
- Stainless steel construction with included cleaning kit
2: Breville Bambino BES450

The Breville Bambino is the best budget espresso machine you can buy right now, and it is the one virtually every expert and review site recommends in the under-$300 category. It uses the same 54mm portafilter and 9-bar extraction as the more expensive Breville models, which means you are getting real espresso performance — not a watered-down experience.
The standout feature is Breville’s ThermoJet heating system, which reaches brewing temperature in approximately 3 seconds. That is not a typo — you can walk up to this machine, press a button, and pull a shot almost immediately. The manual steam wand is capable of producing smooth microfoam, though it does require a bit of practice compared to the automatic wand on the Bambino Plus. The machine is extremely compact and will fit easily in small kitchens, dorm rooms, or offices.
The main tradeoff: the Bambino does not include a grinder. You will need a separate espresso grinder to get the best results. A burr grinder is strongly recommended over a blade grinder for espresso. If you want to keep costs down, you can also use quality pre-ground espresso with the included pressurized basket, which is more forgiving of grind inconsistency.
- ThermoJet heating — ready to brew in 3 seconds
- 54mm portafilter with 9-bar extraction (same as higher-end Breville machines)
- Compact footprint — fits easily in small spaces
- Manual steam wand for microfoam
- Requires a separate grinder (pressurized basket included for pre-ground)
3: Philips 3200 Series Fully Automatic w/ LatteGo
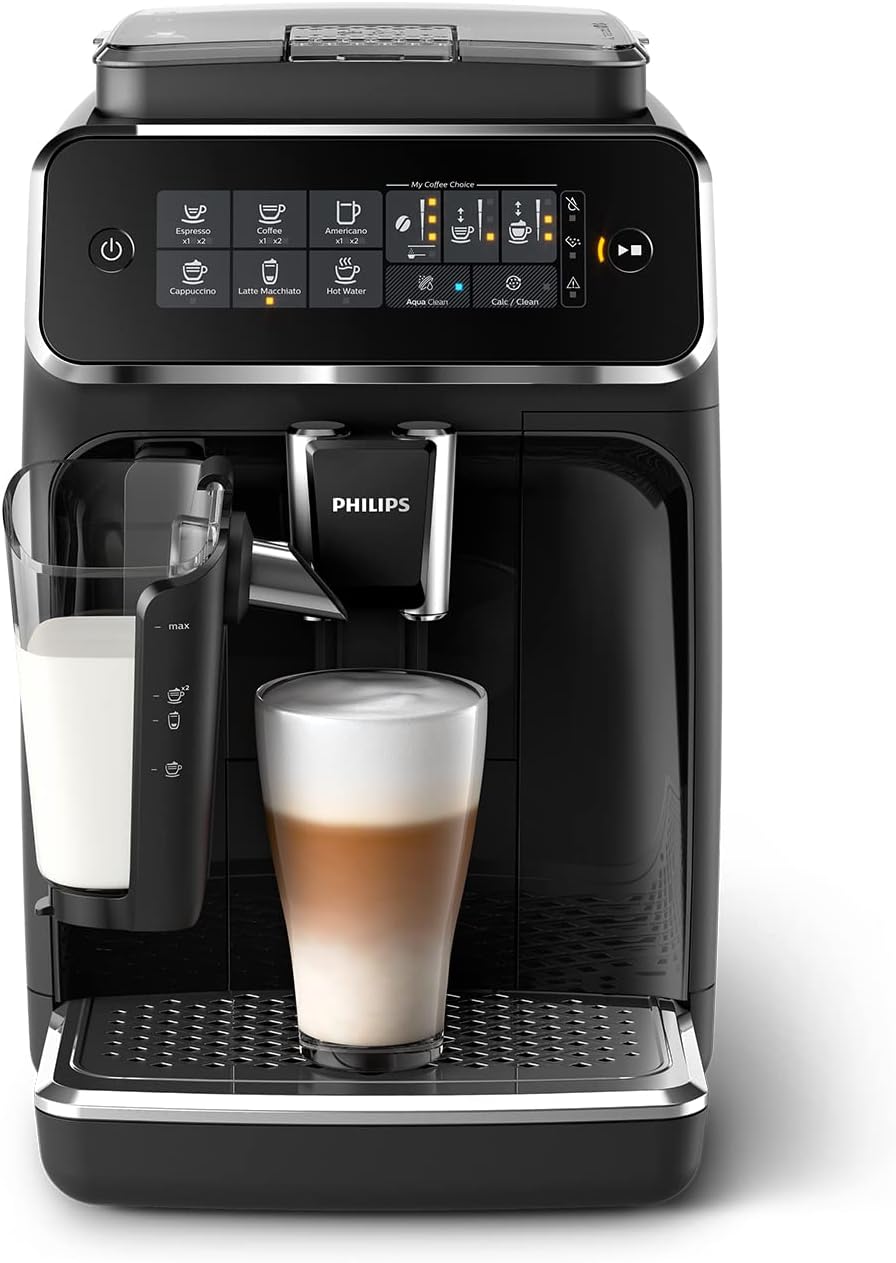
The Philips 3200 with LatteGo is the best option if you want a fully automatic, bean-to-cup machine that does everything for you. It grinds, tamps, brews, and froths milk — all at the touch of a button. The LatteGo milk system froths milk directly in the cup and is one of the easiest milk systems to clean on any super-automatic machine (just two parts, no tubes).
The built-in 12-setting ceramic burr grinder lets you adjust grind fineness, and the touchscreen display makes it simple to customize drink strength, volume, and temperature. You can go from whole beans to a finished latte or cortado in under two minutes with virtually no skill required.
The tradeoff is price — the Philips 3200 is significantly more expensive than semi-automatic options. It also gives you less control over the extraction process, which means you cannot fine-tune shots the way you can with a Breville or a manual machine. But if convenience is your top priority and you just want great coffee without the learning curve, this is the machine to get.
- Fully automatic bean-to-cup — grinds, tamps, brews, and froths
- LatteGo milk system with just 2 parts to clean
- 12-setting ceramic burr grinder
- Touchscreen with customizable drink strength, size, and temperature
- Higher price point but maximum convenience
4: De’Longhi Stilosa EC260BK
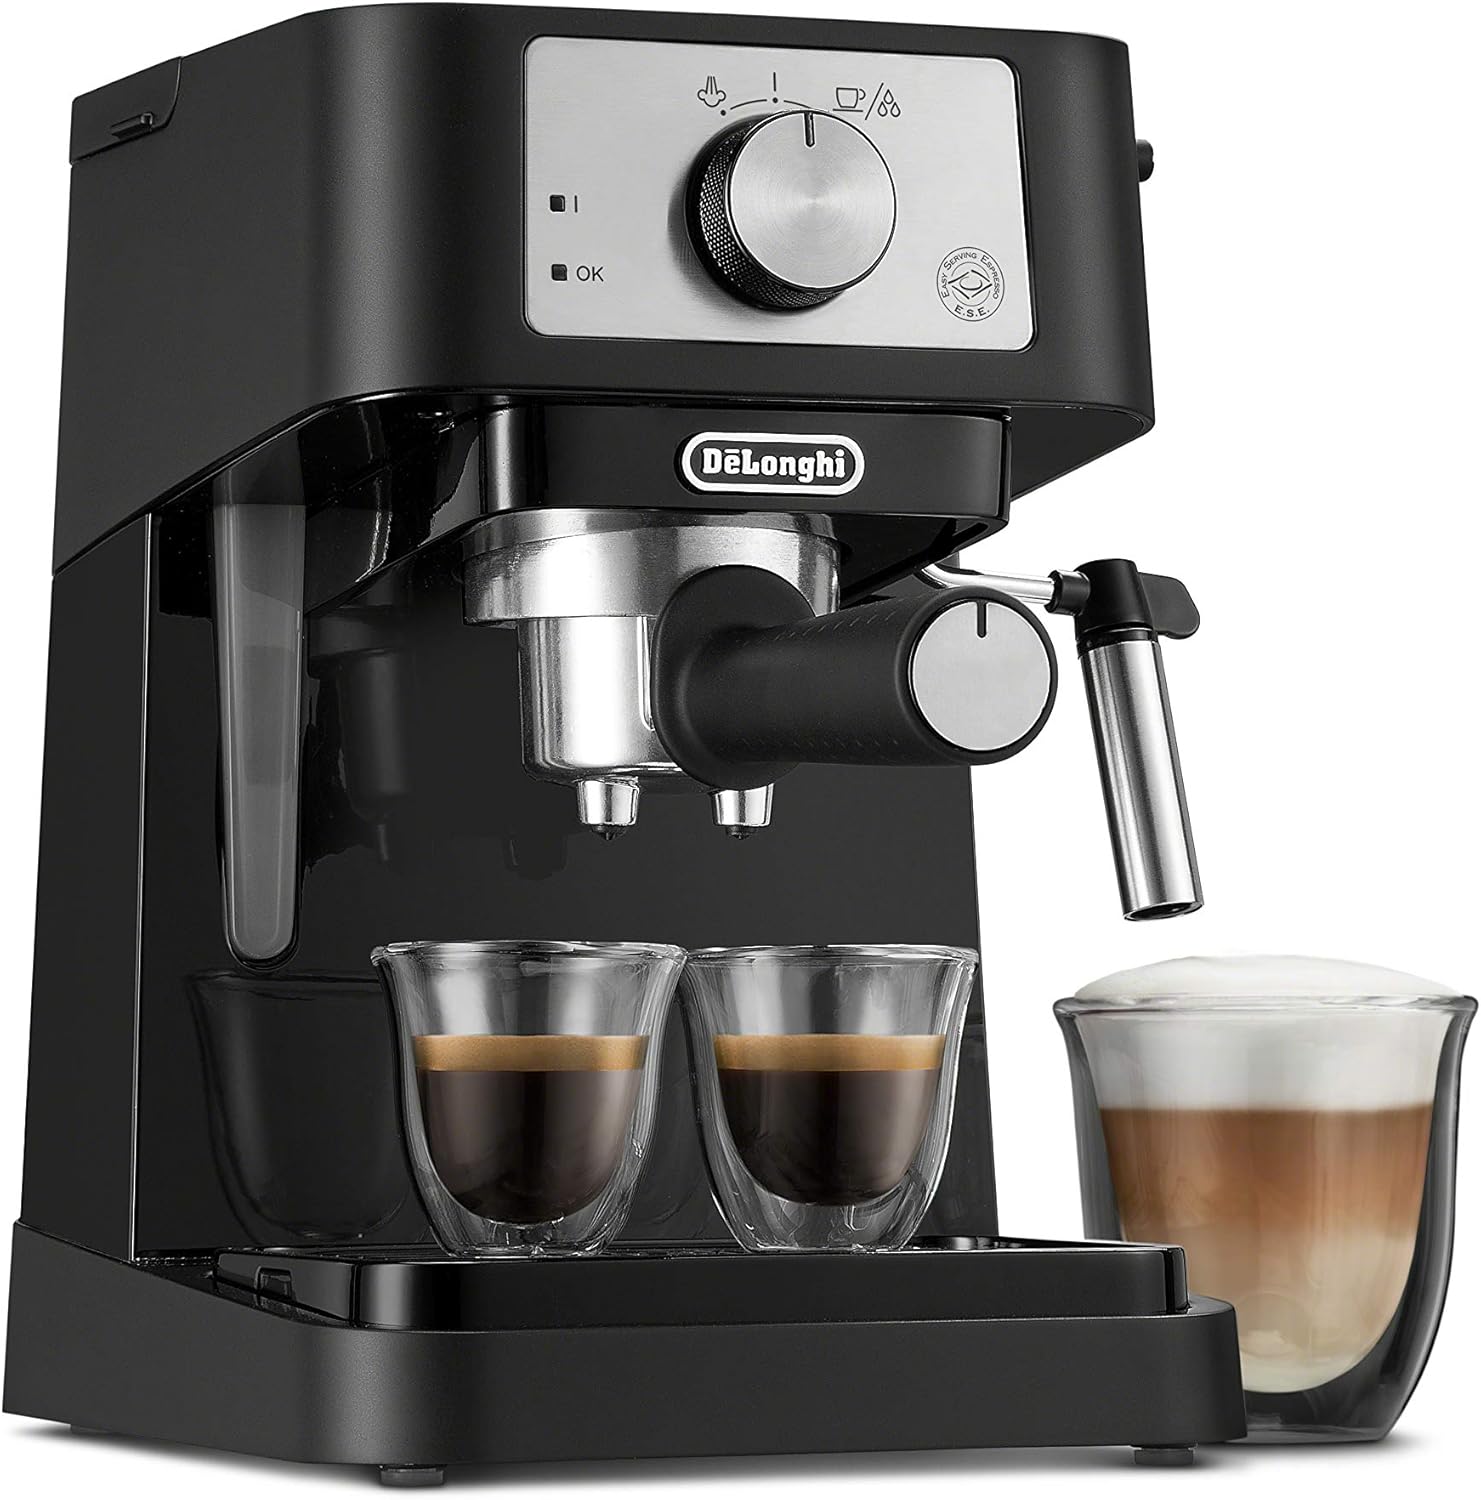
At roughly $150, the De’Longhi Stilosa is one of the cheapest true espresso machines you can buy. It is not a pod machine or a pressurized gimmick — it is a real portafilter espresso maker with a 15-bar pump and a manual steam wand for frothing milk. For the price, the performance is genuinely surprising.
The stainless steel boiler is built to last and delivers consistent heat, which matters more than most people realize when pulling espresso. The manual steam wand has a good range of motion and can produce decent microfoam with practice — unusual for a machine at this price point. It includes a portafilter, tamper, and filters for both single and double shots. The compact, lightweight design fits virtually anywhere.
The honest limitations: the portafilter and accessories feel like where De’Longhi cut costs (plastic construction), and you will definitely want a separate coffee grinder for best results. But if your budget is tight and you want to start learning real espresso at home, the Stilosa is an excellent entry point. It is also a great machine for making a quick espresso martini without investing in a more expensive setup.
- Approximately $150 — one of the most affordable real espresso machines
- 15-bar pump with stainless steel boiler for durability
- Manual steam wand with good range of motion
- Compact and lightweight — fits in small kitchens, dorms, and offices
- Included portafilter, tamper, and single/double filters
5: Mr. Coffee Cafe Barista Espresso and Cappuccino Machine
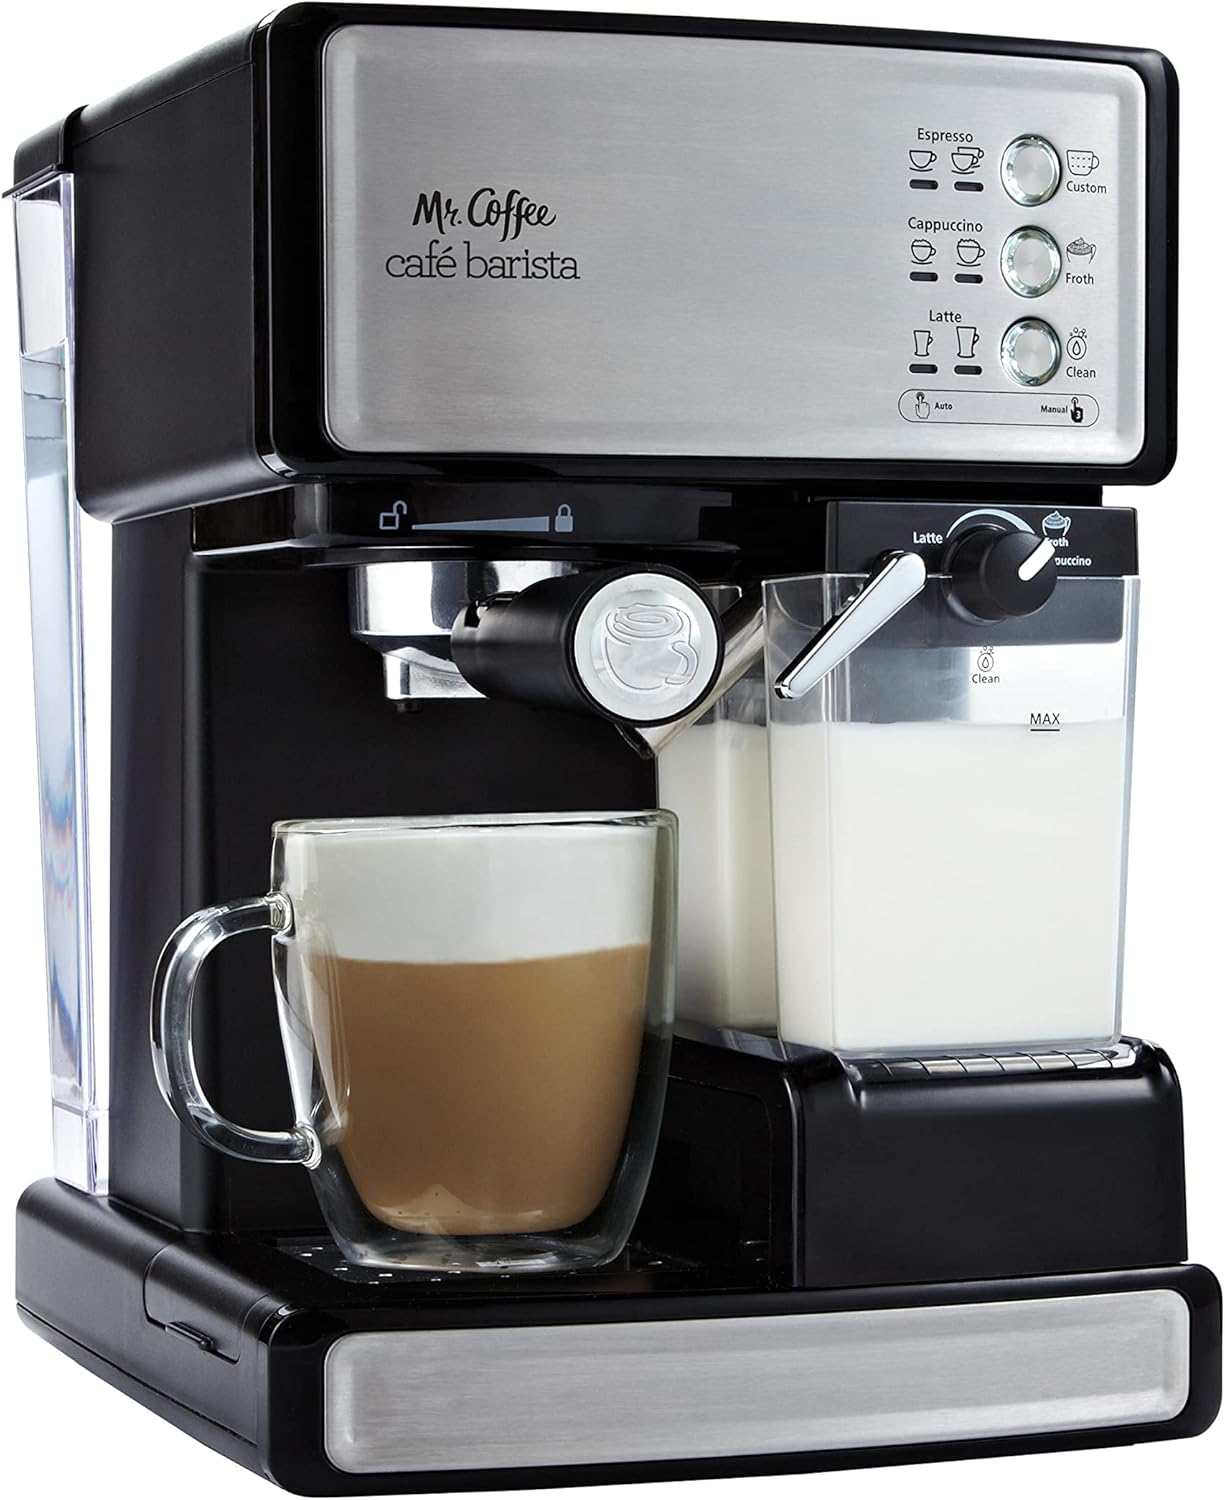
Mr. Coffee has been making coffee machines for decades, and the Cafe Barista is their play at making espresso accessible to everyone. It features one-touch buttons for espresso, cappuccino, and latte — select your drink, and the machine handles the rest, including automatic milk frothing from a removable reservoir that can be stored in the fridge.
The 15-bar pump system pulls respectable shots, and the automatic milk frother is genuinely useful for people who do not want to learn manual steaming technique. The interface is dead simple: three buttons, no menus, no learning curve. For someone who wants a flat white or Spanish latte every morning without thinking about extraction variables, this machine gets it done.
The caveat: the automatic frother produces foam that is more bubbly than silky, and you have limited control over shot quality compared to a semi-automatic. But for the price and ease of use, the Mr. Coffee Cafe Barista is a solid choice — especially as a first machine or a gift for a casual coffee drinker.
- One-touch buttons for espresso, cappuccino, and latte
- Automatic milk frother with removable, fridge-safe reservoir
- 15-bar pump pressure
- Simple 3-button interface — no learning curve
- Removable water reservoir for easy refills
How to Choose the Right Espresso Machine
The best espresso machine for you depends entirely on how much control you want over the process and how much time you are willing to invest in learning.
If you want to learn and grow as a home barista, a semi-automatic machine like the Breville Barista Express or Bambino gives you hands-on control over dosing, tamping, extraction, and milk steaming. These are the machines that will teach you the most and produce the best espresso once you dial in your technique. Pair them with quality espresso beans and a burr grinder, and you will be pulling cafe-quality shots at home.
If you want convenience above all else, a super-automatic like the Philips 3200 removes the learning curve entirely. You give up some control, but you gain push-button simplicity for lattes, cappuccinos, and espressos every morning.
If you are on a tight budget, the De’Longhi Stilosa at around $150 proves you do not need to spend $500+ to get into real espresso. It will take more practice to pull great shots, but the capability is there.
Regardless of which machine you choose, water quality matters. The minerals in your tap water can cause scale buildup inside your machine, affecting both flavor and longevity. Using the right water for espresso and descaling your machine regularly are two of the simplest things you can do to keep your espresso tasting its best.
Conclusion
The Breville Barista Express BES870XL is our top recommendation for most people. The built-in grinder, PID temperature control, and genuine 9-bar extraction make it the best value for someone who wants a complete espresso setup in one machine. It is the kind of machine you can grow into — not one you will outgrow in six months.
For budget-conscious buyers, the Breville Bambino delivers the same extraction quality in a smaller, more affordable package (just add a grinder). And if you simply want the easiest path to a morning latte, the Philips 3200 does the work for you.
Our Top Pick: Breville Barista Express BES870XL
No matter which machine you go with, the key to great espresso at home is using freshly ground, quality beans and keeping your equipment clean. If you need help choosing the right beans for your setup, check out our guides on the best coffee beans for espresso and the best coffee beans for lattes.
10 Coffee Grinders That Unlock Strong, Bold Flavor (And Which One’s Perfect for You)
You can buy the darkest roast on the shelf, use twice as many scoops, and let your coffee steep until it’s jet-black… but if your grinder isn’t up to the job, your coffee will still taste weak.
That’s because grind consistency is the hidden key to bold, strong flavor. A good grinder ensures every particle extracts evenly, giving you all the richness and intensity your beans have to offer. The wrong grinder? It leaves you with a cup that’s either watery or bitter — and neither screams “strong.”
In this guide, we’ll break down the 10 best coffee grinders for strong coffee — whether you brew punchy espresso, bold French press, or smooth pour-over. By the end, you’ll know exactly which grinder belongs on your counter.
The 10 Best Grinders for Strong Coffee
1. Baratza Encore ESP – The Everyday Hero for Strong Coffee
The Encore ESP is a barista-approved classic. With 40 grind settings — including fine adjustments for espresso — it’s versatile enough for any brewing style.
Why it’s great for strong coffee:
- Consistent burrs deliver uniform grounds.
- ESP micro-settings make it perfect for concentrated espresso shots.
- Durable build with easy-to-replace parts.
Best for: Everyday strong coffee drinkers, especially espresso lovers.
Price: Mid-range (~$200)
2. Baratza Virtuoso+ – Precision with Digital Control
A step up from the Encore, the Virtuoso+ adds a digital timer for dosing accuracy. That means you can recreate the same bold flavor cup after cup.
Why it’s great for strong coffee:
- Digital timer ensures exact dosing for consistent strength.
- Commercial-grade burrs for uniform particle size.
- Handles everything from pour-over to espresso.
Best for: Serious coffee fans who want repeatable, strong results.
Price: Mid-premium (~$250)
3. Breville Smart Grinder Pro – Feature-Rich and Espresso-Ready
This grinder offers 60 precise grind settings and a clear LCD interface. At around $200, it’s one of the best value grinders for strong espresso or bold moka pot brews.
Why it’s great for strong coffee:
- Fine grind adjustments ideal for espresso.
- Digital controls make strength easy to dial in.
- Wide range covers espresso to French press.
Best for: Espresso drinkers who want control without breaking the bank.
Price: Mid-range (~$200)
4. OXO Brew Conical Burr Grinder – Budget Strong Coffee Solution
Affordable, compact, and reliable — this is the go-to entry-level grinder for those who want bold coffee on a budget.
Why it’s great for strong coffee:
- Produces a consistent grind at an affordable price.
- 15 grind settings cover most brew methods.
- Great for French press, drip, and pour-over.
Best for: Budget-conscious coffee drinkers who still want big flavor.
Price: Budget (~$100)
5. Fellow Ode Brew Grinder Gen-2 – Sleek Power for Bold Brews
A design favorite, the Ode Gen-2 is whisper-quiet and engineered for precision. It’s best suited for filter coffee, French press, and cold brew — all of which highlight bold, strong flavors.
Why it’s great for strong coffee:
- Flat burrs deliver ultra-consistent grinds.
- Quiet motor makes mornings smoother.
- Beautiful minimalist design.
Best for: Design-minded brewers who love French press or pour-over strength.
Price: Premium (~$345)
6. Timemore Chestnut C2S (Manual) – Strong Coffee Anywhere
Compact, portable, and surprisingly powerful, this manual grinder punches way above its price point.
Why it’s great for strong coffee:
- Steel burrs give precise, strong results.
- Lightweight and portable for travel.
- Affordable without sacrificing quality.
Best for: Travelers, campers, or minimalists chasing strong coffee on the go.
Price: Budget (~$60)
7. Wilfa Svart Aroma Precision – Scandinavian Strength
This Norwegian grinder balances style and performance, with 32 grind settings and a UV-protected hopper to keep beans fresh.
Why it’s great for strong coffee:
- UV protection keeps beans flavorful.
- Wide range of settings for bold brews.
- Consistent for French press and pour-over.
Best for: European design lovers who want consistent, bold coffee.
Price: Mid-range (~$150)
8. ProCook Burr Grinder – Affordable Entry with 30 Settings
This budget-friendly grinder is a solid pick for beginners who want better than blade-grinder results without overspending.
Why it’s great for strong coffee:
- 30 settings for flexible brewing.
- Easy to use and clean.
- Surprisingly strong performance at this price.
Best for: Beginners stepping up from a blade grinder.
Price: Budget (~$79)
9. Lelit William PL72 – Espresso Lover’s Dream
If espresso strength is your priority, this grinder’s precision dosing system and ultra-fine adjustments make it worth the splurge.
Why it’s great for strong coffee:
- Digital timer for precise shot dosing.
- Built for espresso perfection.
- Heavy-duty build quality.
Best for: Espresso fanatics chasing café-quality strength.
Price: Premium (~$500)
10. KINGrinder K6 (Manual) – Budget Manual Powerhouse
An under-$100 manual grinder with exceptional consistency. Great for strong brews without plugging anything in.
Why it’s great for strong coffee:
- Micro-adjustable grind settings.
- Sturdy build, travel-friendly.
- Consistency rivals pricier models.
Best for: Budget-minded coffee lovers who don’t mind cranking by hand.
Price: Budget (~$90)
Choosing the Right Grinder for Your Style of Coffee
- Espresso strength seekers: Baratza Encore ESP, Breville Smart Grinder Pro, Lelit William PL72.
- French press / cold brew boldness: Fellow Ode Gen-2, Wilfa Svart, OXO Brew.
- Travel & minimalism: Timemore C2S, KINGrinder K6.
- Everyday flexibility: Baratza Virtuoso+, ProCook Burr Grinder.
FAQs About Grinders & Strong Coffee
Why is a burr grinder better than a blade grinder for strong coffee?
Burr grinders produce uniform grounds, which extract more fully — giving you stronger, richer flavor.
Do flat burrs or conical burrs make stronger coffee?
Flat burrs = ultra-consistent (great for espresso). Conical burrs = quieter and more forgiving. Both can make strong coffee.
Do I need to spend $200+ to get a strong grinder?
Not always. Budget models like the OXO Brew can still produce bold coffee, but premium grinders offer better precision and repeatability.
How do I adjust a grinder for stronger coffee?
Grind slightly finer than usual. This extracts more flavor compounds and creates a stronger brew — just don’t overdo it or you’ll hit bitterness.
Are manual grinders strong enough?
Yes. A well-built manual grinder can rival a $200 electric grinder for consistency. They just require more effort.
Pro Tips for Strong Coffee with Any Grinder
- Always grind fresh. Pre-ground coffee loses strength quickly.
- Go a notch finer. Finer grinds increase extraction and strength.
- Weigh your beans. Strength comes from consistent ratios.
- Clean your grinder. Oils and old grounds dull flavor.
- Experiment. Try different ratios (1:15 vs 1:12 coffee:water) for boldness.
Conclusion: The Grinder = Your Coffee’s Secret Weapon
If you want strong coffee, stop blaming the beans and start with your grinder. Whether you invest in a reliable workhorse like the Baratza Encore ESP, a stylish powerhouse like the Fellow Ode Gen-2, or a budget gem like the Timemore Chestnut C2S, you’ll taste the difference immediately.